Decided to put together what I could of the rear suspension. The reason was twofold: First, to see if I had all the parts, second, to see if I could figure out how to put the ARB together as there were no instructions in the manual.
Everything went together very well - despite all the missing parts, this is a really well put together kit. I wish I could say the same about the manual.
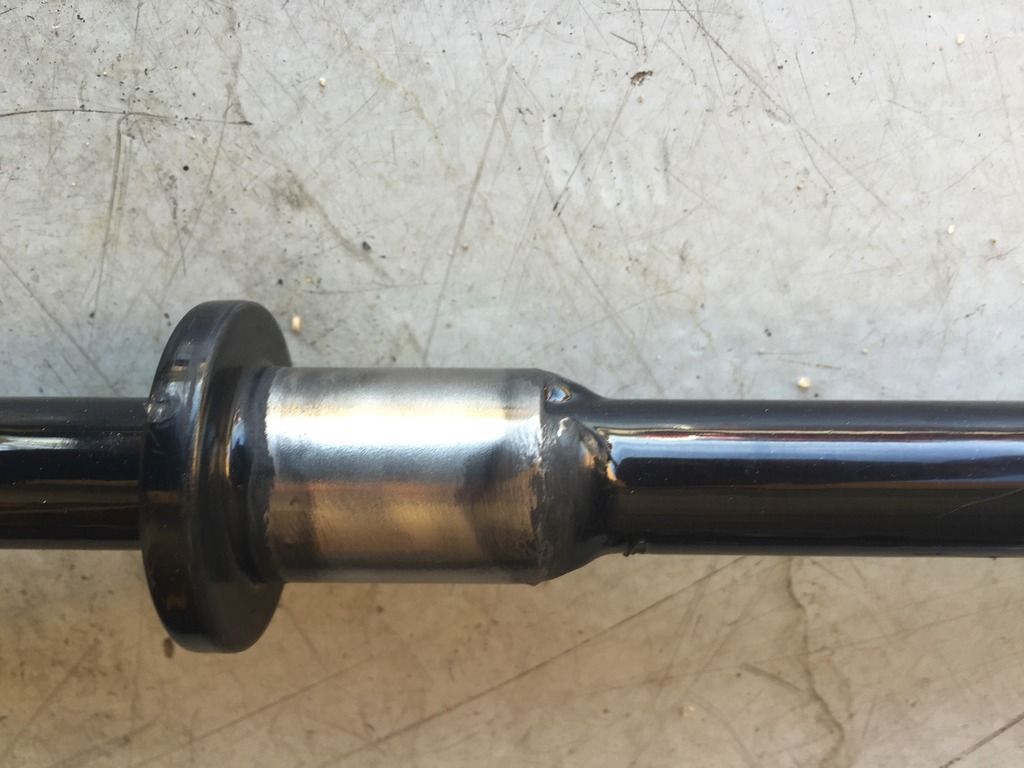
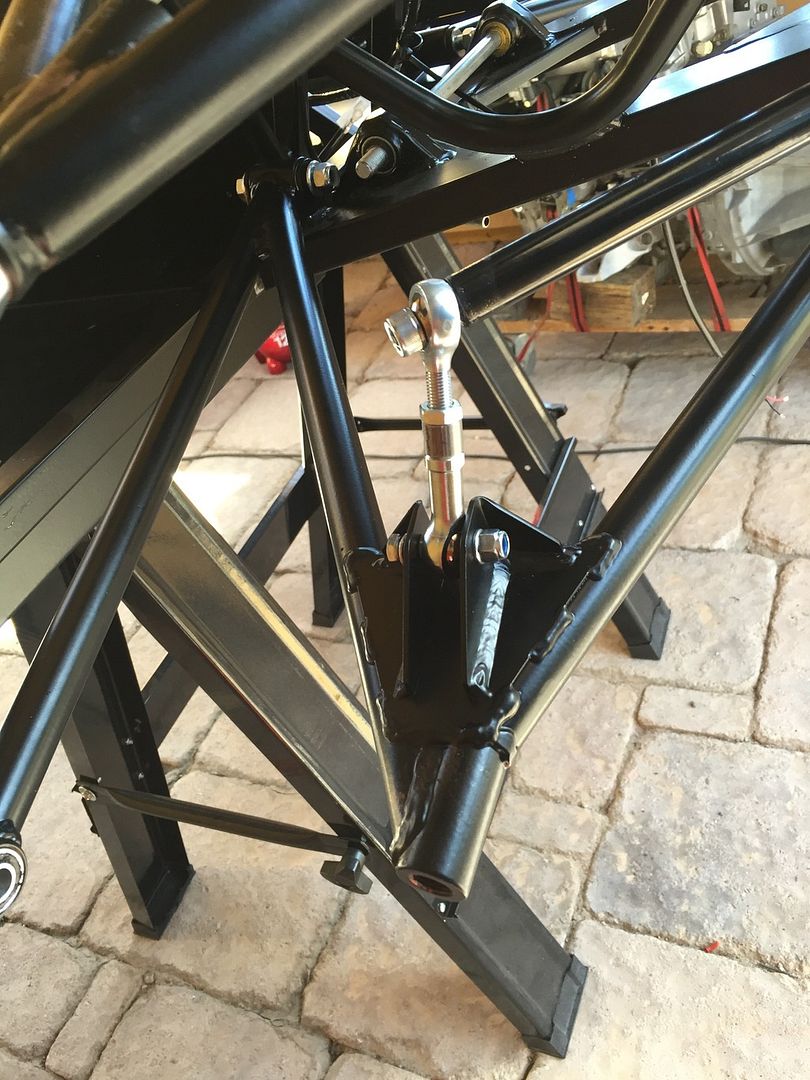
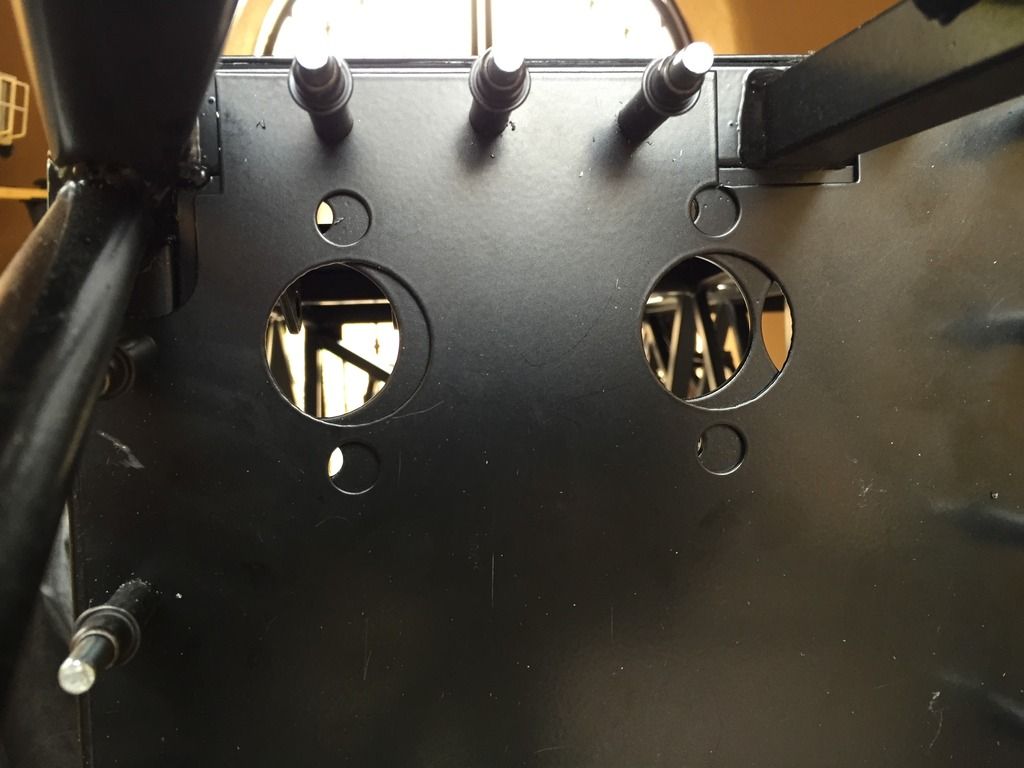
One thing (of many) not mentioned in the manual is to take the powder coat off the ARB where it is held in place with the aluminum blocks. This was easily done on the wire wheel of my bench grinder. Some copperslip grease will be applied on the mating parts.
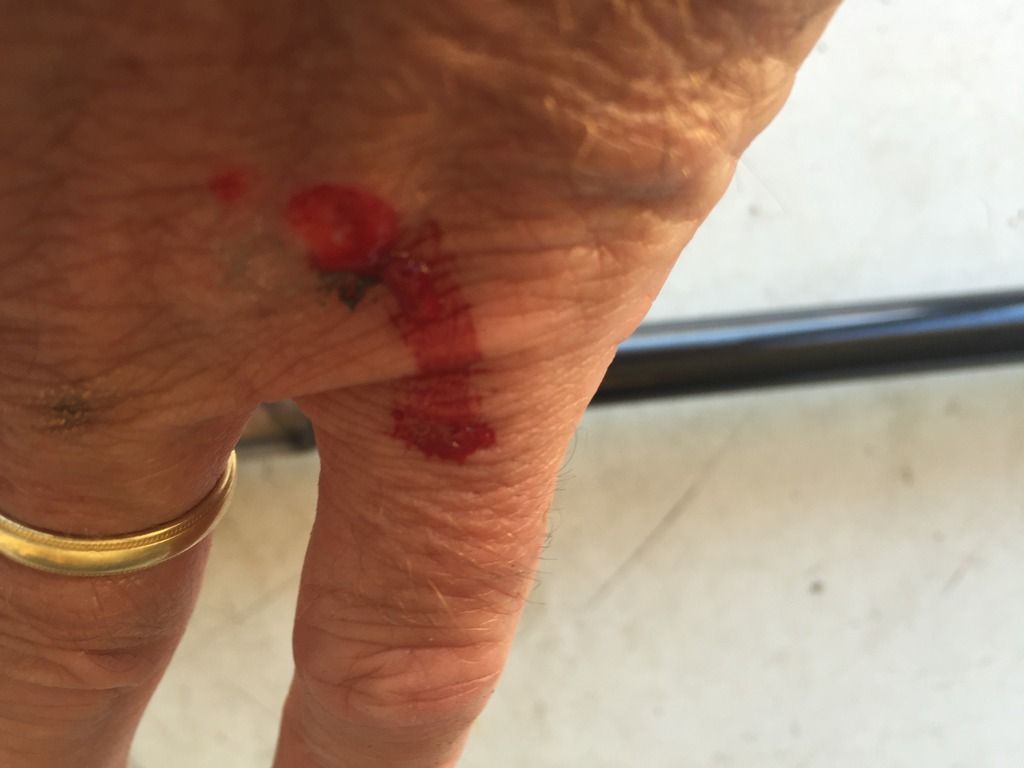
What was also easily achieved was grinding part of my hand on the other wheel of the bench grinder. I must remember to be more careful next time!
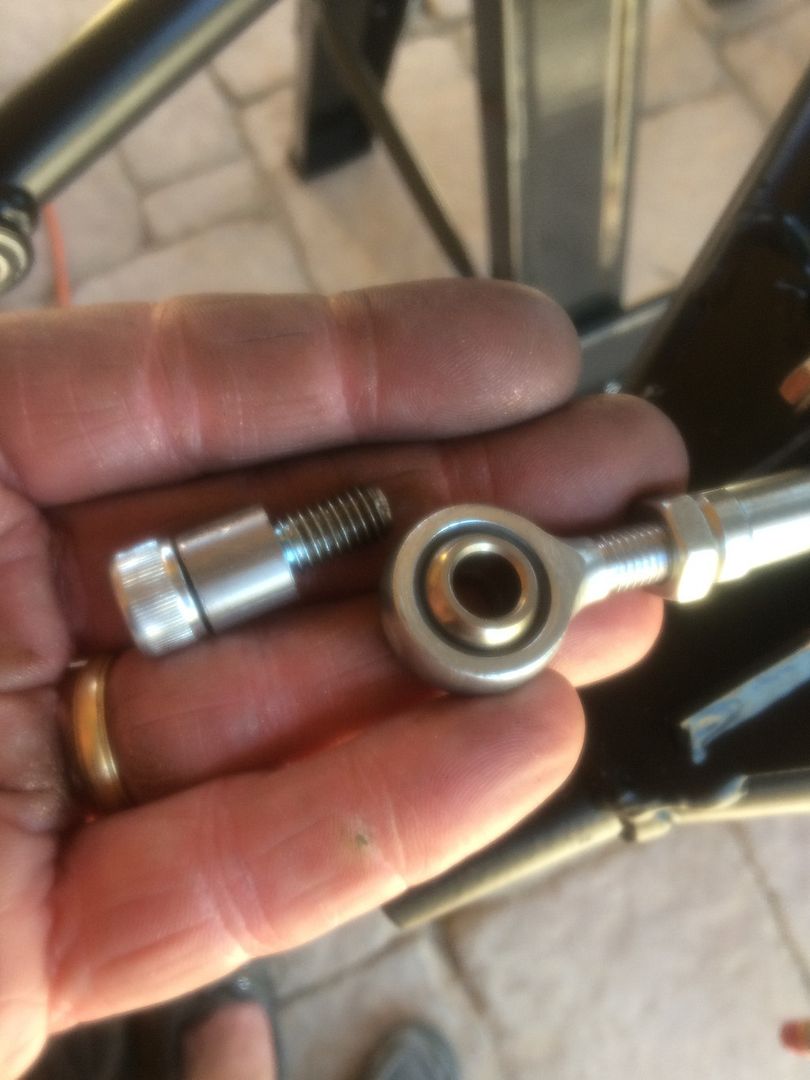
There is a spacer included which I put between the two rose joints for the time being. I think it should actually go on the end of the ARB, but the bolt isn't long enough. That is another thing to add to the list of questions for Westfield.
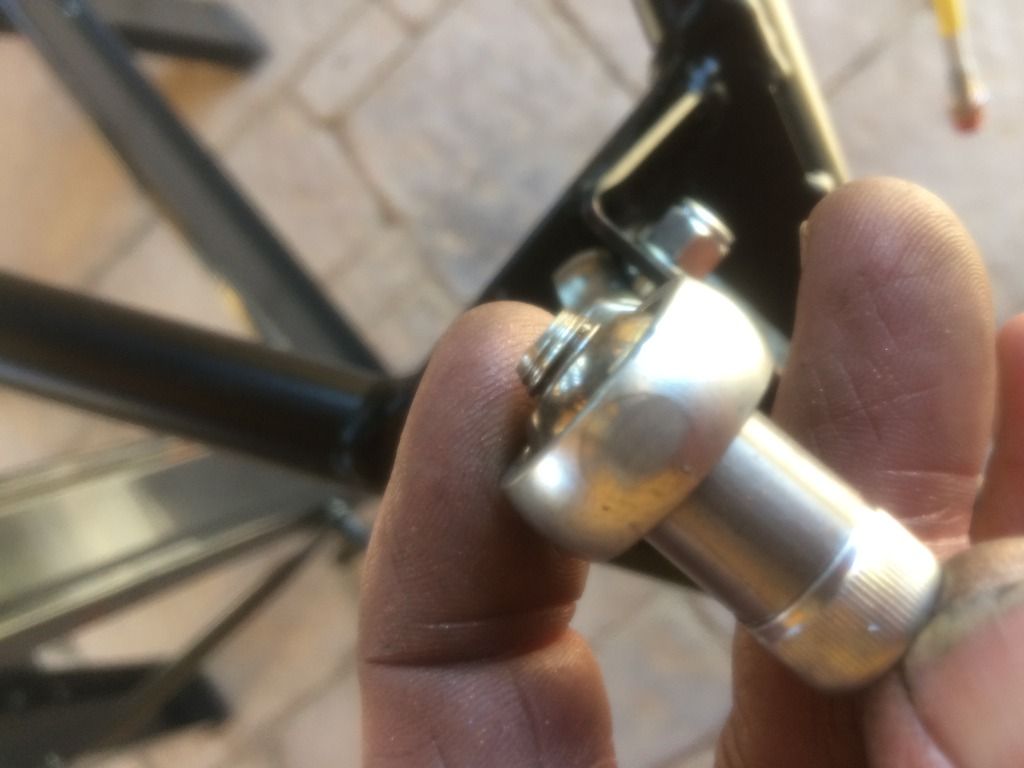
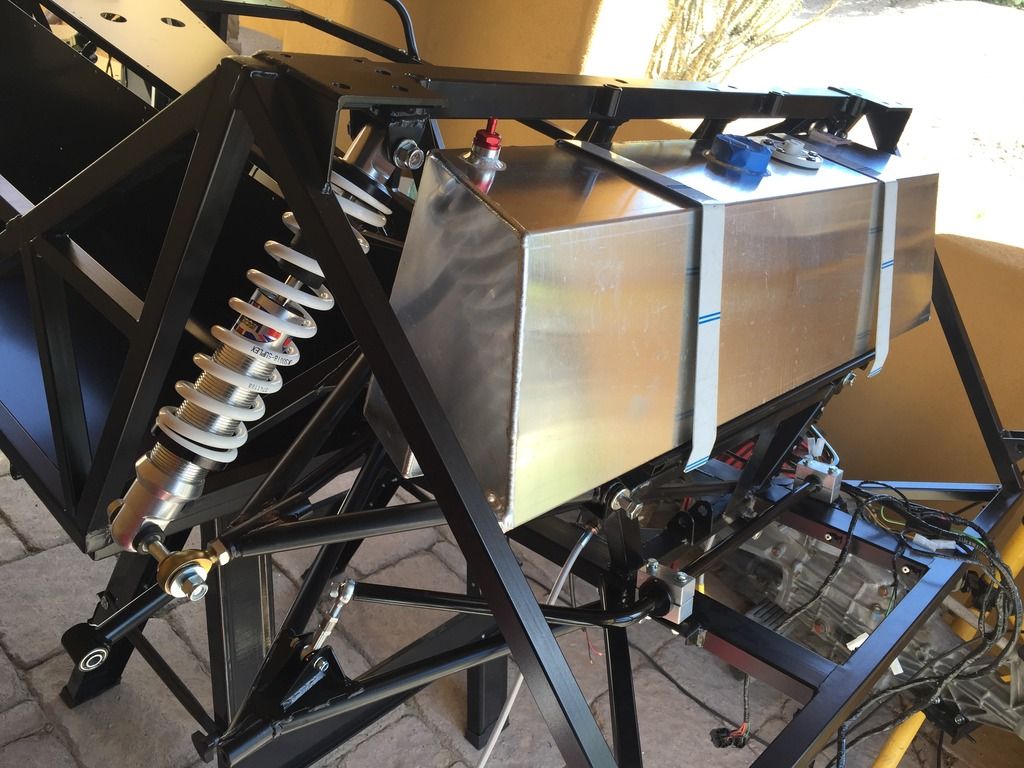
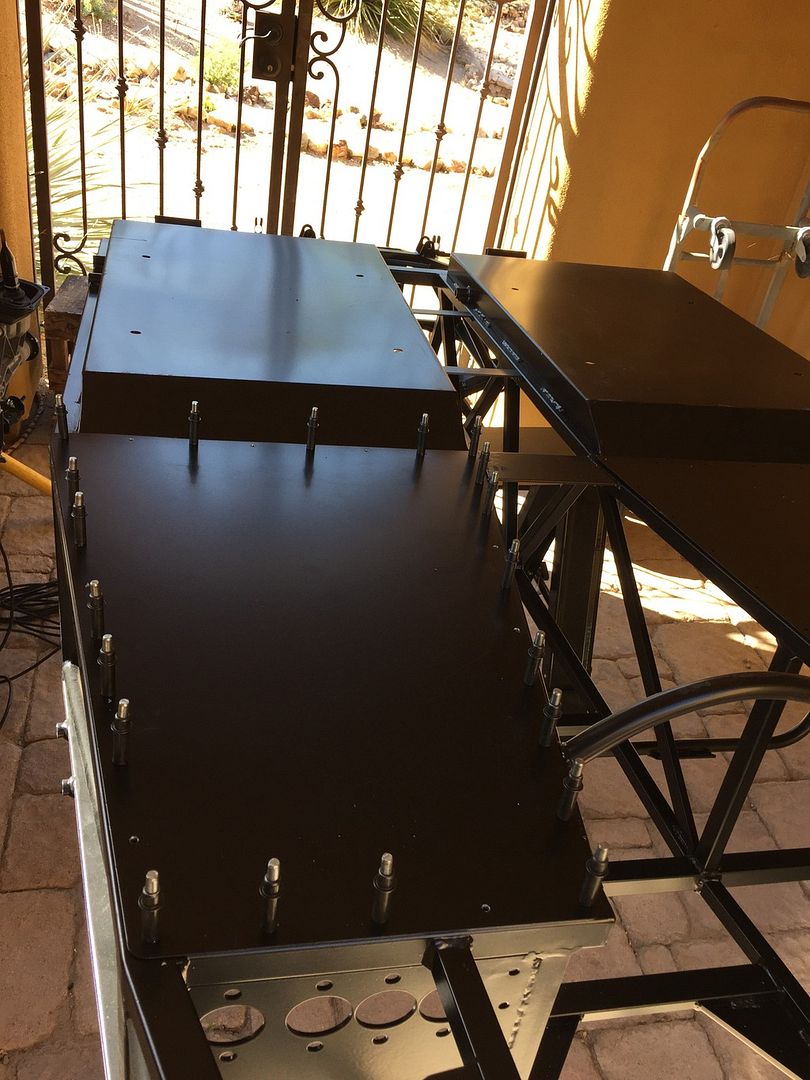
The adjustable shock absorber went on easily and while I was at it, I trial fitted the gas tank support frame and the gas tank. Things are moving along quickly:
The upper rose joint will not screw into the wishbone, probably because of a buildup of powder coat in the threads, so I need a 1/2" UNF tap. Of course, I only have UNC and metric. Order a tap from Amazon. Will be here on Monday.
My buddy Bob Budde came over to take a look at progress and to help me spin the chassis so it is the right way up - I had been working on it upside down to fit the floor panels, the brake lines and the wiring loom. Now it is the right way up, you can see the outline of a car (if you look very carefully and use your imagination).
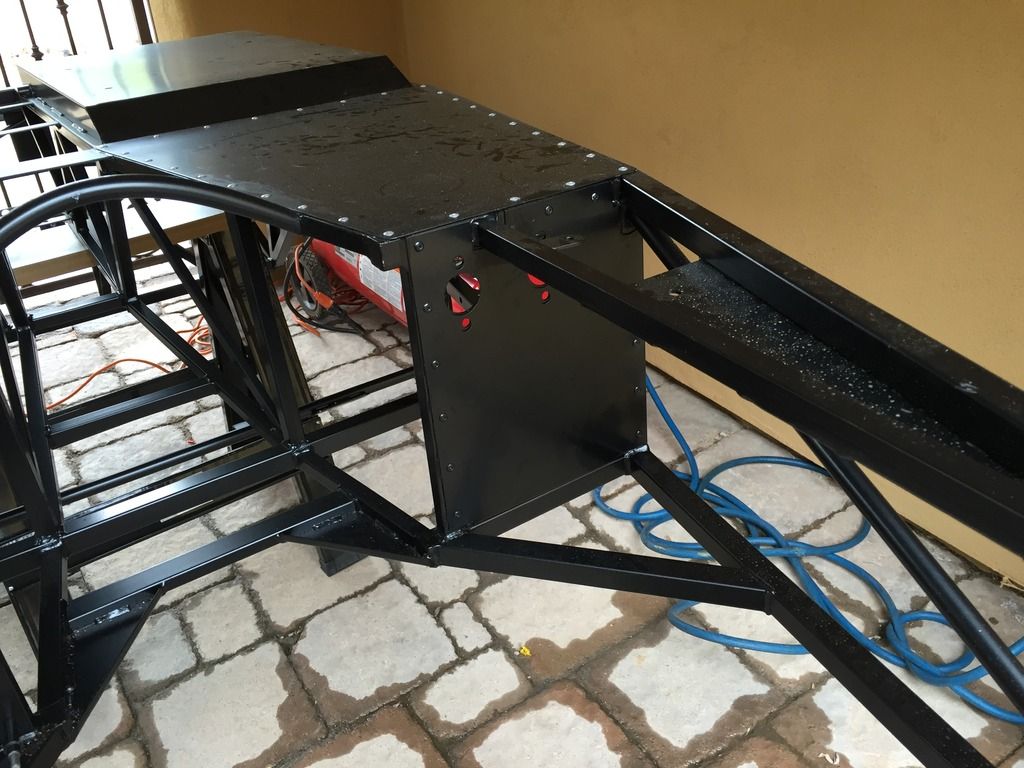
As you can see, I have also fitted the top scuttle panel. Things are beginning to take shape!
Am looking for things to do, so I decided to fit the accelerator and clutch pedals. Both went in easily, but I am missing the lock nuts for the clutch pushrod, which looks a little long.
Big news of the day is we sold the Rocks. A bittersweet event - we love the place and all it offers, but it just doesn't make financial sense, particularly with my retirement. Hopefully they will still let us visit (as in every Monday night, for members' reception). Time for a little celebration:
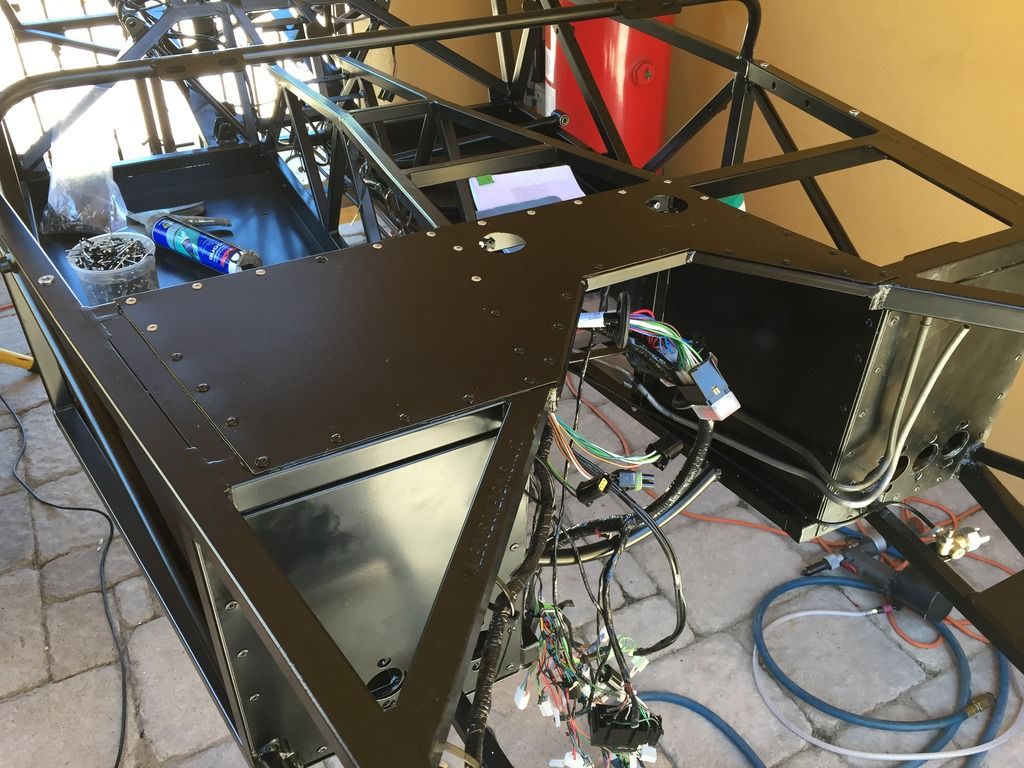
Have decided to fit the rear brake lines and the fuel lines. The manual says to route them under the floor and out the back of the transmission tunnel. As this will be a track car, I have decided not to take the route under the floor as it leaves the pipes open to possible rupture on impact. It seems there is space in the tunnel to route the pipes all the way along, but it will be tight and bending the fuel lines is particularly difficult.
Unfortunately, my first bend of one of the fuel lines kinked the pipe (mistakenly had it in the wrong slot in my pipe bender). Fortunately, I had a roll of fuel line left over from the Austin Healey restoration, so it was no big deal. Am waiting for the brake masters to arrive so I can do the final fixing of fuel and brake lines at the front. Still not holding my breath.
Have decided carbide drills do not like being used at an angle. They are very brittle - have broken all four I bought online (at $10 a pop) so have reverted to cheaper HSS bits. Broke all those also! Back to Home Depot to get some cobalt bits - we will see how those fare, but to be honest I have done most of the difficult holes - the remainder are all straight on so should not have the bit-snapping issue any more.
Spoke to Westfield about the routing of the pipes and they agreed it was feasible to do it the way I am trying. I asked why the manual gave precise measurements for the length of the fuel lines at the front and he said it was just to ensure that they didn't stick too far out the back - why didn't they just say that in the manual?
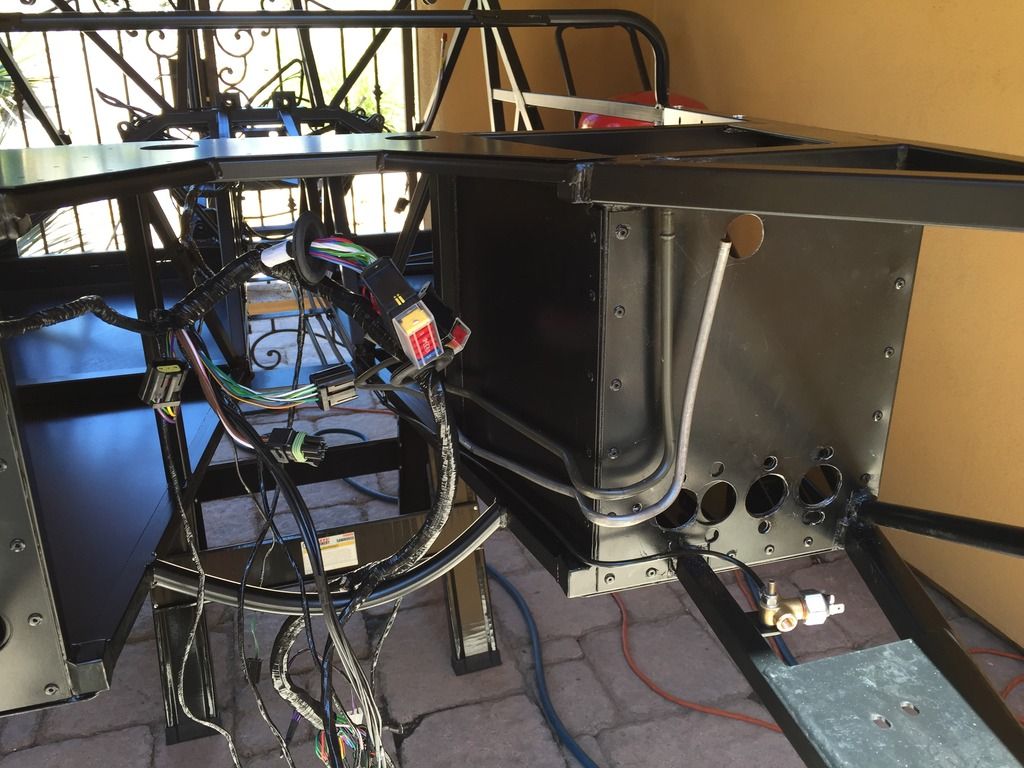
Also loosely fitted the main wiring harness - after examination, it became evident that the routing should be the same for a LHD car as a RHD car (something else the manual was not clear on). The harness is the same for both variants, so if you want your right flasher to go on when you indicate right (really useful on the track), it's best to have the wire for the right hand flasher on the right. The downside is some wires will need extending, such as for the brake pressure switch.
I need to label the harness as it is a mass of wires and connectors. Order a new toy from Amazon - a label maker. Will be here on Thursday.
Panic over. Normal weather service has been resumed. Here is the view from the patio at our villa at the Rocks:
As we are staying at the Rocks for the week, I will be commuting to home. It's a tough commute - just under 2 miles! No traffic at any time of the day.
Got a visit from Jon, one of the other forum members, who was on a flying business visit from the UK and helped identify a few parts for me. As he walked into the garage his first words were "where's the silencer?" - I hadn't twigged I was missing a rather large shiny bit (at least I had noticed that it was missing the tip with the 90 degree bend). Another thing to add to the list.
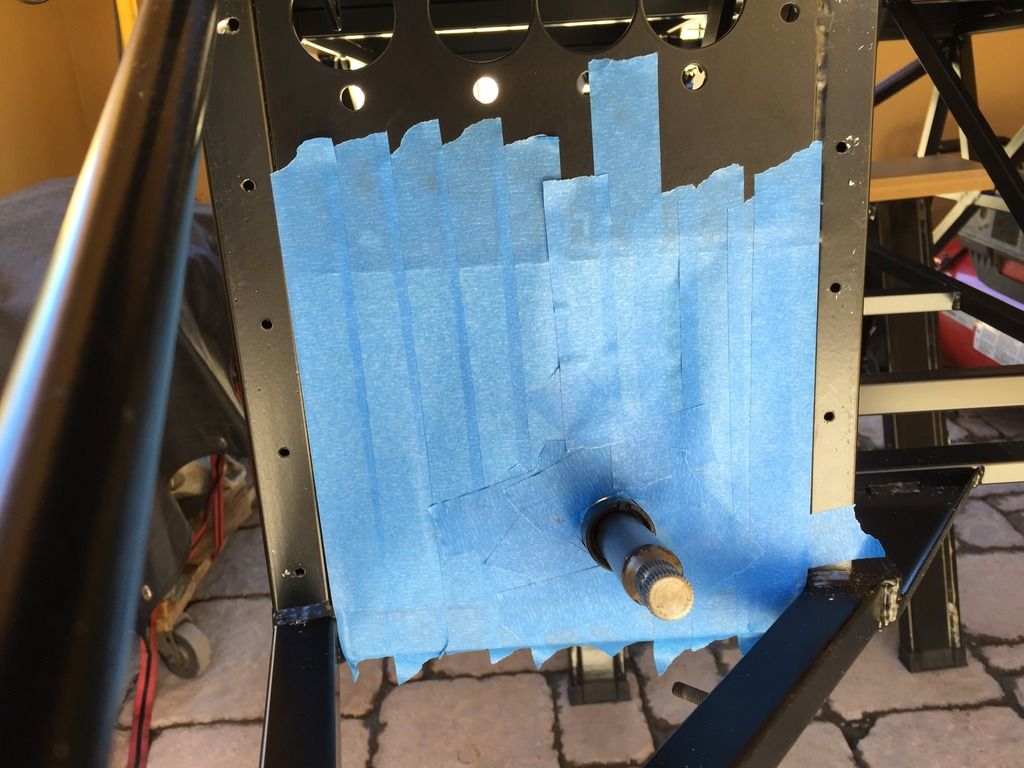
Jon advised I use the AeroRace 2008 build manual - so much better at explaining what to do for some of the fundamental items than the FW/S2000 manuals. It made me realize my first mistake (of many to come?). I had carefully measured the hole for the steering column by fitting the upper column and using masking tape:
However, I realized after looking at the AeroRace manual there is an aluminum spacer block to go on the lower mount, which will shift the lower end down, so now the hole is in the wrong place - and it fit perfectly! As suspected, I will now have to take the larger hole and grommet approach. In my defence, the spacer was in a plastic bag with a bunch of unrelated items and I only realized what it was when I saw the pictures in the AeroRace manual (each section has pictures at the start of the parts needed).
Westfield has confirmed they are sending me the front wishbones later this week. Am not holding my breath.
It is cold and raining. I unpack the big box only to find the parts I really wanted (master cylinders, wishbones, uprights, brakes, differential) were not there. Mr. Angry sends another e-mail to Westfield/Manik. How they must look forward to hearing from me.
At least I have a propshaft, harnesses, missing ARB hardware and a bunch of other stuff now.
I celebrate by fitting more panels in the rain. When I decided to do some of the build outside, it never occurred to me I could get wet. This is Arizona after all. Luckily, the chassis is under cover in the courtyard.
The holes for the master cylinders don't line up - if the panels were moved over to align, some of the holes in the panel for the rivets would miss the chassis rail. Not a big deal, as the RHS holes will be blanked off (if I ever get the plates) and I need to open new holes on the LHS for the dual master brake cylinders and bias bar.
Held in with Clecos for this reason and for the drilling of the hole for the steering column - not sure if I will try to fit it exactly or make a larger hole and use a grommet as suggested in the manual - my guess is it will start out as the former and end with the latter!
Break off for the day and move into the Rocks. We had reserved a week there because we thought the kitchen renovation would have started by now. Mr. Angry has written lots of e-mails on that topic!
Got an e-mail from Manik (the US company that imports Westfields) with a promise to get me the picklist so I can see what is missing. They also tell me a box will arrive next week from Westfield with some of the missing parts.
Mr. Westfield didn't come with a build manual, but fortunately I had downloaded one from Manik's website and had gone through it while I was waiting for him to arrive. It clearly is a work in progress. This is going to be interesting.
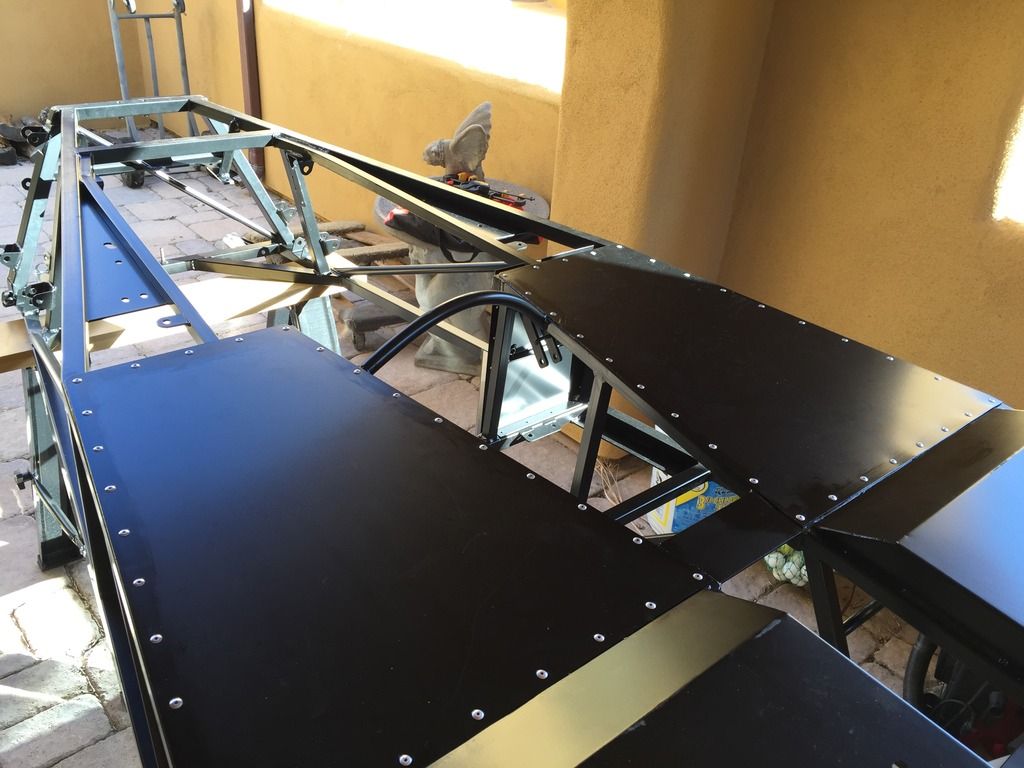
Celebrated by fitting a panel or two:
The aluminum panels come pre-drilled. You have to align the panel on the chassis, clamp it down and drill through the holes. Then you pop-rivet the panel into place, after adding a bead of silicone sealant.
My three best friends at the moment are carbide drill bits, Cleco fasteners (those are the pins you see in the picture which hold the panel into place through the holes, very clever) and an air riveter. All three are highly recommended for anybody considering a build.
The result is very neat.
Have now ground to a halt. After fitting these two panels the next job is to fit the brake lines. However, the master brake cylinders are missing, so I can't install the lines. I could install the fuel lines I suppose.
Read through the manual to see if there is anything I can do - thought about installing the wishbones, but of course the front ones are missing and I have no rose joints for the rears (add that to the list of missing parts). Also, the ARBs (Anti-Roll Bars) are nothing like what is in the manual, and I only appear to have the fittings for the front, not the rear (so I add that to the missing part list, which is getting quite long).
6:00 am call from UPS to tell me Mr. Westfield got separated from his paperwork. No shit Sherlock. They say they will call back.
9:00 am call from UPS telling me they have found Mr. Westfield. Frantic call to the towing company to rearrange the pickup - fortunately, they had promised to stand by just in case and will go as soon as they can. They promise to have Mr. Westfield to me around 12:00 pm.
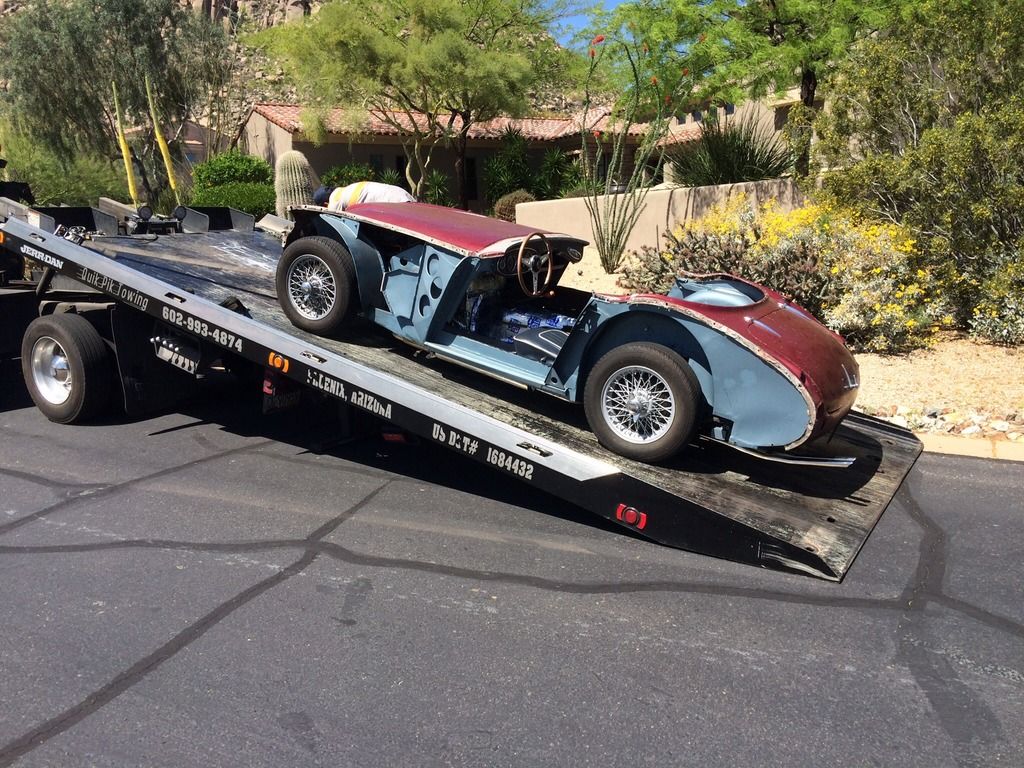
12:00 pm. True to their word, Mr. Westfield arrives at his new home on the back an articulated truck:
Mr. Westfield comes to town. . .
Now all we have to do is get him off the truck and into the driveway. The driver has assured me that this is no problem and he has done it before (I had met him a week earlier when he came to pick up Mr. Healey to take him to have his cosmetic surgery and to make room for Mr. Westfield):
. . . while Mr. Healey leaves town
Anyway, back to Mr.Westfield:
Unloading was smooth and painless, as can be seen here. Juan the driver let me play with the hydraulic controls!:
Unfortunately, Mr. Westfield had not been well secured and had shifted during shipping, bursting the side of the crate - two coolant pipes were sticking out of the hole, so who knows what is missing. I am not impressed by the packing - the crate is essentially built around the chassis, which was sitting on a large pallet, so any loose pieces could fall through the gaps in the bottom. Would have been much more sensible to add a plywood floor.
Spent the rest of the day unloading the parts. No packing list so I have no clue if anything is missing. I do notice I am missing one or two critical components, such as the differential, propshaft, uprights, brakes, front wishbones . . . This was supposed to be a complete kit. Time for Mr. Angry to fire off an e-mail to Westfield and Manik.
Got Ryan to come over from the Rocks to help me get the chassis into the courtyard where I will be working on it. It goes in well enough, I wonder if it will come out when it has its wheels on - we will see.
They did give me a windshield for some reason - I didn't order one. However it was shattered. Also, some bright spark in packing had decided to put the wheels on top of the bonnet, which had cracked - we will need a new one.
Mmmm beer . . .
I make a list of what I think is missing and what is damaged.
Oh well, at least the playoffs are starting, so I head to the Rocks.
Mr. Westfield is supposed to arrive tomorrow by UPS to a freight depot in Phoenix. I have an articulated flatbed arranged to pick him up and drop him off, but when I called UPS this afternoon they told me they had no trace of him. Apparently he has not checked in anywhere since leaving New Jersey.
UPS promise to look into it. Seems unlikely he will arrive, so I have had to cancel the pick up.
UPS have promised to put an urgent trace on and tell me they will call me back by 8:00 am tomorrow morning.
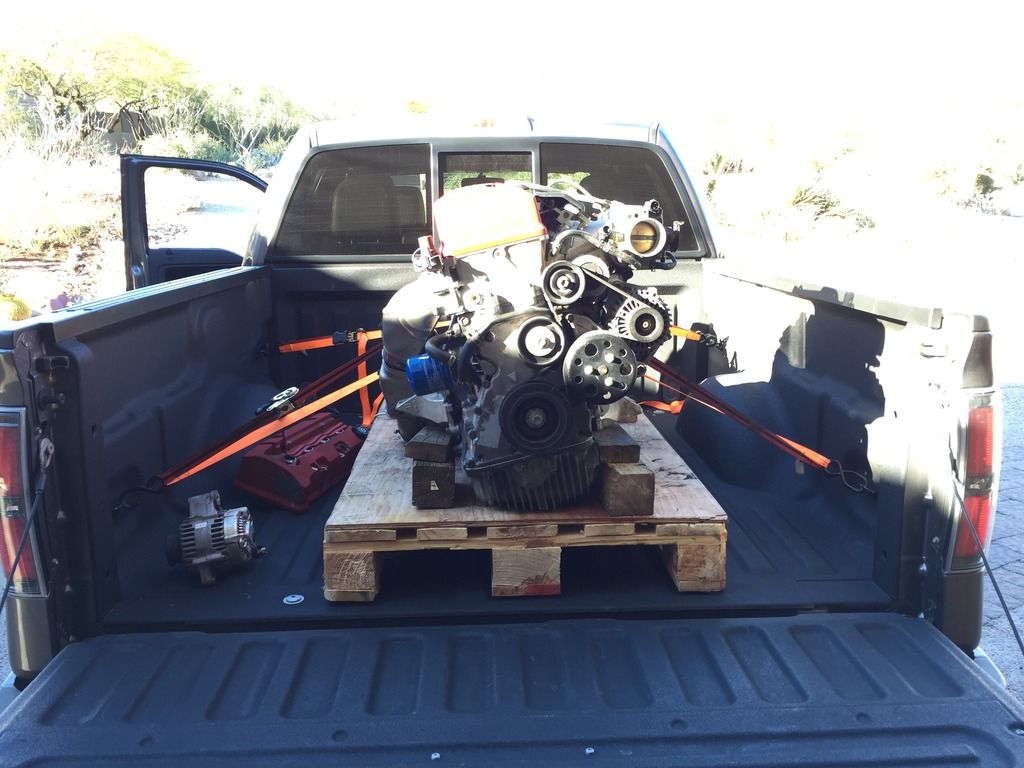
Turns out the first engine was destroyed. Looked like the spark plug had come apart in cylinder number one and done irreparable damage there. Number four was badly scored also:
So it was back to the drawing board. Scienceof Speed recommended HRMotorsonline, who supplied a fresh JDM motor with 46,000 miles on it. Off that went to ScienceofSpeed for fettling, and now it is home, waiting for the rest of the kit, which should arrive in the morning (yay!)
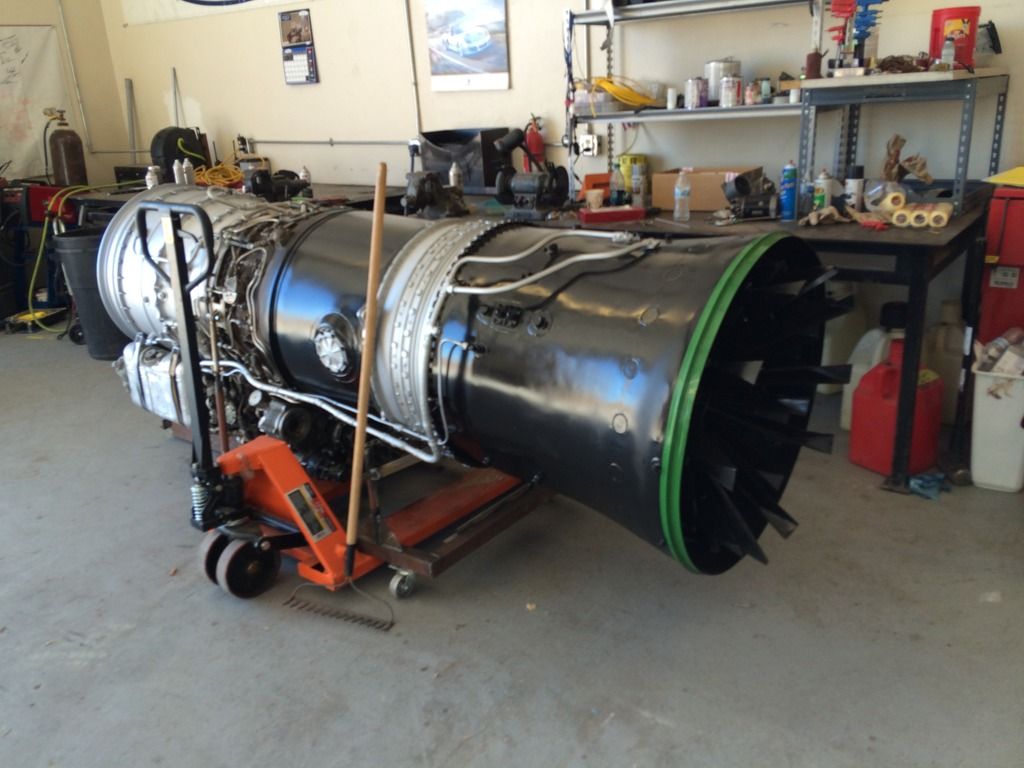
Just kidding - that's a jet engine that was lying around at the track. Here you go: