Wednesday, September 23, 2015

Videos from the track

Here are a couple of videos from the track. 

Mr. Westfield is only wearing street rubber at the moment, so there isn't much grip, but they seem to be indestructible! I did so much sideways stuff my neck was getting sore, and it didn't seem to wear them out at all, despite the clouds of vaporized rubber - the car is that light. I do have a set of R888 performance tyres, but didn't want to fit them prior to having the baffle in place. 

Will be back at the track on the 16th and 17th next month. The baffle should be welded to the sump, so I will fit the better tyres.  Watch this space. . . In the meantime, here is one of the early laps - still taking it gingerly and not going up to the red line. Was toying with the Elise at the end of the straightaway - wanted to keep Alex in front to get some footage of him (honest)!


And here is Alex doing his best to destroy the tires:


Monday, September 21, 2015

Mr. Westfield Moves Out

My younger son, Alex, flew in from Montreal to help get the car to the track and do the dynamic testing!

94731779-8825-4236-9F4E-AE6B8C6BA094_zps
Someone is ready for the track
I had previously set up the geo(short for suspension geometry - basically ensuring everything is pointing vaguely in the right direction) myself using a homemade camber gauge (the results were consistent with the results from an iPhone app) and the "string box" method of setting the toe-in. I rechecked everything now to ensure everything was OK, as I had had to make some adjustments to the front after the quick-release hub was fitted to the column as the wheels were not pointing straight ahead. I stiffened up the dampers (to maximum clicks at the front and 2 less at the back) as with two-up, the mounting plates of the side-impact bars were grounding (grinding?) out. I don't particularly want to increase the ride height, so we will see what that does. Everything has been set up assuming there will be just a driver (me) in the car.

Once I have everything shaken down at the track, I plan to get the geo done properly, along with proper corner-weighting. 

Time for a quick spin:


D96752E3-FEA4-4F17-87FB-31D710B3597B_zps
Time for some sticky-backed plastic
I had to take the car back to Signature Graphics to have the nosecone attended to (there was a slight ripple in the wrap around the nose), so while we were there, I had 3M protective film applied to the rear wings and the side of the body where they attach. The film is really tough and practically invisible, so we will see how it holds up. It's worth having the professionals apply this stuff!

So, with the Mini support vehicle loaded up with tools and every spare part we could lay our hands on, along with several jerry cans of race fuel, we set off for the track, which is about 250 miles away - not a bad distance for the first long drive. The car was impeccable, cruising comfortably at 85 (Officer, I had to go faster because there was a vibration in the cycle wing at 80!). My only gripe being a numb bum after 90 minutes or so and an ache in my left leg due to the fact there is no room for a footrest in an LHD car. Both were sorted with a pitstop required because of the tiny fuel tank (must be why they designed it that way). Was getting over 30 mpg (that's a US gallon), so not that bad at all. I drove with a helmet on the highway - quite glad I did as I got pinged with a few small rocks along the way. There were a lot of stares from the other vehicles on the road. Surprisingly, I didn't get pulled over. When we stopped for gas, I was immediately surrounded by a small crowd (mostly of older ladies) who wanted to know what it was.

The track in question is Inde Motorsports Ranch in Willcox, Arizona, a private member facility, which is probably one of the finest in the country. We were fortunate to have the track completely to ourselves on Wednesday and Thursday, which was ideal for setting up and testing the limits of the car. A number of other members were down on Friday, so that gave us the chance to see how the Westfield stacked up.

AD3B3D81-C179-42EB-9EA6-E7124253B90E_zps
Ready for action
That car is made for the track - the engine has a significant amount of grunt at higher revs and that combined with the light weight of the car meant that my Lotus Elise couldn't keep up with it on the straightaway (or pulling out of fast corners), however, the Elise was initially quicker around the track, due to superior aerodynamics, better tyres, and the ability to brake harder, (more about that later), but nowhere near the grin-factor of the Westfield. Apart from anything else, you just feel you are going way faster in the Westfield.

EF120594-0B42-45D4-99E0-8E61B6E50491_zps
Westfields seem to feed on large bugs!
The Westfield takes some getting used to though - and it was not helped by the fact we were only running with street tyres - a good set of track tyres will help immensely. Because of the light weight, you have to be very careful to match the revs when changing down, or you will spin! Initially, we had a big problem with the rears locking up under heavy braking, remembering there is no ABS (which is why I felt I couldn't brake as hard as in the Elise). Plus you have to remember to get on the gas gradually, or you will end up going sideways quickly! I spun off in places I didn't know existed.

We spent some time moving the brake bias towards the front (a bias bar is essential for a track car), and we got it to the point where the front was locking up just before the rear, then dialed it back a bit (you do not want the fronts locking up first on track), so the rears would grab a fraction early. We also softened up the suspension slightly (8 clicks on the front and 5 on the rear) which seemed to help. It only bottomed out with two us in the car. With driver only it was fine.

The changes to the brakes and dampers made a huge difference to the handling, which meant the other adjustments to make were to driving style (more smoothness on brakes and throttle input coming out of corners. After three days we both had more confidence in taking the car near (or past its limits) and could keep pace with the Elise (which was running on slicks, and we have been driving for 10 years so we know what its limits are). In fact, I believe the Westfield was marginally faster, even on street tyres, as we caught the Elise easily on the straight. 

The only problems we had during three hard days on the track was the gear knob came loose (fixed with some lock-tite on the grub screws) and, annoyingly, the bolt attaching the upper steering column to the middle section at the U-joint kept coming loose slightly, which resulted in a small amount of for-aft play in the wheel, but not enough to be dangerous. I am not sure to address this, as it seems the groove in the column is bigger than the diameter of the bolt - I will see if a larger bolt fits the UJ. After a hard session I did notice the oil pressure was low. I don't have a baffle fitted in the sump yet (being rectified this week), but I think an oil cooler and/or dry sump may be in the offing. When the car was low on gas it did lean out and splutter a couple of times, so it looks like I will have to fit the swirl pot after all. Oh, and Alex hit the ignition toggle once and shut everything off as he changed down from 4th to 3rd, which was quite amusing. I did notice one of the cycle wings was rubbing on the tyre slightly, so I will have to keep an eye on that.


58DB4B26-AC6F-442D-8E2F-AF3C710424F0_zps
The baffling sump issue

The factory-supplied baffle isn't a great fit, but it should do the job. I presume it just needs tacking in place - no need to weld all the way round, I suppose?

If going sideways is your idea of fun (it is mine), the car is unbelievable, if you have the LSD fitted. It is very chuckable, and steers easily on the throttle - a drifter's dream. That is the main reason I kept the street tyres on!

The head instructor at the track took the Westfield out and came back with a huge grin on his face - he said he wouldn't change a thing - mind you, he did need his legs shortening a bit, with the seat as far back as I could get it, his left knee was close to the wheel 
(The seat fouls on the rear seatbelt mount, so stops about 2" short of the full travel - it's fine for me, so that's all that really matters).

Sunday, September 13, 2015

Side Impact Bars . . . Continued

So,

the side impact bars came back from the fabricator and powder coating - they fitted the car perfectly, or so I thought.

We hadn't actually fitted up the half-cage with the side bars in place, and when the fabricator moved the rear mounting plate so that the front mounting holes would line up, he had to weld in additional plating at the back for the bars to mount to. Once I realized what the problem was there was much swearing. After much thought and more swearing, I decided the only solution was to cut the freshly powder coated bars - the half-cage sits on top of the bars and spreads out slightly from the bottom, so the cage was fouling on the additional plating - the bottom mounting plate on the half-cage was about 15 mm above where it needed to be. So I cut as much as I could out of the additional plating, trying not to go as far as the fresh welding (I did go through it slightly, so had to reweld a small portion, but it should not affect the integrity of the joint). I fine tuned it with a flap disc on an angle grinder and went down as far as I dared, but it still wasn't quite enough. Fortunately, the side impact bars come with spacers to level out the cage if you only fit a side impact bar to one side - the spacers were just enough to bridge the gap. So a lucky escape and all fitted up nicely, except that the addition of a spacer now meant that the holes I had previously drilled in the lower stays didn't align any more, so they needed enlarging.

All in all, it was a great, but frustrating, workout, as I must have tried to fit the half cage at least a dozen times, if not more. It took a Saturday afternoon and Sunday morning to complete the whole job.

E20BBA52-4CA5-42F8-8362-A8115EA76E11_zps
Quite a lot of plumbing

The fabricator's welds weren't the neatest, I have to say. I used spray paint to cover where I cut/welded/ground the powder coat off. I doesn't show to the casual observer. but I think I will now have to paint all of the bars, as the colour doesn't quite match.


There is very little clearance to the body:

FF1EFA17-2538-42E6-A35A-DA0396EF4130_zps
You can just about slide a sheet of paper in there

Having these bars on gives a greater sense of security on the road as they provide a nice cage around your elbows! Hopefully they will never be put to use on the track.


So here is the finished product:
BC353C97-D6A4-479B-82BE-0DF7CB72BB08_zps
Fancy seeing that in the rearview mirror?

D1E02A5F-31F2-4F61-8C4E-F3B0723E1DF3_zps
Fake Lotus or Fake Porsche?


Interesting comparison of 1950s British and German sportscar design!

Monday, August 31, 2015

Quick visit from Max

He snapped this pic. Pretty cool.

Posing outside Pitstop Auto Detailing
We didn't get much time to play, but he really enjoyed his quick blat.
It turns out his legs are a little too long - even with the seat as far back as it will currently go, his knees are wrapped around the steering wheel, so either he will have to have his legs shortened, or I will have to figure out how to get more rearward adjustment to the seat. I think the former solution may be easier than the latter!
He discovered how sensitive Mr. Westfield's controls are - it certainly takes some getting used to.

Livery and Side Impact Bars

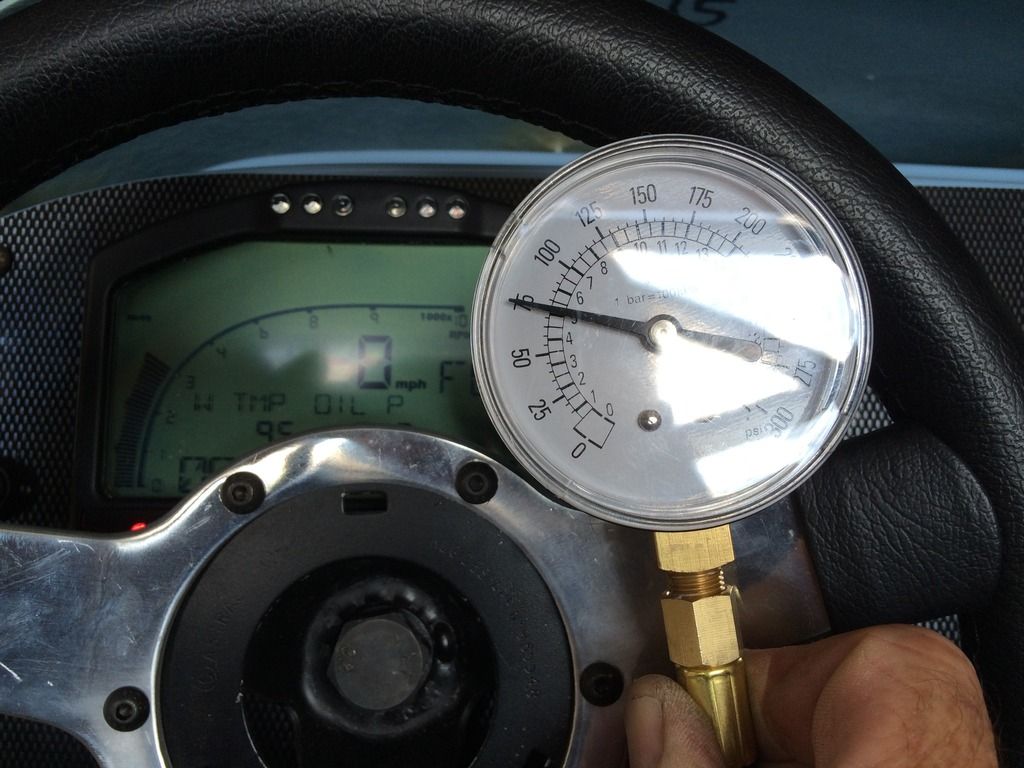
It's been a while - have been road testing and sorting out the finishing touches. Temperatures have been 110+ F here and am still getting some engine pinging - have tried octane boost, but am not a fan after reading up about the stuff on the internet - at least I don't have to worry about it damaging the cat! I did find 95 octane (US system) racing fuel at a gas station near me, at $6 a (US) gallon, it seems a bit steep when you can by a whole barrel of oil for under $40! It has, however, solved the ping issue, mostly.

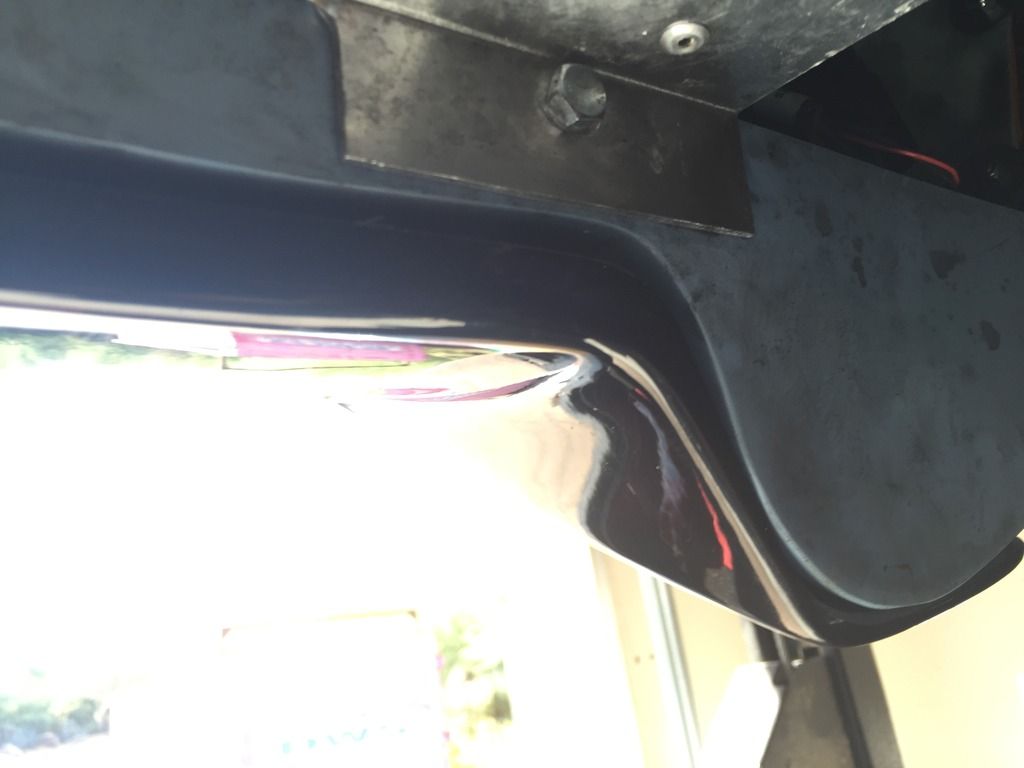
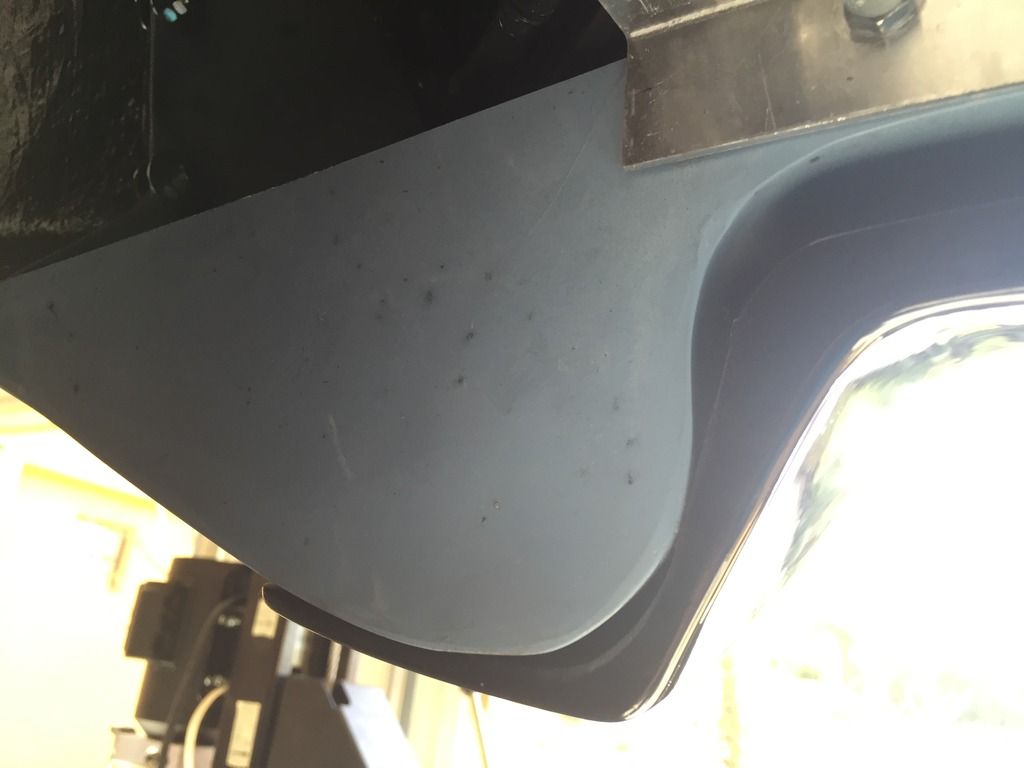
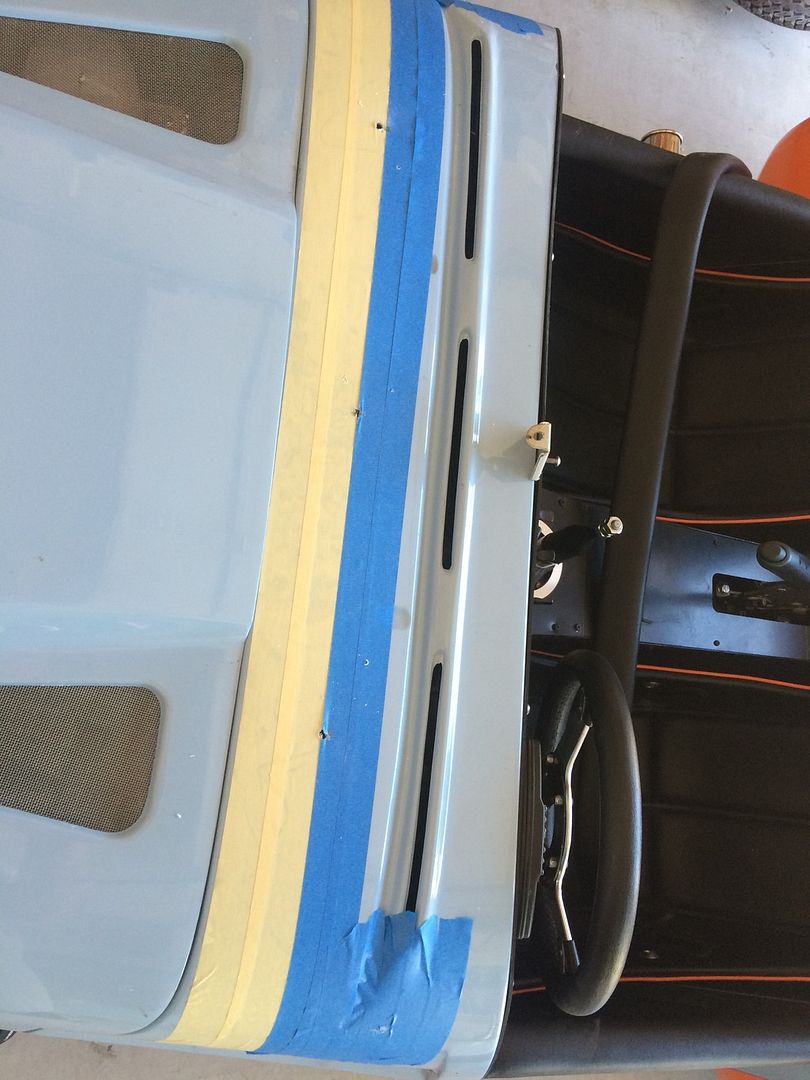
Took the car to have the graphics done. While I am waiting for the replacement bonnet and boot lid, I decided to have the damaged ones wrapped in carbon fibre to hide the cracks - it does a really good job of concealing the damage. They did a great job! A dark pinstripe around the rear wheel arch join hides the poor fit. Getting the stripe right at the rear was a challenge, given the droopy right side of the rear panel and the fact that the car doesn't sit level without me in it!

A4FD42D5-9428-4622-BEAF-D2518341A898_zps
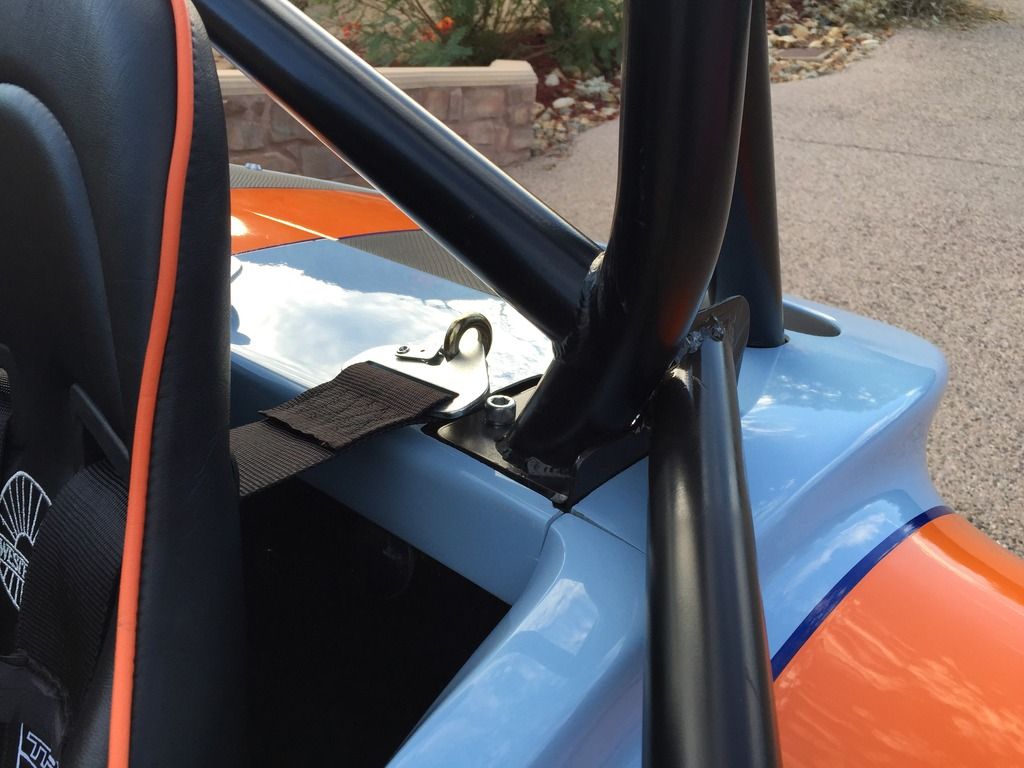
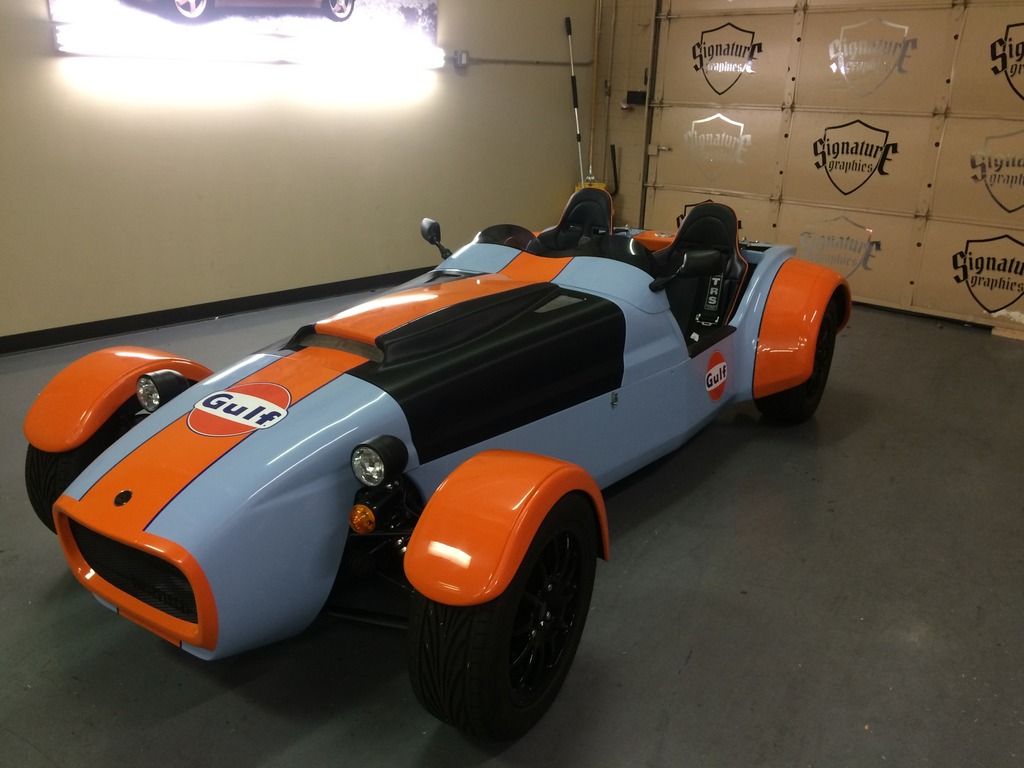
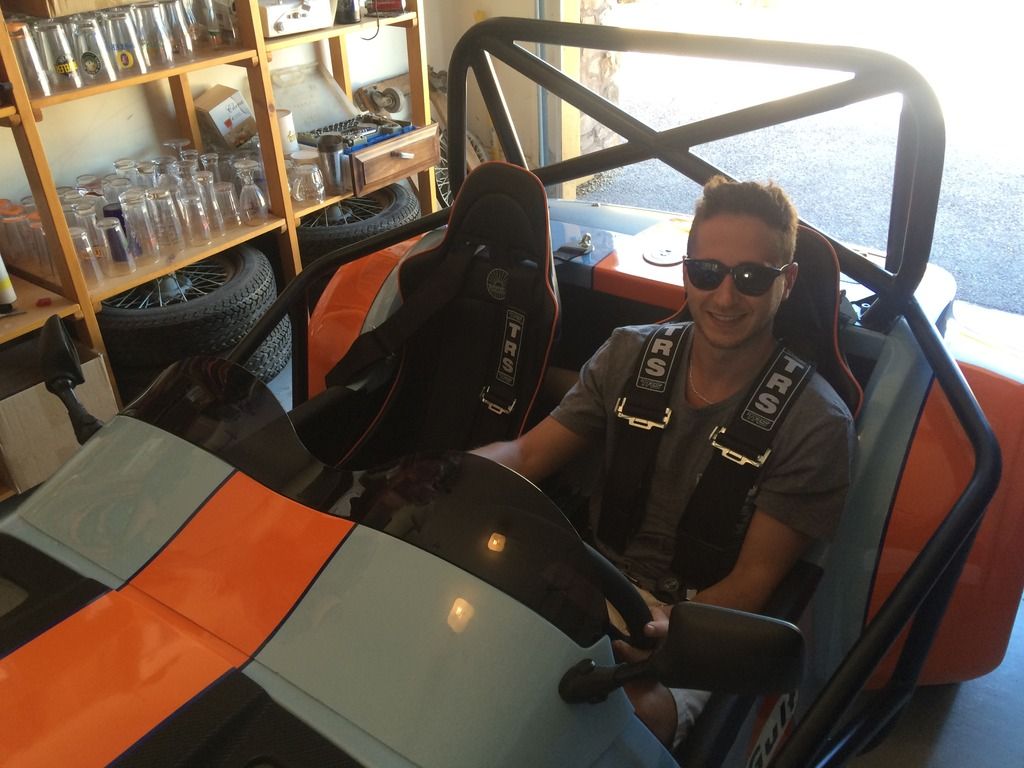
My first view of the transformed Mr. Westfield

21AA1225-1BCC-4CD0-AB8D-DFDCE953D2D1_zps
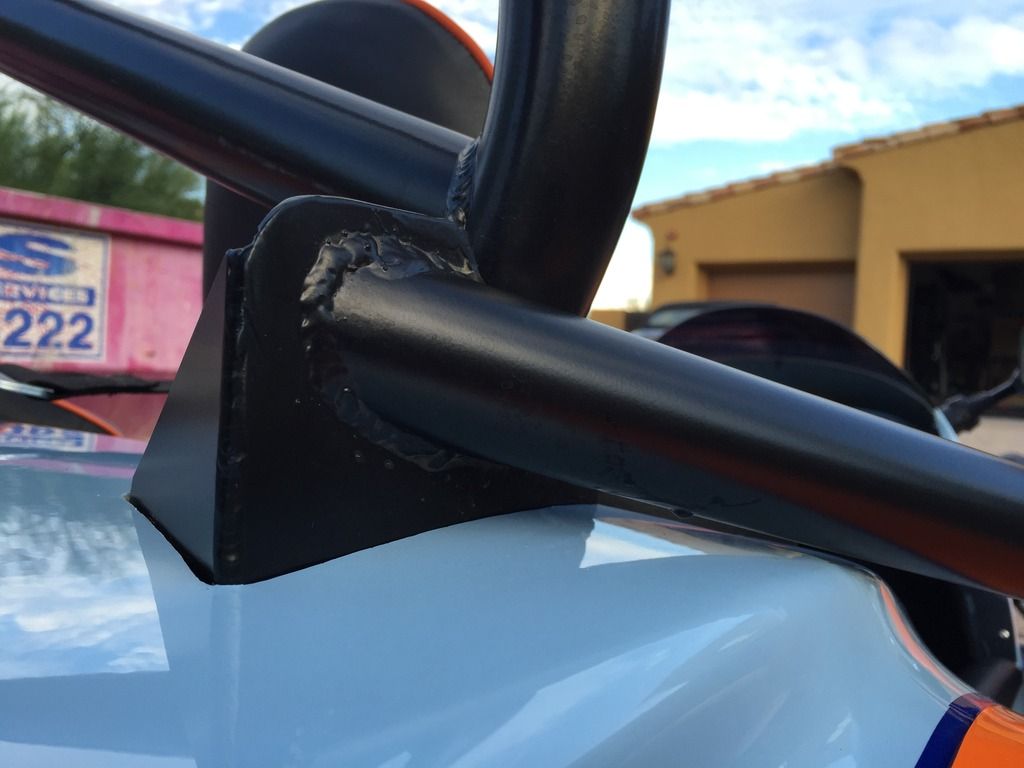
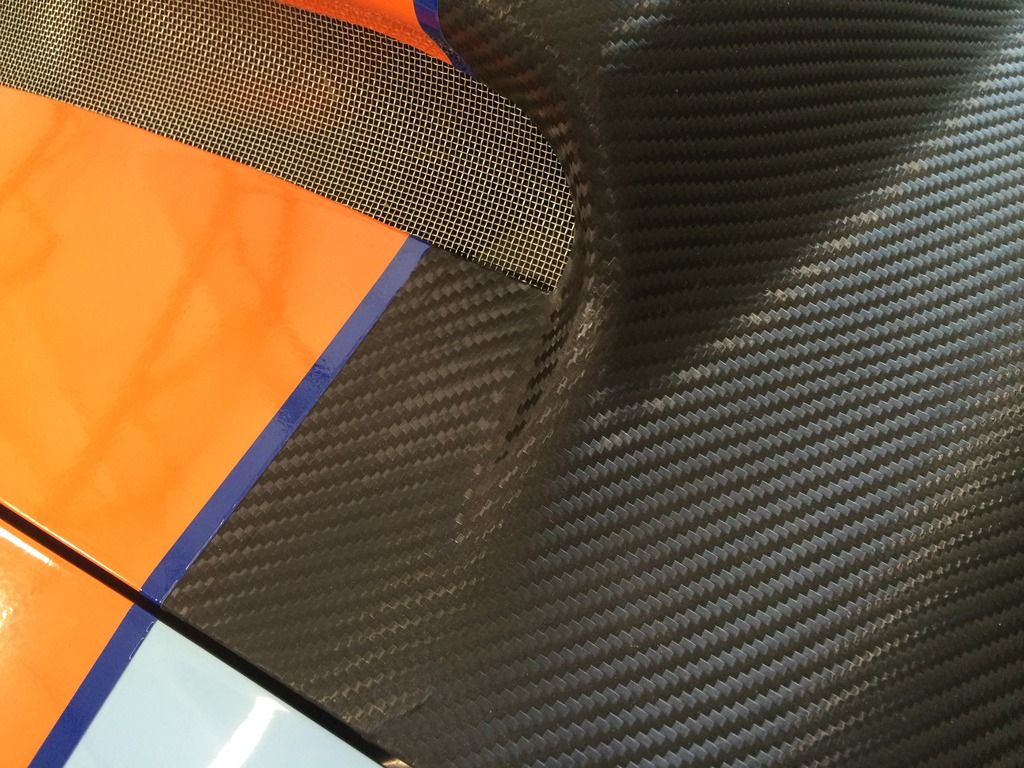
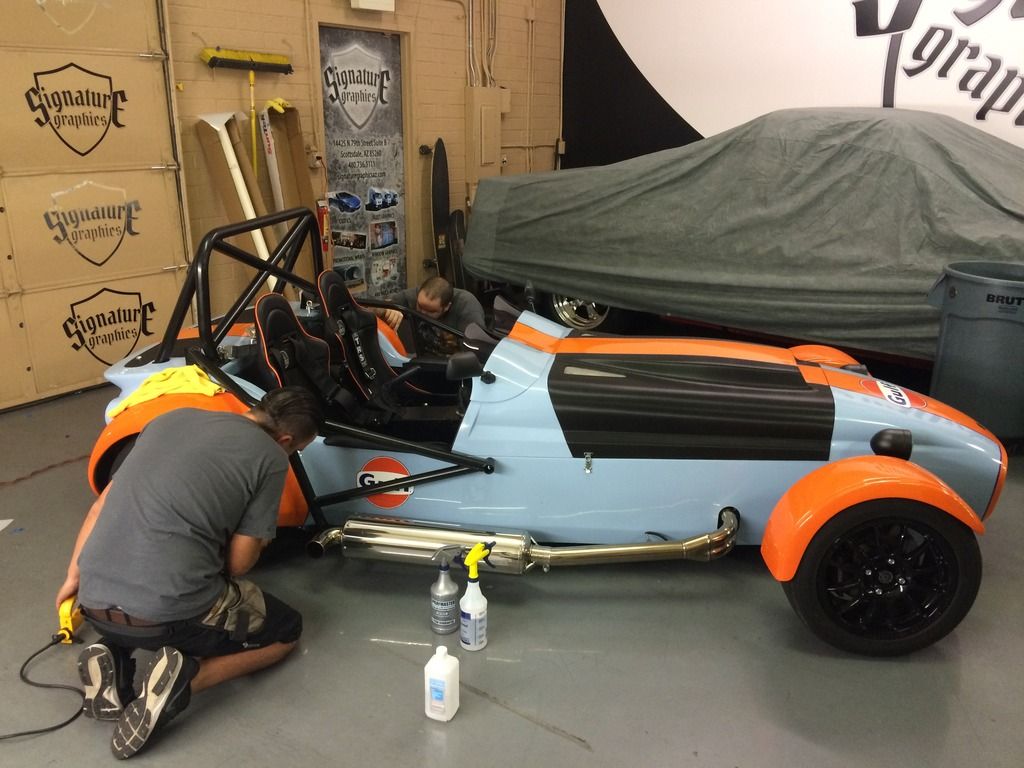
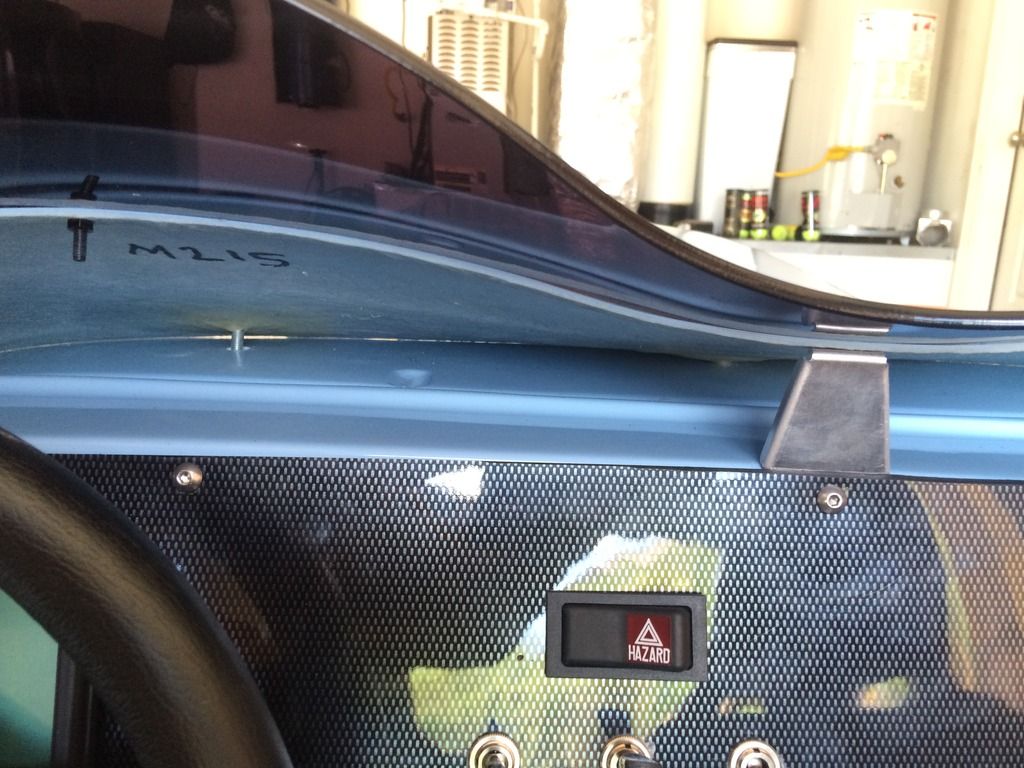
Detail of the carbon wrap - really good job
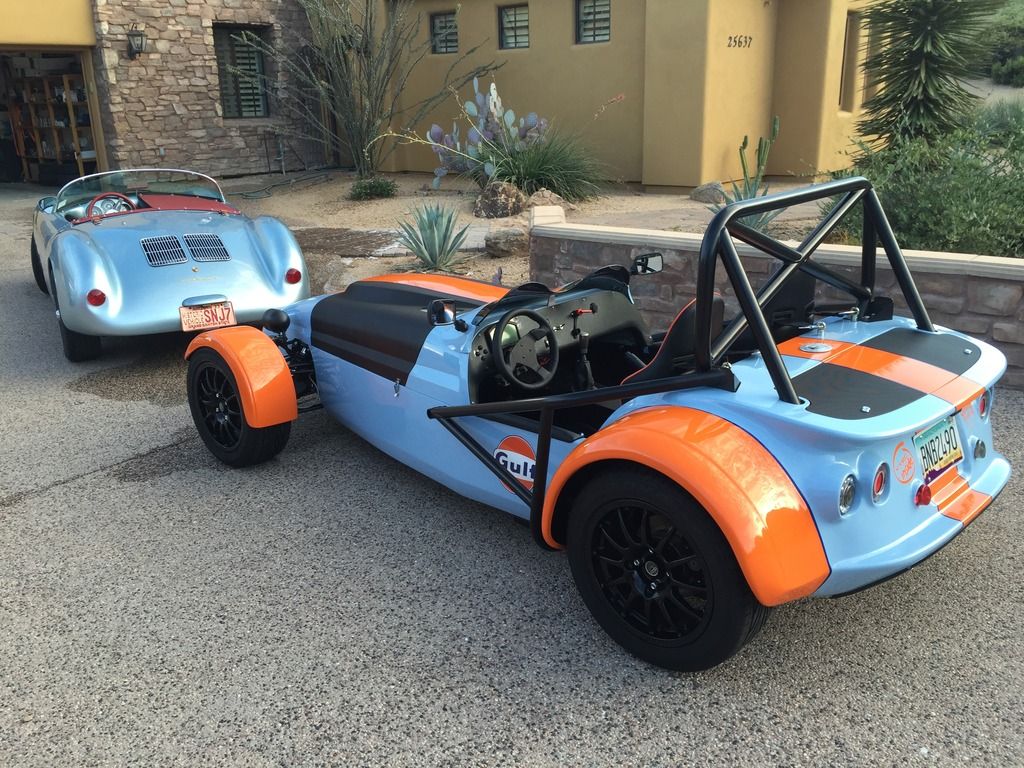
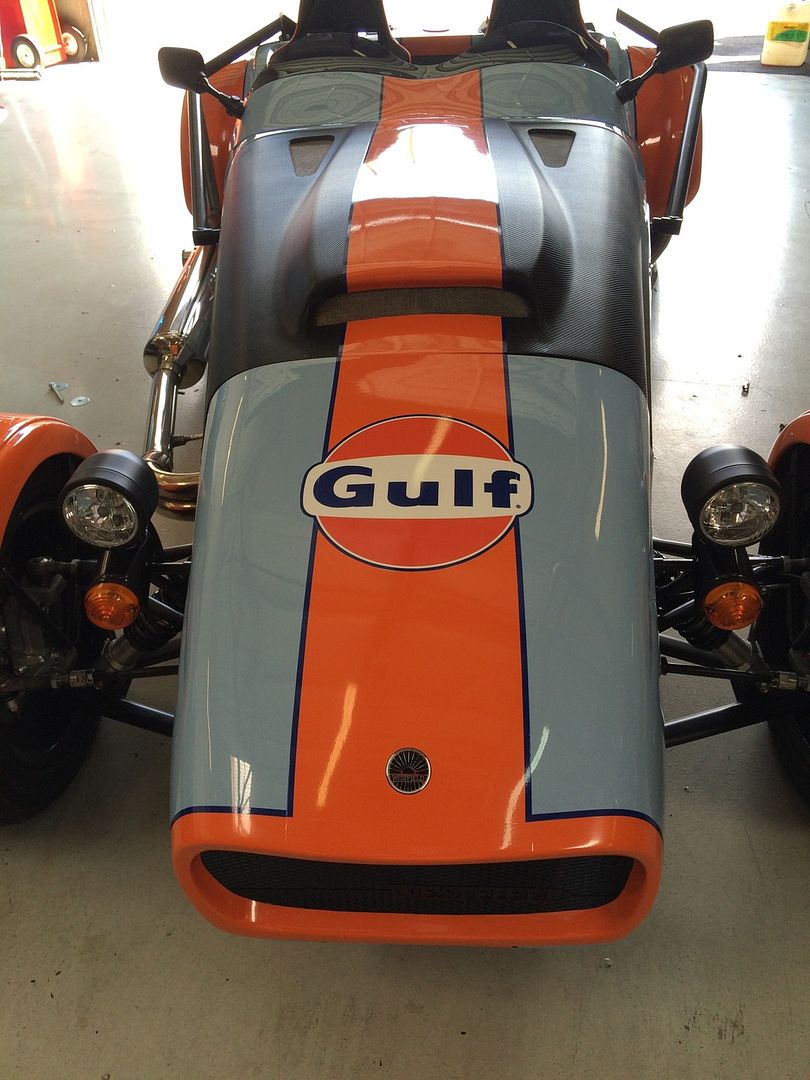
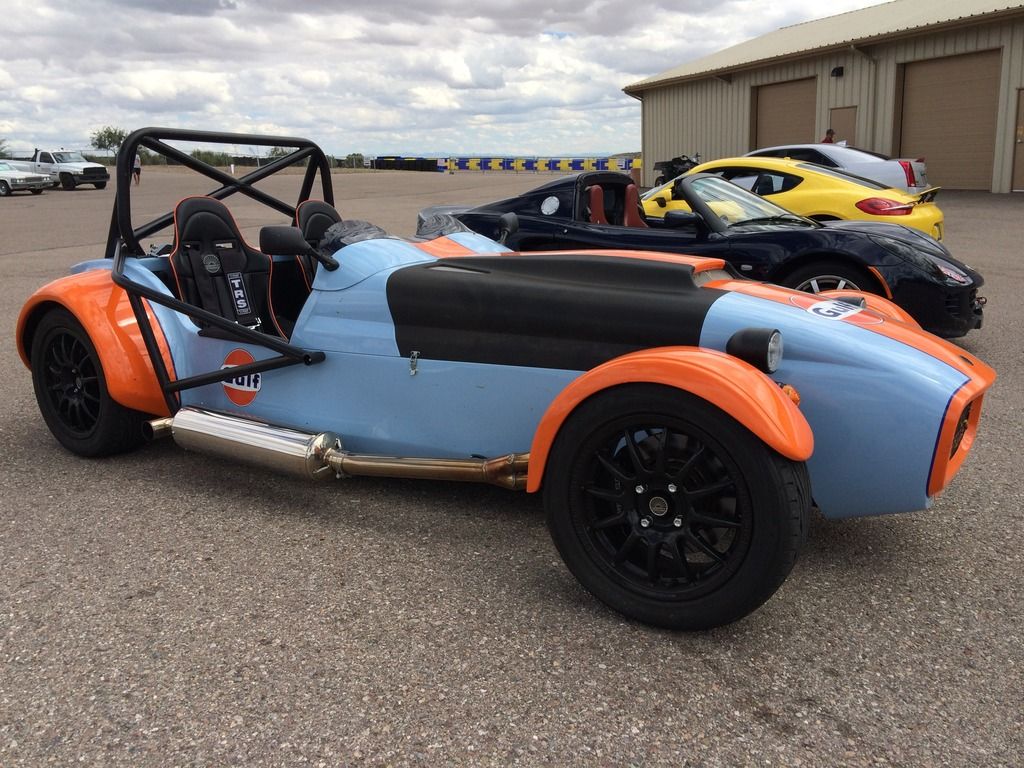
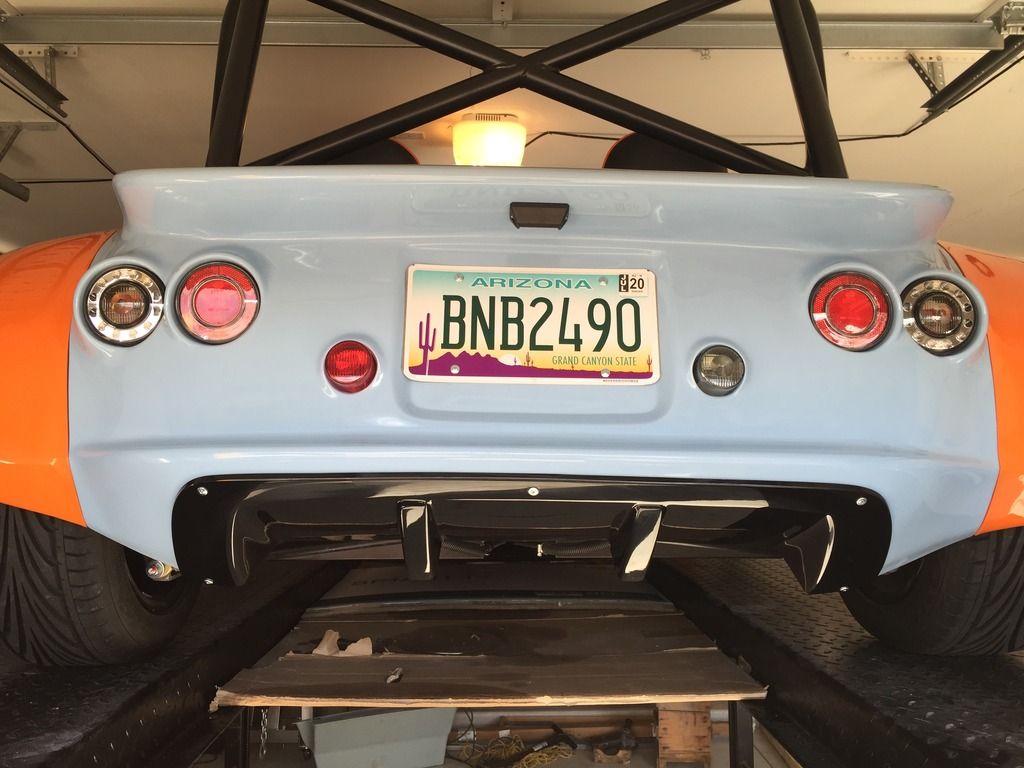
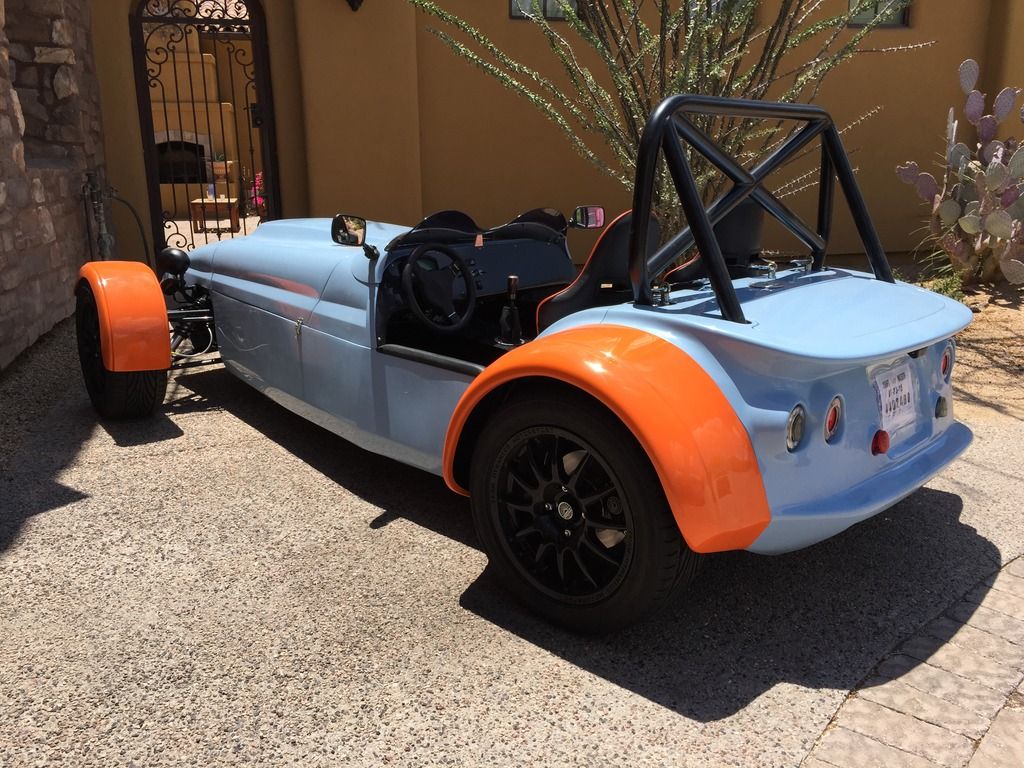
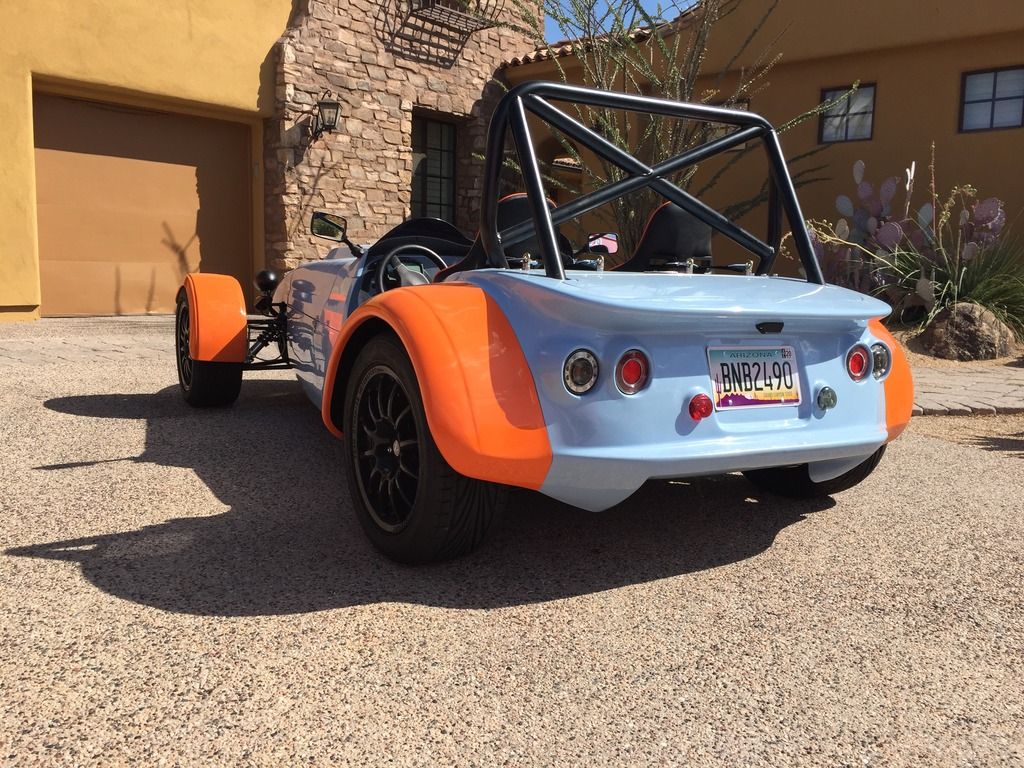
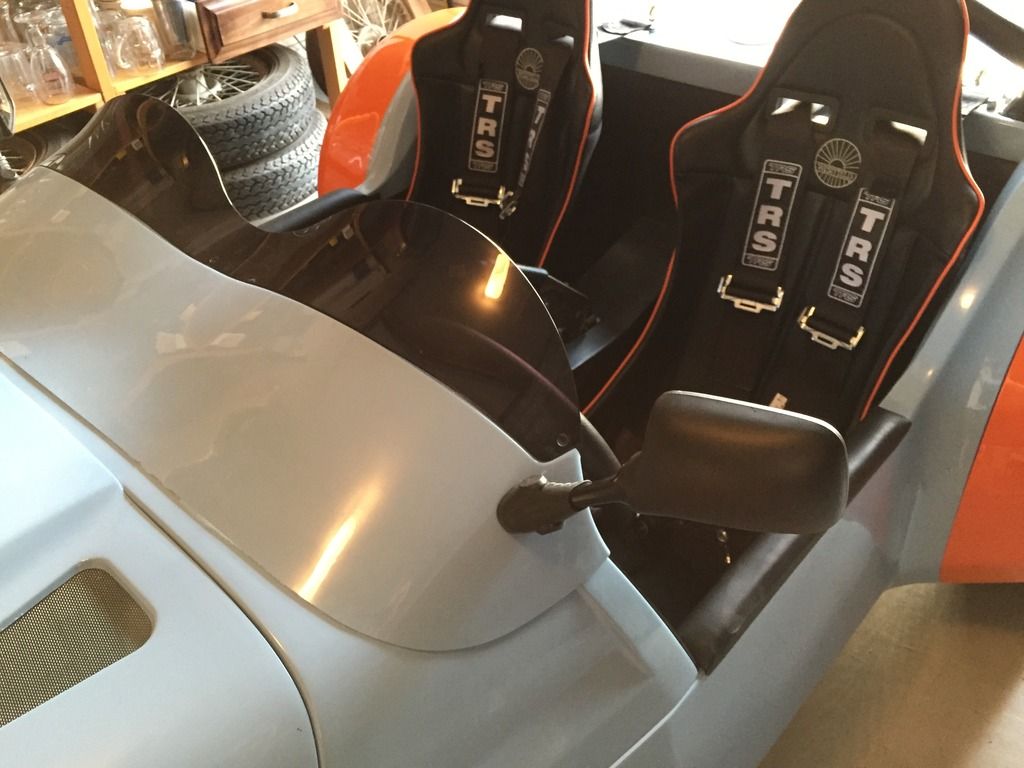
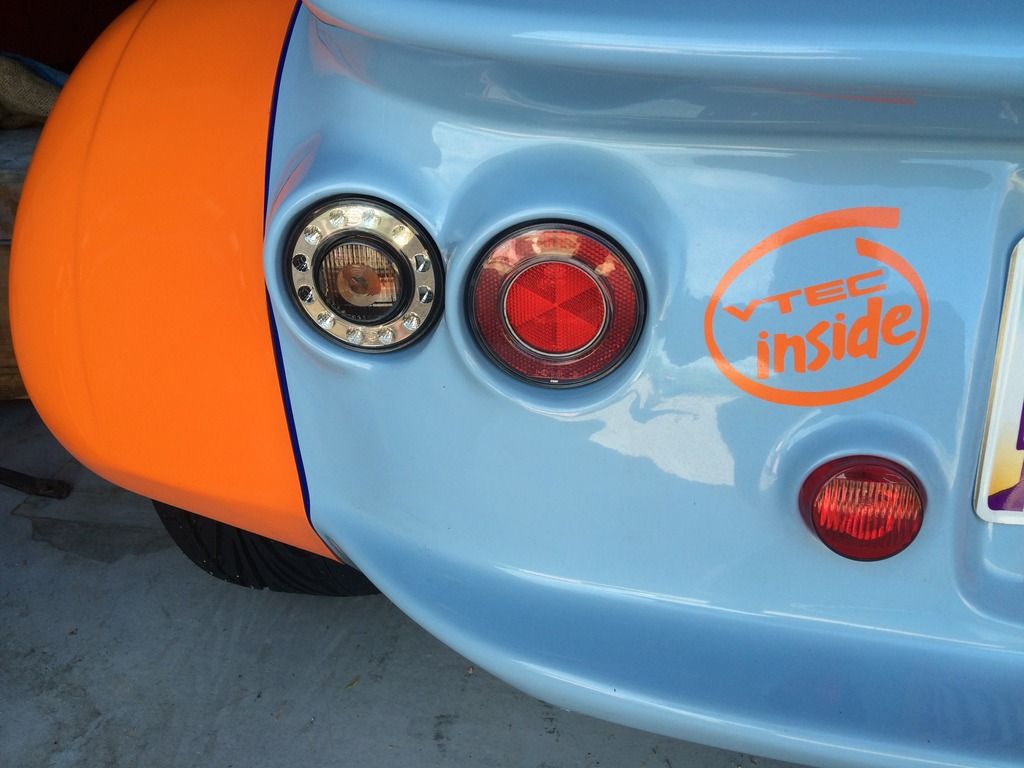
517E85A0-B5BF-422F-BD94-AACD712507C2_zps
Anyone for Gulf?


AE9FBAAB-7865-4F00-95D2-08DE1F0CC580_zps
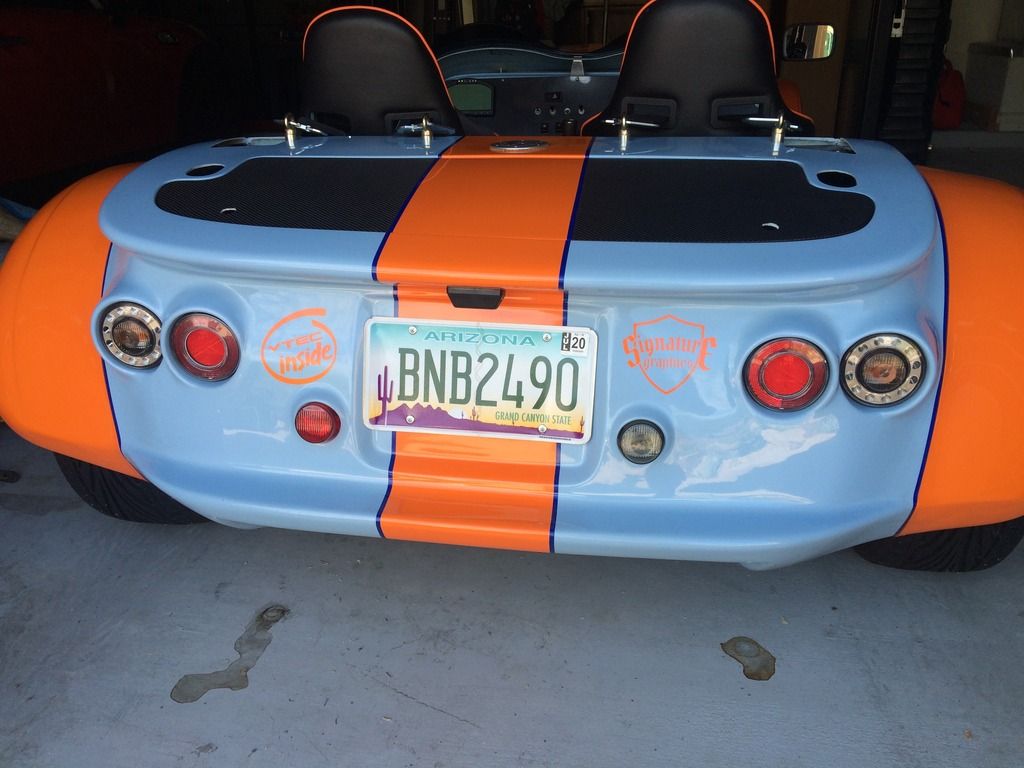
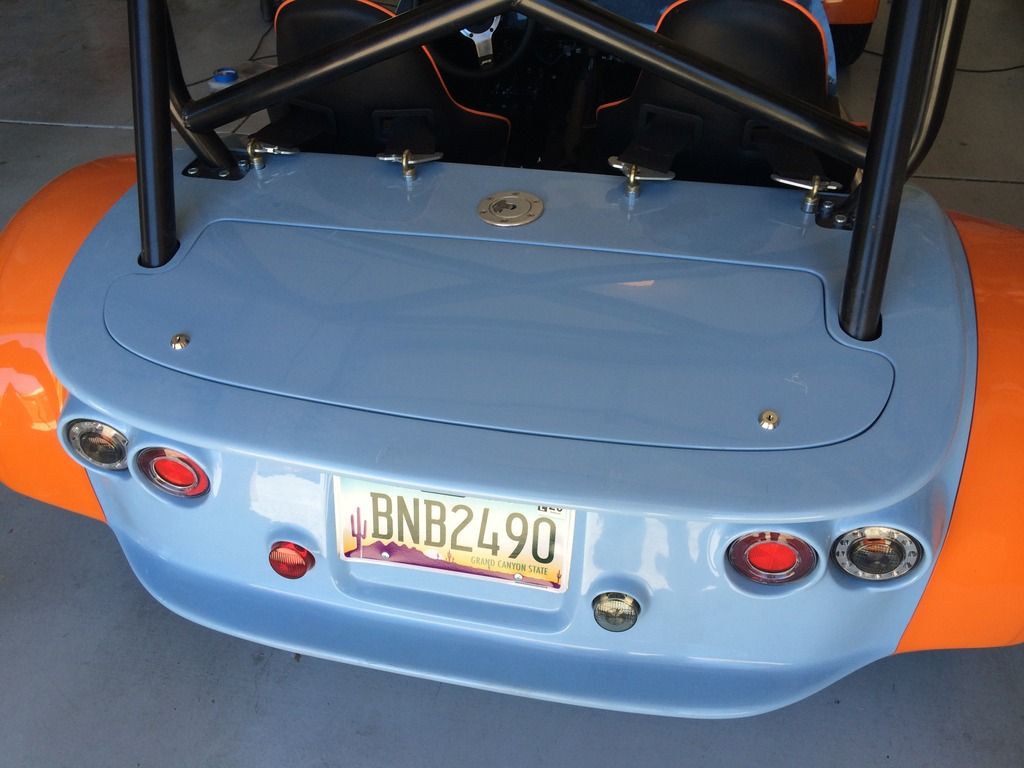
lovely rear view. Lots of other drivers will be seeing this

18C4B0F9-7A8C-4060-8E3B-57E8C2461C58_zps
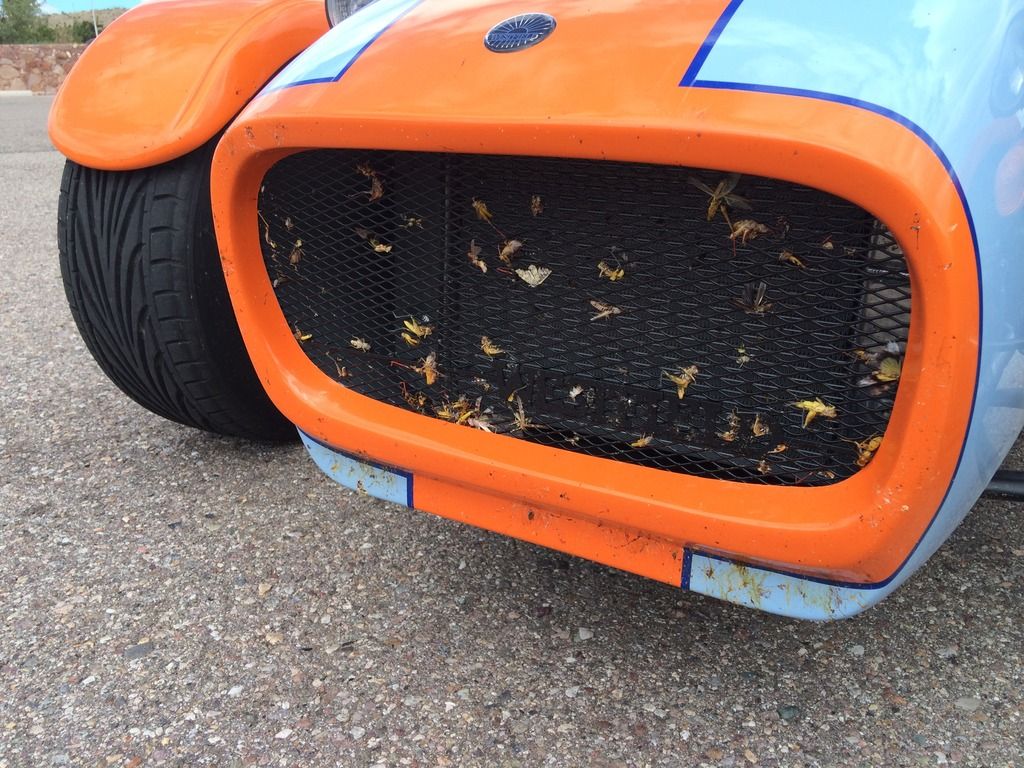
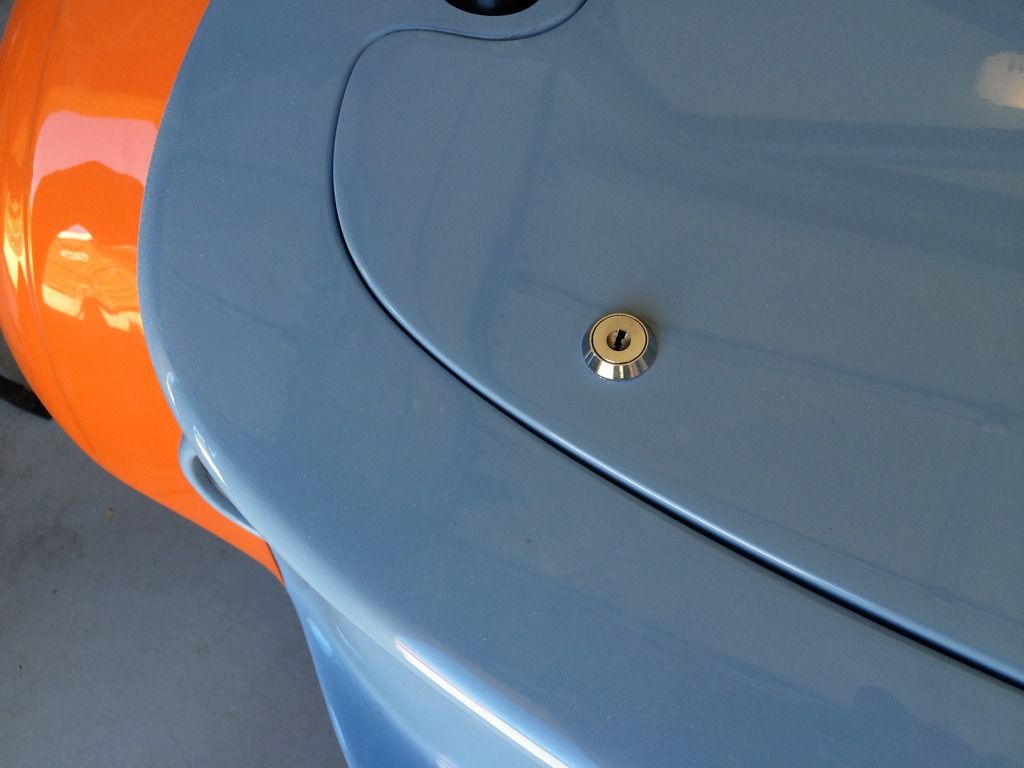
Hopefully people will stop asking what is under the bonnet!


An Audi RS7 driver discovered how quick Mr. Westfield is on the way home from the graphics shop. He thought he beat me away from the lights, but he sounded like he was at WOT and I was only at 4,000 RPM - I took it easy as I was worried about the trunklid flying off - I had taken the locks off to get it wrapped! Quattro and electronics did help getting the power down for the Audi - quite a challenge in Mr. Westfield

Fitting the side impact bars has been a pain in the rear, and not something I would recommend for the faint of heart. The supplied bars do not fit the Honda chassis, because of the dropped floor. Westfield told me it was as straightforward as extending the upright piece that wraps under the floor and mounts to the underside using the seat mounting bolts. 

If only it was that easy.

So the plan was for me to cut the tubing and temporarily add an extension so that everything fit, then get a fabricator to insert an appropriately size piece of tubing, with a pipe on the inside for strength and then weld everything up. What they finally decided to do for security was to replace the whole upright piece, which required making a jig.

I say this is not for the faint-hearted for several reasons:
  • it requires cutting large holes out of the rear of the bodywork
  • you have to drill holes in the bodywork for the front mounts
  • you have to cut your expensive, new powder-coated impact bars
  • You have to weld next to your nice new fiberglass bodywork
I would not recommend anyone buying these until Westfield fix them so they do fit. They did have a good point in that they were only originally intended for the race car. Apparently, I am the first to try to fit them to a chassis with the lowered floor. Ian in the parts department did say (after they sent them) that he wondered why I had ordered them, because they knew they wouldn't fit! It would have been useful for them to tell me that before they sent them.

With their insistence that the only modification was to extend them to account for the lowered floor, I went ahead and made the required cuts to the bodywork. No going back after that. You have to cut the bodywork in order to see if they fit, as the mounting plate is much larger than the one for the roll bar. 

You can see it marked out approximately here:

593FE37B-4B80-4AD1-B2FF-1AA5C1B57C8F_zps
Do I really want to cut this?

The trouble is, once you have cut this much out, there is nothing left holding the front lip of the rear panel to the sides (lower left in the picture). Cutting this close to the edge also chipped the gelcoat. Once the side bars are in, the half cage sits on top of them.


The front mount is located by drilling through the crush tube in the chassis from the inside. 

6FE39981-F4D4-4BC7-81D4-10F0AB23E260_zps
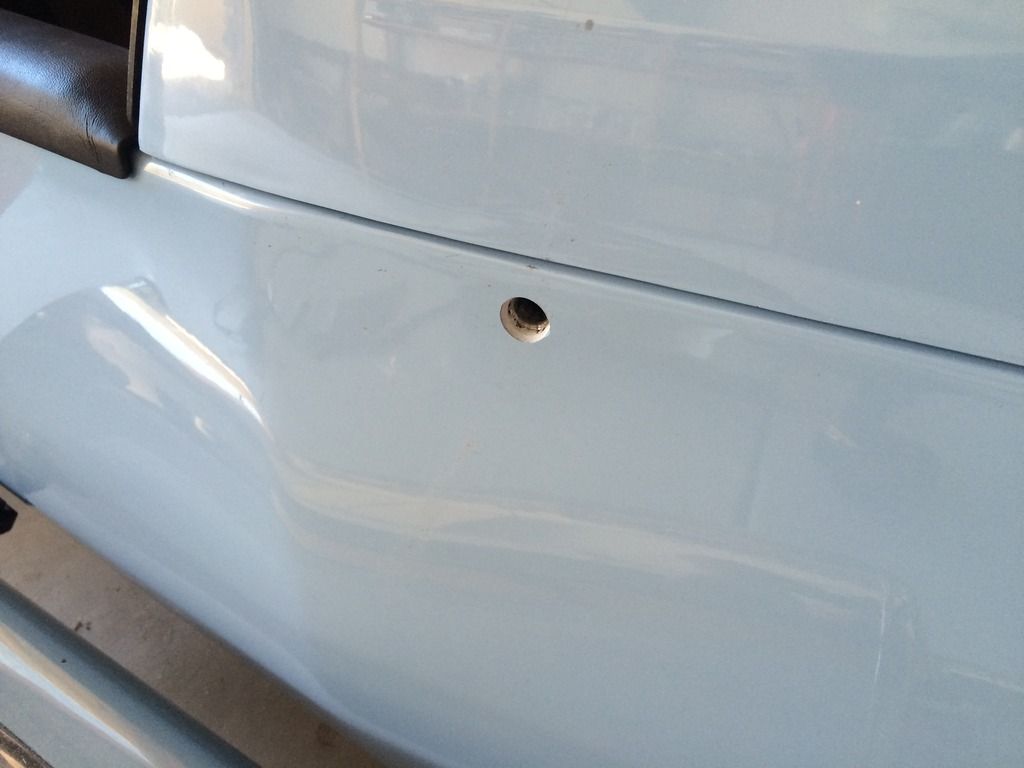
Perfectly drilled hole, but . . .
Nice and neat. Definitely no going back.

Next step is to cut the upright on the impact bar just below the T, so I can fit each piece and see how much needs to be added. 

This is where the fun started.

When I mounted the top plate, the front mounting point in the chassis didn't line up:

49B222F3-809F-405D-978B-40E58C4BF053_zps
. . . Bugger it!


Not even close. I can't move the top mount forward, as this would move the half cage forward, and the rear body holes are already cut. 

Mounting up the bottom portion showed that the mounting holes were in the wrong place - they were about an inch off so I drilled new holes in the bottom plate to move the plate inwards so the two pieces of tubing would line up approximately (the bar was also fouling on the exhaust) - They also wouldn't line up from front to back.
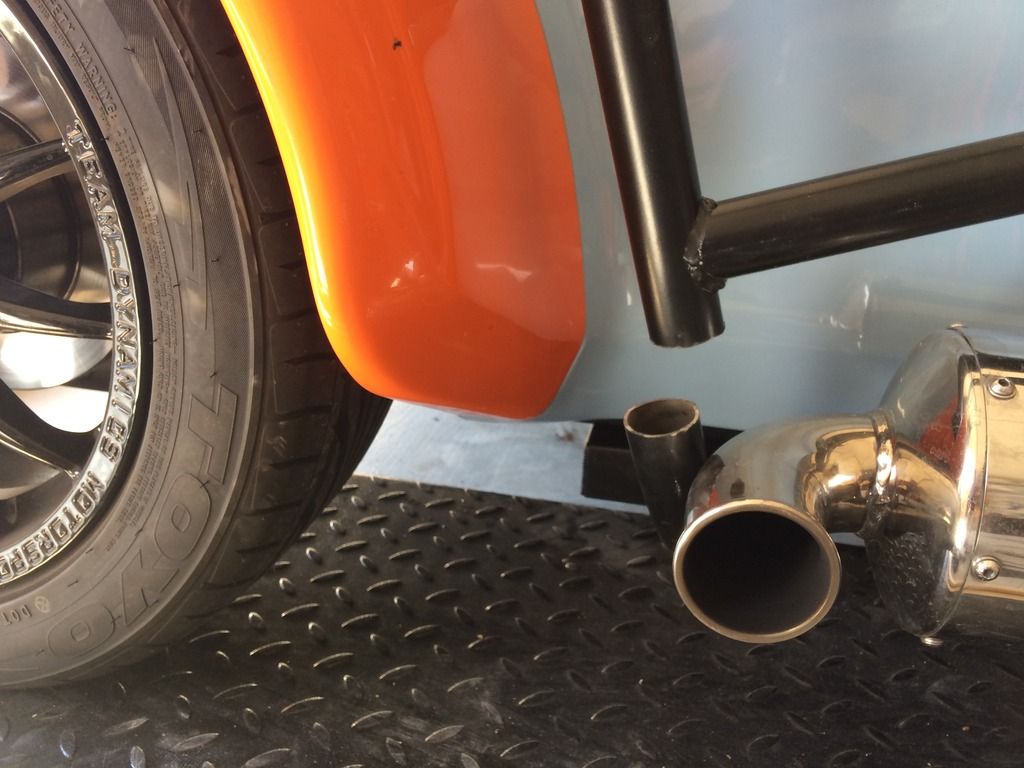
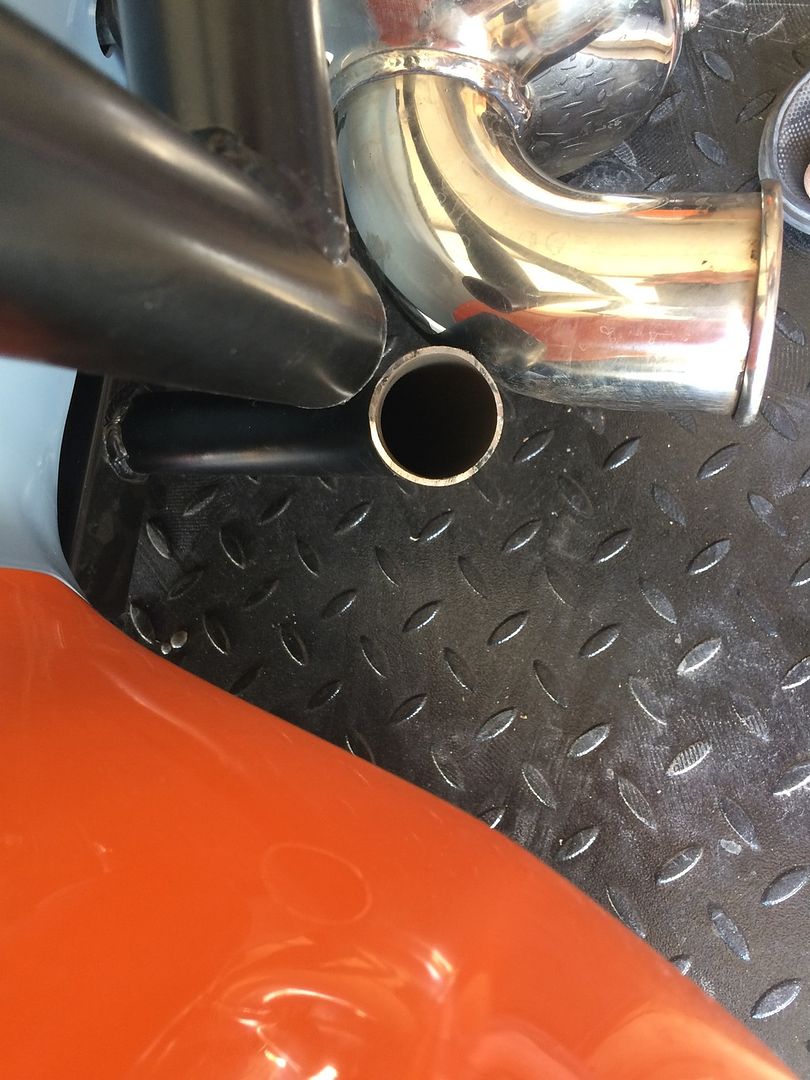
948E741D-F1BE-4469-8C5B-EA002BF4EB59_zps
Touches the exhaust


979C098A-B944-4F24-A7ED-338B520242A0_zps
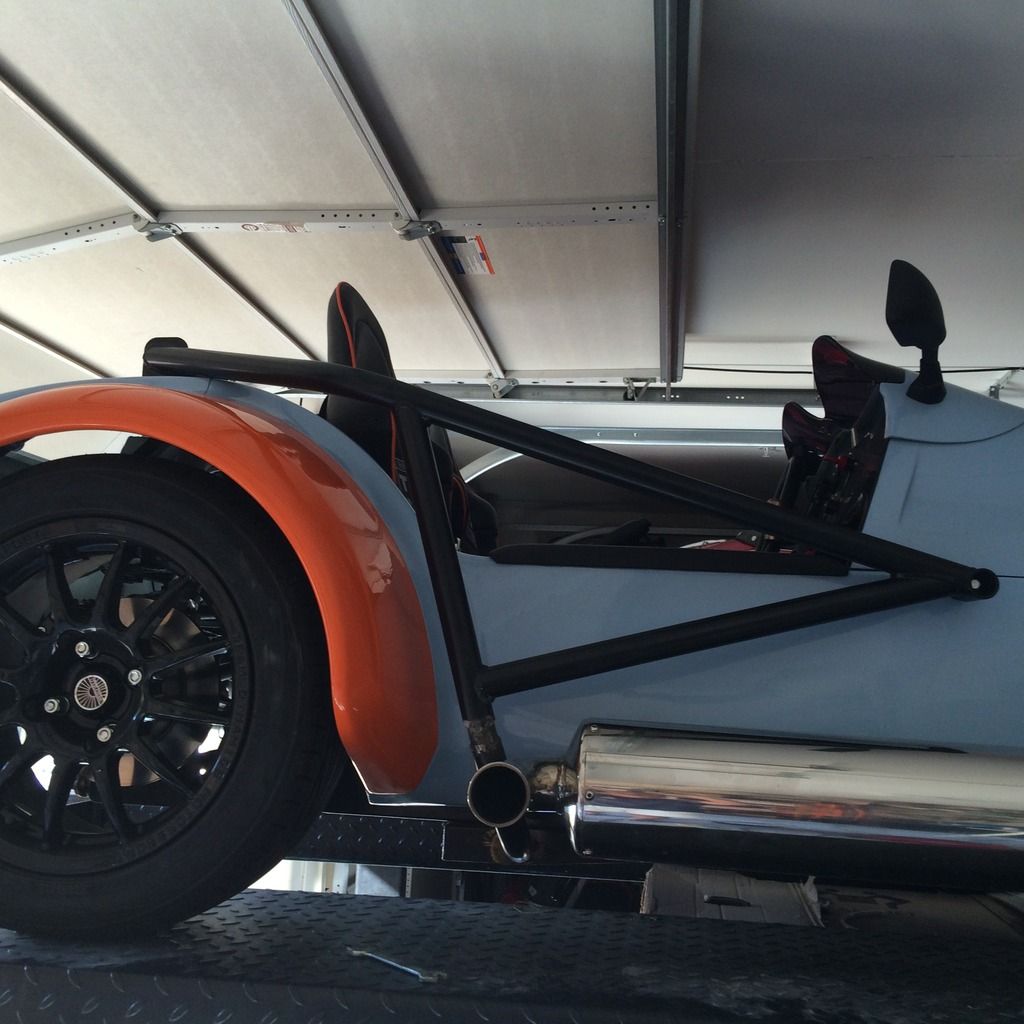
Seems a little out of alignment

12464515-8CBC-4430-86C0-223108511BD0_zps
And out this way too

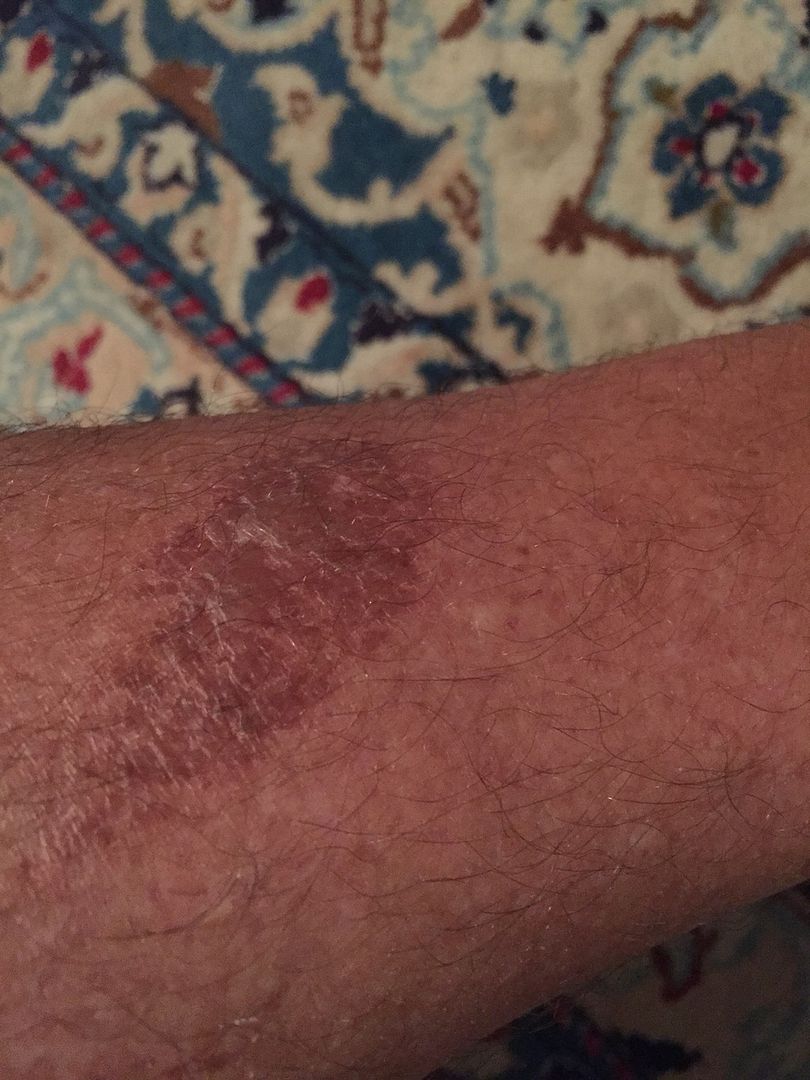
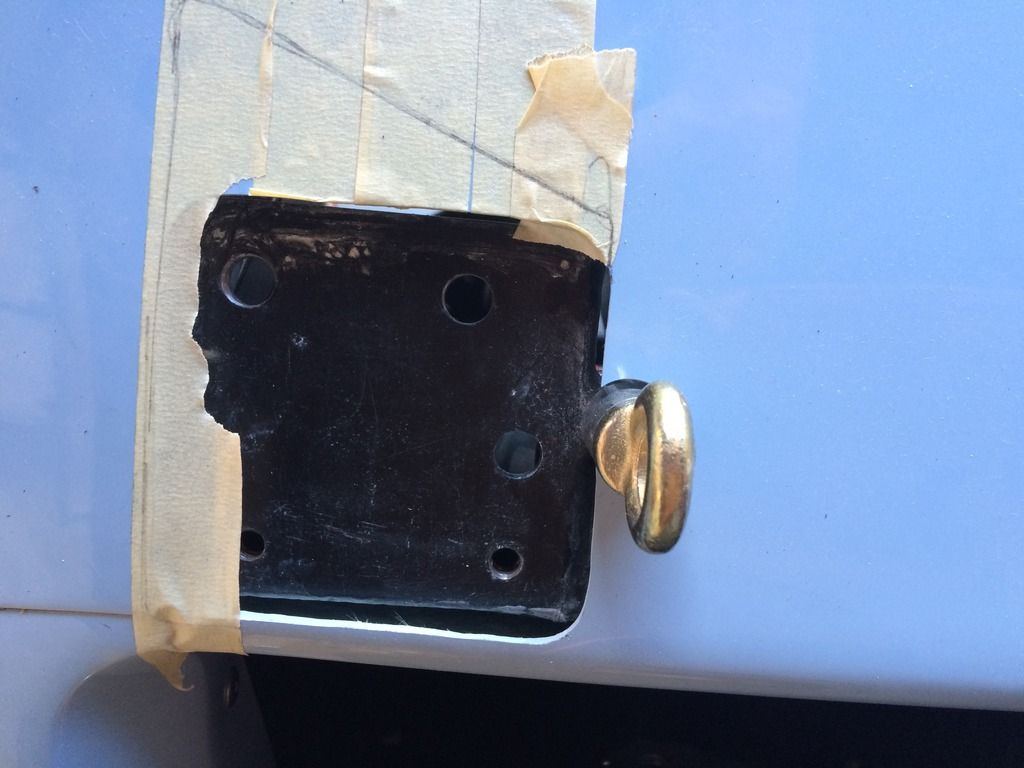
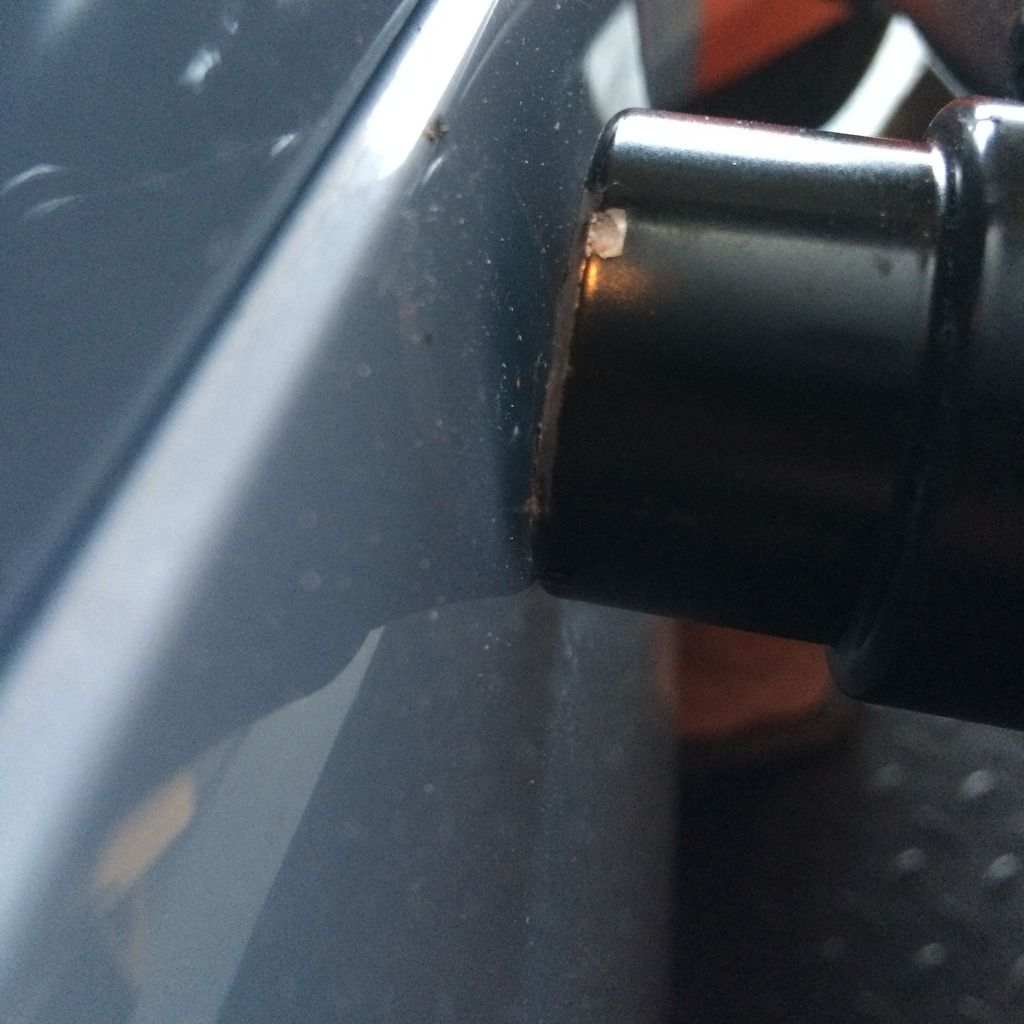
The solution was to cut off the bottom mounting plate, tack in the required extension piece, then retack to the bottom mounting plate. Lots of worry about setting fire to the car! I was so worried about the fiberglass that I forgot about the exhaust and got some spatter on the rear pipe - hopefully it won't cause a problem with rust down the line.


Not the best of welding jobs, but it was fine to mock up the piece. The driver's side was an even worse fit, with the front mounting point way off and at an angle (shown prior to drilling the hole):

40078C6A-62A7-4E4D-ADAC-03E4C53ED721_zps
Beautifully bodged extension form a piece of home depot plumbing pipe
16C496DC-66A7-451E-A53B-4D33F75D1CAC_zps
That's not right

I worked with the fabricator at his shop to do the final fit and adjustments. As I mentioned above, they made an entirely new upright piece. I am much happier about this approach than patching in an extension. They also said the tubing used for the supplied bars was quite thin - the new upright is much thicker and will be the only piece left standing if ever there is an impact!

The solution to getting everything to line up with the front mounts? Cut off the rear mounting plate (and the bottom mounting plate, again - fortunately it had only been tacked in) add an extension to the vertical part of the mounting plate where the bar attaches and remount it. It would have been easier to build the bars from scratch.

16080712-8275-4969-8D3B-D5BED84694B2_zps
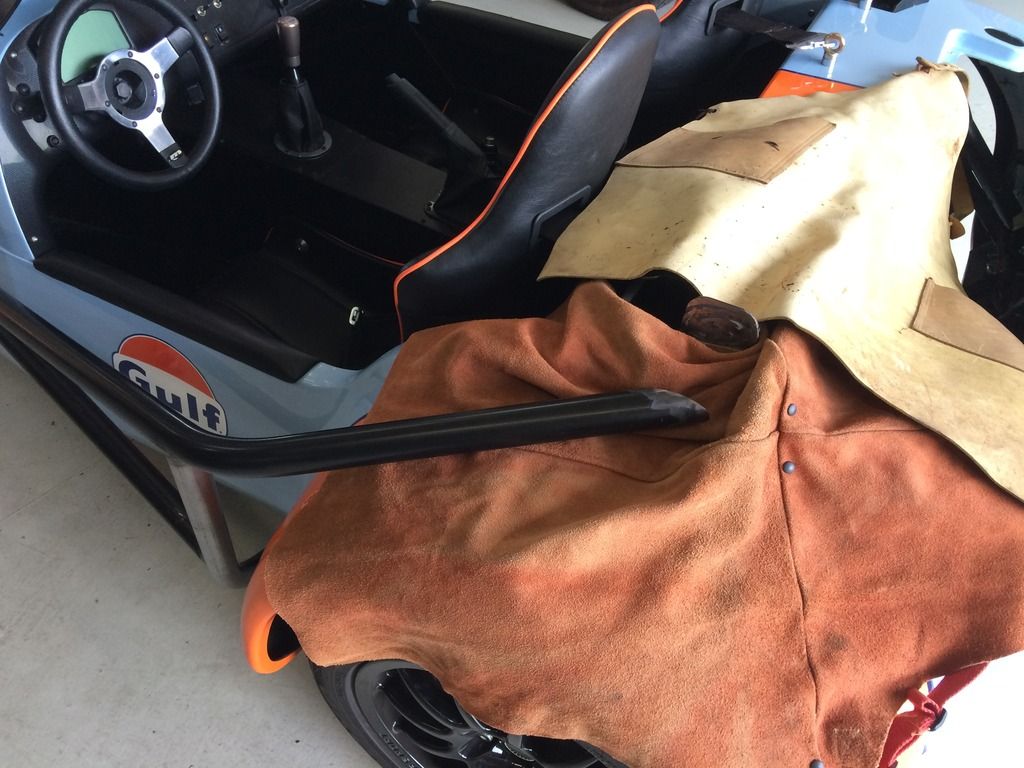
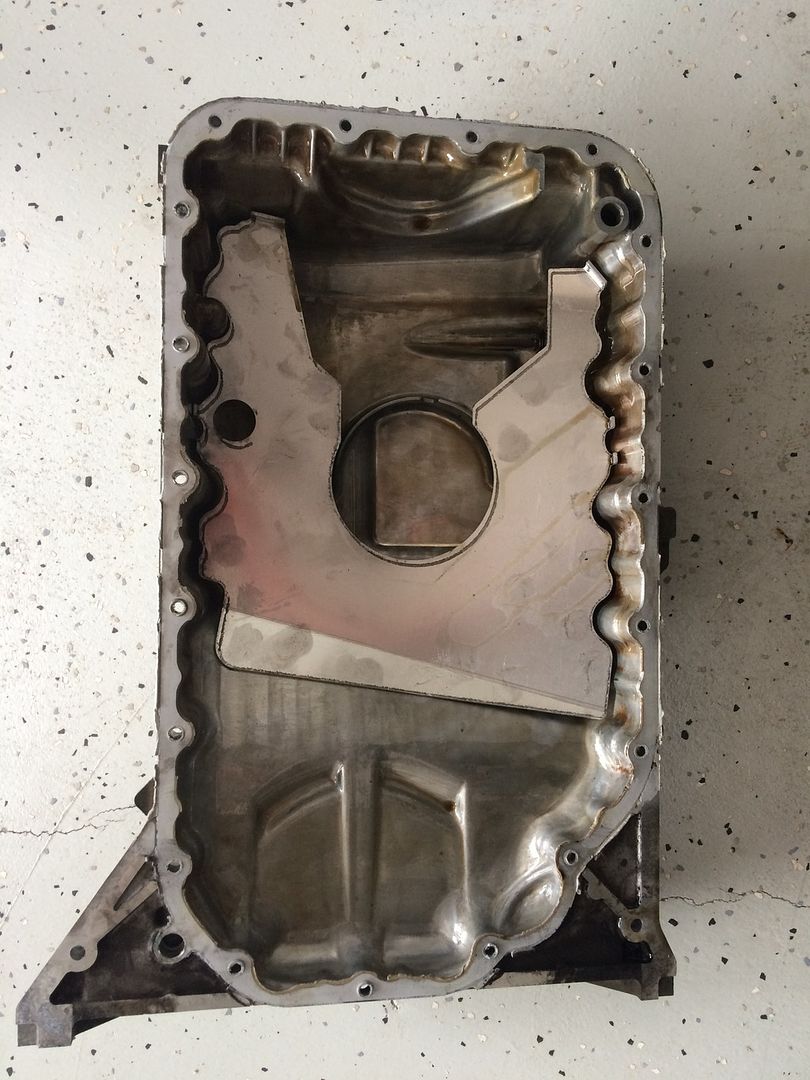
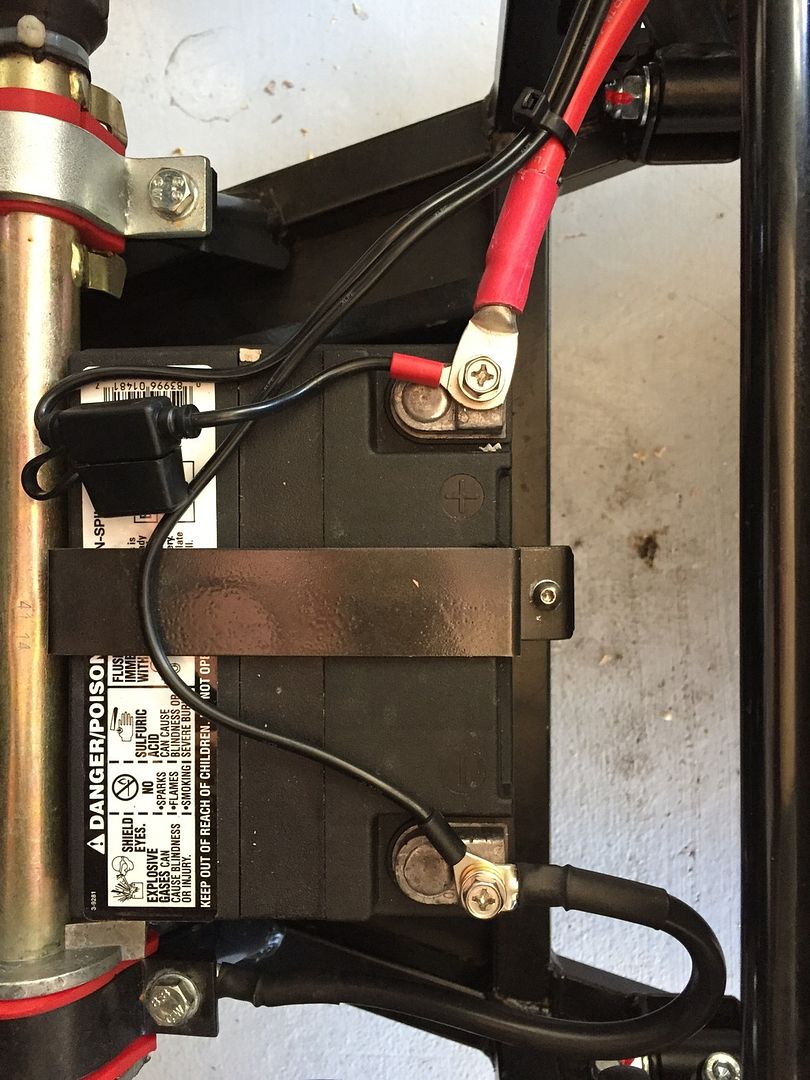
OK now, lets weld right next to the fuel tank vent pipe . . 


Here we see Mr. Westfield wearing his protective aprons. I was a little worried as the gas tank vent was right under there and the tank was full of 95 octane race fuel! Fortunately, we didn't blow him up. You can see where the bar was cut off. We had to move it forward a good 15-20mm on the driver's side. The front mount will be bevelled to align better with the body.

Everything should fit nicely once it comes back from being welded up and powder coated. What a faff, but well worth it - hopefully I will never need to test them out. My feeling is the bolts on the seat mounts are a little small to hold this securely, so I will probably replace them with some thicker ones. Unfortunately I had welded them in, so it will need some careful surgery at some point.

The bars should be ready next week and I will be able to get everything back together. 


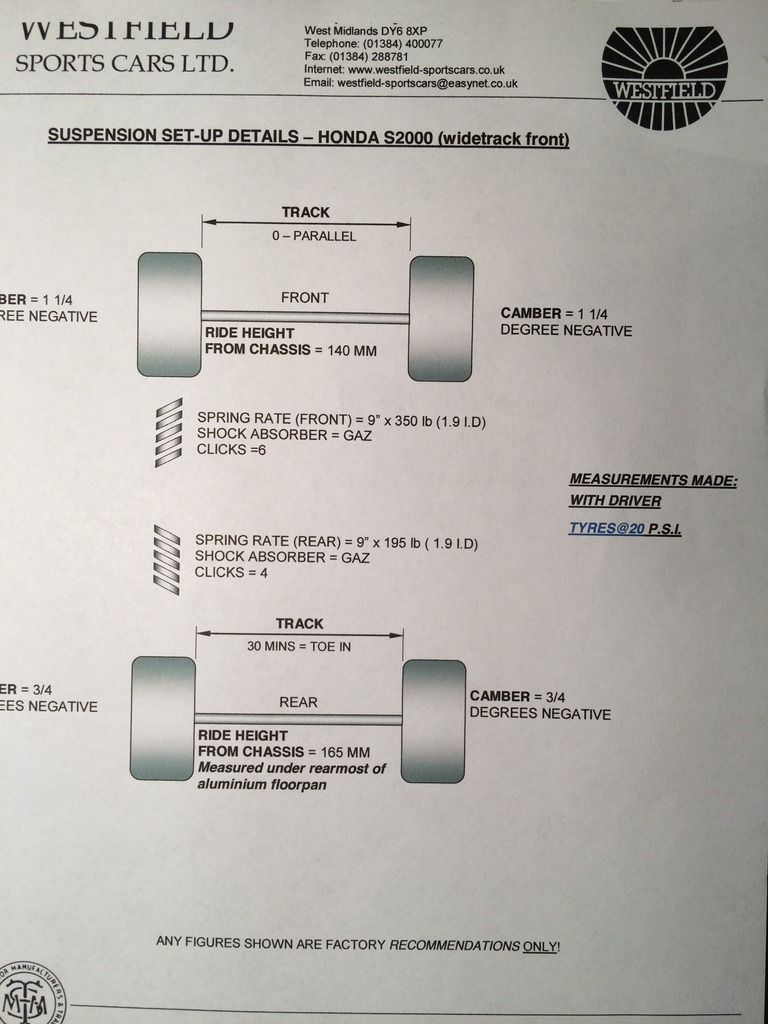
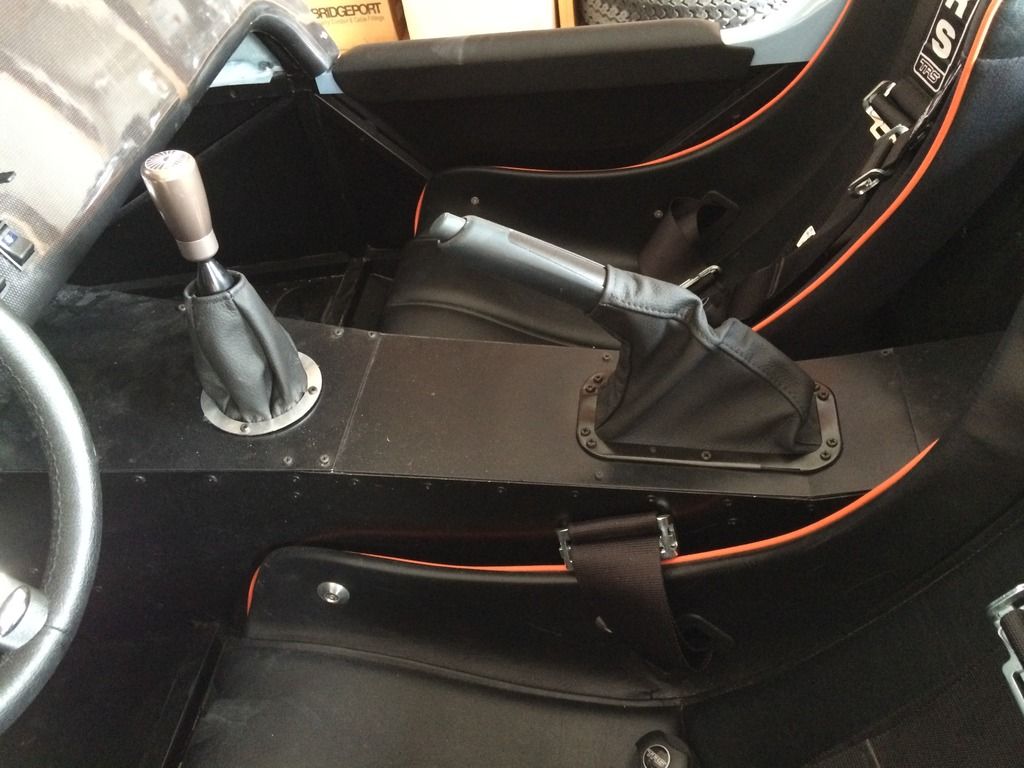
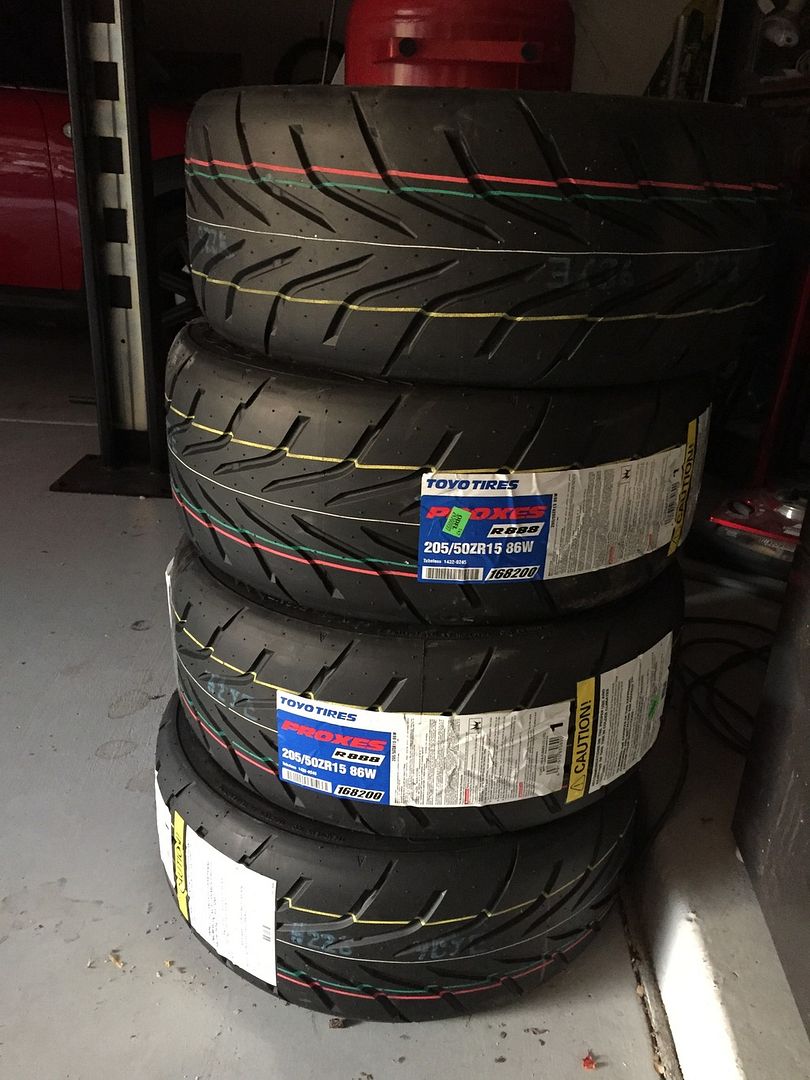
I have to finish setting up the suspension geometry (front done - except that Westfield say I have to change the upper ball joint washers for some thicker ones , but the rear is a little more involved), and then I am taking it down to the track on the 15th for testing. Can't wait! Alex will be flying in form Montreal to help - however, it looks like I need to move the driver's seat back to accommodate his legs, based on his brother's trial over the weekend - his knees were touching the steering wheel, which now has a removable hub (and is a better wheel)

Wednesday, August 19, 2015

Clarification on the gas tank

Not quite as big as I thought - according to the factory it is only 28 liters, which is 7.4 US gallons - good job I checked! I have changed the configuration and it seems about right, but I haven't had the nerve to run it down to close to zero to see how much I can get in - that's a job for the track! I have ha it down to around 1 gallon and I didn't run out, and it took about five or six to fill up so it is close! Not that important for the track, but it would be good to know when I am about to run out.

Configuration for the dash is all correct now - fan coming on when expected and oil pressure seems reasonable. Job done!

Thursday, August 6, 2015

Diffuser

Finally fitted the rear diffuser - not that it actually diffuses anything! Can't say it is a great fit, and you really see the asymmetry of the rear body moulding when you try to put it on.

Left side from underneath
and the other side
In the absence of any directions of how to actually fix it to the rear of the car, I inspired myself from a few pictures I had taken at the factory and aligned the inside edge of the diffuser with the inside edge of the body. The fit on the inside isn't very good, but you don't see that. Just fitted with self-tappers for the time being, will upgrade with rivserts and bolts at a later date. The back middle bolt will need a spacer, as there is a gap of about 15 mm or more between the body and the diffuser.

Rear diffuser, guaranteed to take 1 second off my lap time


I trimmed and fitted the pedal cover on the driver's side footwell. This will stop my toes from getting blasted by 200 degree (F) air every time the fan comes on! Serves me right for driving with flip-flops.

Also did some tidying up underneath, to move the fuel lines slightly, as they were rubbing on the gearbox. I also added some convoluted tubing just in case. Also added some to the clutch flexible tubing as it lies across the brake masters.

If I was to do it again, I would run the fuel lines higher inside the tunnel and exit them after the gearbox mount instead of in front, there is plenty of room to do it that way, but difficult to change once everything is in place.

Timelapse

Finally was able to convince iMovie to make the complete time-lapse. Three months flash by in five minutes.


Tuesday, August 4, 2015

Swirl Pot

As I now have my swirl pot, I removed the boot box today to see where I could put it and it seems a little large to go anywhere. Have asked Westfield where to stick it (!?)- they had told me to fit it to the tank frame with rubber bobbins, but the frame doesn't seem wide enough at the back. I will see what they say next.

20A fuse fitted in the fan circuit (factory confirmed the fan pulls more than 15 amps on start up). So far, so good. Left sidelight and left rear light did stop working though - fuse 1 (10A) blown - I must have shorted out something while I was tidying up the bird's nest behind the dash . .

Wired in a starter button and relay, and ignition toggle switch in place of the key on the column (I just cut the wires and soldered in appropriate extension wiring so I could still use the connector on the loom). Both much easier to get to than the key when you are strapped in with a harness. The starter button is the same as the four menu buttons for the Dash 2 and is directly below them, the toggle switch was added next to the other switches in the middle of the dash.


As you can no doubt see, the hole for the headlamp switch is slightly too large, so the switch has moved out of alignment with the fog lamp switch (a result of over enthusiastic dremelling!) Will fix this with an aluminum plate behind the dash at a later date

I also wired in the FIA Master switch (essential at the track so you can quickly disconnect the battery and kill everything, should there be a problem), which necessitated switching the battery around (which was good, as the terminals were very close to the steering rack when it was the other way round) and fitting a six foot +ve cable (found on Amazon intended for a boat battery). The 4 foot cable supplied with the kit was just long enough to go from the switch to the starter.

There is a resistor which needs to be wired to the switch so that, when it is switched off, the charge in the alternator has somewhere to go (to earth), otherwise the kill switch will kill the alternator. Very important the resistor is wired to take the +ve feed from the starter side when the switch is operated, NOT the battery side (unless you want to have a melt down when you switch the car off).

Everything works great. Start sequence is FIA on, ignition on, start - perfect for the track. I defy anybody to start it without instructions (or labels on the switches). Just as well really, seeing as I have bypassed the key switch.


I also installed a permanent connector for a battery tender while I was at it. The plug is situated on the underside of the chassis, so should be relatively easy to get to (it has a rubber cover to protect it from the elements).

While I was fiddling around with the dash, I moved the DASH2 up as much as the mounting holes would allow. Now I can nearly see the idiot lights at the bottom. Still needs moving up a bit, will have to elongate the holes. Can't move it too high, though, as the shift lights will be obscured.

I STILL have the diffuser to fit and to adjust the camber. Then I need to take the car and sidebars to a (not so) local performance shop to have the bars adjusted to fit the dropped floor.

No solution for the pinking. The factory are supposed to speak to Omex to see if they have a solution (such as a summer map). I could add octane boost to the gas, but that is a pain. Sill pinking today (well it was over 110 degrees), also found out that my toes get fried iff I drive in flip flops (probably not the best choice of footwear), I must remember to fit the panel that covers the pedals, and will keep out some of the engine heat from the footwell. Each time the fan comes on (thanks to the new fuse) I get a blast of 200 degree air over my feet)!

Friday, July 24, 2015

Overheating

Went for a blat today and noticed on the way back that the cooling fan wasn't cutting in as it is supposed to. On the climb up the hill to the house, the engine was getting perilously hot (well it was 104 fahrenheit out there). When I got home the fan still hadn't come on -the fuse had blown, again - it seems a 15A fuse isn't enough, but how much current can the wiring take? A question for Westfield methinks. In the meantime, I fitted a 30A fuse - if that blows we really have a problem. Mind you, we may have another altogether different problem if the wiring melts. Do not try this at home, I only used a 30A fuse because I didn't have a 20A one. This is a temporary measure.

On to Amazon (wonderful place). Ordered a lovely assortment of fuses for $8 and free shipping, to be delivered on Sunday, no less. I got 80 fuses for the price of 5 at AutoZone, give or take.

The engine was pinging a lot under load as well - modern engines aren't supposed to do that - but the Omex ECU doesn't use a knock sensor, so it doesn't know the engine is having problems. I suppose the UK set up doesn't take into account crappy US gas, temperatures over 100 degrees and nearly three thousand feet of altitude. I am guessing it is set up for sea level atmospherics and gloomy cold UK weather.

Worse still, it is a closed system, so I can't just go in and tweak it. To be discussed with Westfield when I am there next week. I am visiting the factory to return the assortment of extra brake pedals they supplied me with and other sundry bits and pieces I had left over, and to pick up my swirl pot, if it is ready, along with a couple of other missing items.

All that to say, there will be a lull in proceedings here while I wend my way, and back, to Blighty. . .

Thursday, July 23, 2015

Trunk/Boot locks and a mishap with the exhaust

Fitted the locks to the trunk (sorry, boot) today and what a faff that was - I drilled the holes for the locks on small marks on the trunk(boot)lid that are made during the fabrication process at the factory, and then used paint on the latches to locate where they entered the boot box, but no matter how big I made the slits, I couldn't get them to engage. No doubt this is in the manual, which I gave up on a long time ago, but the solution was:

  • flatten out each latch and rebend, as I realized the step in it was stopping the latch from rotating fully, as it was being stopped by the edge of the boot box. The bend is now closer to the lock mechanism than before.
  • setting the latch so that it was not turned fully 90 degrees when locked (no need and it was fouling on the rear body panel - see next bullet)
  • once the slit is cut in the bootbox I also needed to cut back the edge of the rear body panel, as in my case it was stopping the latch rotating. unfortunately that made a bit of a mess of the nice clean slits I had cut, but you don't see that handiwork unless the trunk, sorry boot, lid is off.

Setting up my phone in the boot and taking a video when I shut the lid an operated the locks helped me see what was going on in there. Who's a clever boy then?

After all that and lots of trial and error, the boot lid finally locks. Both sets of keys are the same, so you actually end up with 3 spares! (perhaps I will keep one in the boot). In the photos below, you can  see the damage to the boot lid caused in transit - I understand the replacement is on it's way, along with a new bonnet and rear wing.


It is  a neat job though - here is the other side:


Oh yes, and the catalytic converter fell off this morning - can't imagine how that happened!

 Much better. Doesn't look like a can of beans got such halfway any more!

On the subject of the exhaust, the headers are rapidly changing color. I suppose it was to be expected, but I wanted them nice and shiny at least for a little while. I guess it gets rather hot in there:


Tuesday, July 21, 2015

Fiddling with my Configuration

As the Westfield configuration wasn't correct for the oil pressure, and as I have checked the oil pressure with a mechanical gauge (hopefully that is right), I decided to change the configuration file manually - I had noted down readings at various RPM on the Dash2 and the mechanical gauge and determined that the Dash2 was fairly consistently out by a factor of 1.8, so using a laptop I reconfigured the scaling so it would read more sensible pressures. We will see how far off I am once I get the correct file from Westfield. While I was at it, I converted the reading from bar to psi (multiply by 14.503778, so what had been showing as 2.8 bar, now actually reads around 73 psi, which is in line with what I saw on the mechanical gauge and is about where it should be - perhaps a little low).

I also changed the scaling of the temperature gauge from centigrade to fahrenheit, and the gas tank from % remaining to US gallons (but I had to guess at the tank size of 45 litres - I have a feeling that is a little large, I think it may be closer to 30. Easy enough to fix once I get the confirmation from Westfield).

Was too hot to take Mr. Westfield out today - will take him to play tennis early in the morning. He will enjoy that.

Monday, July 20, 2015

So I Rushed out this Morning . . .

After tennis and went to the registration office to get a 3-day registration which allows you to take the car for inspection/registration/emissions testing etc. (and nothing else). I got there just after 9:00, and . . . they were closed, until 10:00. Bother. So I went home - stopping off at the hardware store on the way home to say hello and pick up a few large washers to put under the passenger side seat bolts to spread the load (Westfield still haven't sent them). Fitted them when I got home. I went back to the office later after they were open - the 3-day registration is simply a matter of handing over $6 to the charming lady there (really, so much nicer going through an independent agent rather than the DMV - you have to pay "convenience" fees, and in this case they really are - very convenient, no wait and service with a smile). So this was the result:

Ready to go to see the inspector 
So a few final checks to ensure nothing was loose (especially the wheels, as one started to come off the Healey on my way to the inspection a year ago), grab my helmet and it's off we go. First stop the gas station, where I am stopped by a young man who said he just had to ask what it was. Turned out he was a photographer and he asked if he could take some pictures sometime - once I get the Gulf livery done (and the replacement body panels) I will take Mr. Westfield to see him.

On the subject of the body panels, I bonded some glassfibre to the underside of the bonnet where the cracks were to strengthen them. The cracks still show, but now the bonnet is solid and does not flex - gives a much better finish line with the nosecone.

I arrived at the inspection station around 1:50, and was immediately asked by someone if it was a Lotus. This car definitely attracts a lot of attention. Added my name to the list and was told the wait should only be half an hour or so. At 2:40 the inspector called me over and we got started. Fortunately, he was very helpful and it was a completely different experience I had had with the Healey with another inspector (which had filled me with some trepidation for Mr. Westfield).

The inspection process in Arizona is relatively straightforward - they just want to check the bills of sale (for the kit and the engine) and examine the serial numbers to ensure that nothing is stolen.

In the inspection station. Turn your head and cough please
The serial number provided by Westfield isn't recognized by the system here so they assign an Arizona VIN number, which is attached to the chassis (and must not be tampered with). No real mechanical inspection needed (the inspector gave it the once over, I think more because he liked the look of it) and that was it - about a 20 minute process followed by some paperwork. After I explained what it was and showed him some pictures (which he said wasn't necessary), he agreed to title it as a replica of a 1960 Lotus 7. The title also shows it as a "Special Construction" which is Arizona speak for a kit car.

A 1960 Lotus.
Not sure why they think Lotus made mobile homes though

As it is titled as a 1960, the registration cost is only $10 a year and it is exempt from emissions testing (I think all special construction vehicles may be exempt, but I figured this route was the safest). I also believe that as a replica, I won't have a legal issue regarding the lack of a windshield and wipers, which are normally required - I think they were optional on the Lotus Seven. End result:


Finally, we can go for a spin legally!
Legal!

That view reminds me, I still have to fit the diffuser. Job 1 for tomorrow, or the next day.

The drive back was a lot of fun. What a car, and I haven't really pushed it yet.

Sunday, July 19, 2015

Back from the Mountains

Back from the Rockies and on with a bunch of small remaining items.

I adjusted the ride height so that I wouldn't keep scraping the gearbox mount on my driveway - I set it slightly lower than the recommended 140mm at the front and 165 mm at the rear (135/155 measured under the chassis rails, after putting weight in the driver's seat/footwell to approximate to my weight when dressed with a helmet etc.). No scraping on the driveway any more! I need to make a camber gauge, so in the meantime I did an approximate setting using a spirit level on the wheels, which showed a small amount of negative camber on each wheel. There is still too much toe-in at the front, but it will do for the time being until I can get it to a shop that can set everything up accurately. The recommended settings from Westfield are shown below:

Suspension set up direct from the factory
I also decided to tackle the gear knob - as other Mega S2000 owners have noted the Westfield gear knob is too large for the Honda gearstick - I addressed this by winding on three nuts to the gearstick then grinding them down until the gear knob would just fit over - I could then attach it securely with the three grub screws. It fits very securely with no wobble that I was fearing.

I was going to cut the gear stick down, as it seemed quite long, but I actually find it is a good height as it is, with your arm resting on the handbrake lever. I also fitted the provided gaiter as best I could, but I am not really satisfied with the outcome - I will have to come up with another solution (it is a little short, and untidy at the bottom):

Funny little gear gaiter


The handbrake gaiter fit much better. I had struggled with this before, but came up with the solution of stapling the gaiter to the rectangular rubber seal that goes over the handbrake, then securing with the metal bracket. A little untidy, and it wouldn't show if I was fitting carpets, but this being a track car I am not. Anyway, it is functional. There are that many screws because there were that many holes!

Handbrake is neater than the gearstick


I also fitted the VDO temperature sender, which should look like this:

A strange type of connector that I have not seen before, but a female spade connector fits on it sideways.

This gave much more sensible temperature readings, with the fan cutting in around 94 C.

I also removed the oil pressure sender and fitted a mechanical gauge to check the oil pressure. The Dash2 was reading 0.5 bar on idle when hot and a maximum pressure of 2.8 bar when driven. I felt this was just way too low and the mechanical gauge agreed, showing just over 1 bar on idle and between 5 and 6 bar when revved (you could see the impact of the pressure relief valve dropping the pressure to around 5 bar after being momentarily higher).

5 bar (75 psi) at 3,000 RPM, now that's more like it!


I got a revised configuration file from Westfield, but that gave nonsensical oil pressure readings, so I am waiting for another file.

All being well, I should be able to take Mr. Westfield to the DMV tomorrow for show and tell.

Friday, July 10, 2015

Final Jobs

I received the spacers for the harness eyelets yesterday so I fitted them today. I was able to do it without removing the rollbar, which was a nice surprise. It is, however, impossible to enlarge the holes unless you have the flexible drive attachment for the Dremel. With that it took about 15 minutes to do all four. I did have to grind down the rollbar mount slightly on the right hand side to get the spacer to fit - other than that no problem, and I was able to get all four to tighten up nice and straight:

Harness spacers fitted and ready to go


The harnesses attached very easily to the lower mounting points - no problems with powdercoating in the threads. Here is the final product:

Faff city - no popping down the road with these boys
 to put on - it takes at least 15 minutes to get strapped in!

I have not fitted the crotch straps yet as I am still waiting for the hardware. Actually getting into the race seat and attaching the harness is quite a faff unless you have a pit crew!


After that, the final, and yes I mean final, job was to hook up the speedometer sensor and calibrate the dash. After a bit of adjusting of the position of the sender, it worked fine - it even told me (accurately) what gear I was in!  Actually a bit fiddly to enter the calibration on the dash but I got it eventually (after not hitting the enter button the first time).

I say it was the final job, but it really isn't. Westfield sent me a replacement temperature sender, but I can't use it because it has a funky wiring attachment - I have never seen one like that before. I also still need to tidy away/attach the wiring under the dash, and of course do the geo set up. And then there is the phantom swirl pot, the replacement body panels and the side impact bars than need a little modification.

I went to the DMV to see if I could get a temporary registration - no luck. The best they could do for me was a three-day registration so I could take Mr. Westfield down there so he could have a level II inspection (I think they stick a finger in his exhaust and ask him to cough). That was no use to me as I am away next week. Will sort it out when I get back. I just know it will be a headache.

These did arrive today though:

Some real track tyres

They will work a lot better on the track than the (wrong) tyres that were sent with the kit. I have run a set of R888s on my Lotus recently, and while they are an OK track tyre they don't let go progressively - it is all or nothing. We will see how they fare on the lighter Westfield.

Finally, a shot of Mr. Westfield's wonky mirror. I am not sure if it is annoying me enough yet to take it off and adjust it:


From that angle, it looks fine.


Nice calf burn from a hot exhaust.
Thankfully, the exhaust is not on the driver's side!
Oh, and by the way, don't stand too close to the exhaust on a Westfield. Ask me how I know:


Signing off for a week's vacation in Colorado. Will update with the progress with the DMV when I get back!

I still can't get the time-lapse video off my computer and on to YouTube. That is another thing that will have to wait until I get back.

Thursday, July 9, 2015

Aeroscreen

This is a job I had really been putting off, to be honest, as trying to get the holes lined up seemed to be a daunting task. As it was, it really wasn't that bad.

First three holes made by eye. Actually with a drill,
as I don't have laser beams for eyes, but you know what I mean
Siting the middle three holes was done by eye (as they are not precisely bonded to the underside of the aeroscreen. the front of the aeroscreen ended up being around 20 mm from the front of the scuttle  I actually worked to ensure that the middle screw holding on the perspex screen was more or less directly above the middle dash fixing screw (as this holds the aluminum support bracket - it actually didn't end up directly above, but a little bending of the bracket helped). Drilling the holes oversize helped with locating the aeroscreen. I ensured the front of the aeroscreen was parallel with the front of the scuttle.

I don't know if I was lucky, but the side bolts were easy to locate - I just made sure the front of the aeroscreen overlapped the dash at the sides - I was able to mark where the shortened bolts were touching the scuttle and drilled oversize holes there - no need for slotted holes - the aeroscreen is flexible enough to work the bolts through with a little bending.

view from the cockpit


The only thing I am a little concerned about is the bolts go through the scuttle at an angle - I put large washers on the back prior to tightening the nylock nuts, but I am wondering if there should be some spacers in there to take the load. I am also wondering if there should be a finishing strip to the front of the aeroscreen to stop it chafing, to seal the gap and to make it a little neater - the front of mine is quite rough (I have been on to Westfield about this, we will see what they say).
Finished aeroscreen

. . .abd from the other side


Finally, I fit the wing mirrors. Unfortunately, fitting is a little hit and miss (I was basing the placement on pictures I had taken of the demo car last year at the factory) and after fitting the driver's side, I found that I couldn't get the body of the mirror parallel to the ground (it points up in the air a little). With experimentation, I was able to get the passenger side level by making the front mounting hole a little higher. The driver's side will come off at some point for hole adjustment.

So I went out for a little blat to test the aeroscreen and mirrors. The screen works well, but with the lowered floors, I am sitting too low - I had thought putting the runners in would be sufficient to raise the seats enough, but apparently not. I had omitted the spacers, so I will put them in to see how much of a difference that makes, but I think the seat needs to be at least an inch higher - I found myself peering around it.

I have found the car to be very low, or our driveway very steep. if I don't go out at an angle, the hoop under the gearbox smacks the ground at the top of the driveway - I took a look underneath yesterday and it is already in a very bad way - Fortunately I can raise the ride height by adjusting the springs - perhaps I should do that while it is being used on the road (as opposed to the track). Another job for tomorrow.

Finally. . .

The spacers for the harnesses eyelets arrived by airmail today (but still no swirl pot) so I can fit them tomorrow and hopefully go to the DMV. Fingers crossed! I do still have to wire in the speedo sensor and do something with the mass of wires under the dash, most of which are not used. I could just cut a lot of them out, but I want to keep them just in case I do want to turn Mr. Westfield into a road-going car at some point.

Have been trying to upload the complete time-lapse video but with no luck - watch this space!