Tuesday, June 30, 2015

Cutting holes in the bodywork

After 31 years as a consulting actuary, I retired today.

So I celebrated this evening by taking a drill to the body of my Westfield and fitted the exhaust.

Relatively straightforward - I put some masking tape on the inside of the body where the manifold was and drew around the ends of the pipes. I was wondering if I could pull the body out enough to be able to drill the centres without removing the body panel, but all that did was put a stress crack in it! so off the panel came - relatively easy as I must have had it on and off at least half a dozen times.

Beautiful taping skills


I know, lovely tape job! It's not easy to get at with everything in place. I was able to locate the centre by eye, using a 2 1/8" hole saw. once the centers were drilled, I took the plunge and drilled from the other side (tape on the bodywork is a good idea to protect the finish from inadvertent slips):


There is no going back now
Then I joined up the sides with a hand blade to get a perfect fit around the manifold. . . . which I then opened up 1 cm all around with a Dremel, so the exhaust would fit on and to leave some clearance for the clamps:  Not sure if this was the best way to do it, as the neat hole around the manifold became a little bit of a freehand job when I then enlarged it.

It was really a question of not having a larger sized hole saw and being fed up of the trip to the hardware store. However, I am pleased with the resulting job - it is very neat and should give sufficient clearance from the heat of the exhaust. Time will tell.

Now that is a perfect fit

Very pretty if I do say so myself
It actually needed a little more fettling at the front to clear the clamps, but it ended up being a pretty neat job. A piece of sandpaper wrapped around the rubber pipe for the fuel filler was the perfect diameter to smooth the the curves!


The rear mount was just a matter of drilling through the hole from the inside and enlarging it with the Dremel. I did make it a little too far back so when I inserted the spacer it distorted the body a bit, so I just enlarged the hole for the spacer some more - it isn't visible once the exhaust is fitted.

Getting at the bolts to tighten up the exhaust on the manifold isn't easy with the body in place, so I left it for another day!

Sorry for the poor picture quality, it was dark by the time I finished.


Off to the track tomorrow and then fuel filler, harness bolts and cage (gulp) fitting on Thursday.

Friday, June 26, 2015

If I Said you Had a Beautiful Body . . .

Would you . . . , oh never mind. Fitted the body today. Despite the Westfield instructions to build it off the car and then to fit it to the car, which is a two person job and sounds like a real faff, I decided to assemble it on the chassis and it went relatively smoothly, apart from the Westfield droopy right side! (most builders complain the right rear side is lower than the left, so I am not the exception)

Before fitting the body, I did remember to take the measurements for the harness attachments, roll bar and gas tank. I am going to try a shortcut to position all the holes. I took two pieces of masking tape stuck face to face, to make a strip that I could stick across the holes and mark up. After drilling up through the roll bar mounting holes and locating them properly, I can just align the marked holes on the tape and the harness holes should be laid out across the bodywork - we will see how that works out. I had actually thought of using this approach for the aeroscreen, but it should work well here. Of course, before drilling, I will check agains the measurements I took!

Mounting holes marked up before fitting the body
All of the attachment holes in the rear tub, the wings and the body panels had been pre-drilled by Westfield, and I had bolted everything together a while ago to test the fit. I left the wings attached to the tub and fitted them as one unit, followed by the side panels - I could lift the wings just enough for the side panels to slide in - the blocks on the side panels do need Dremelling down though - I just went around them a couple of times with a drum sander attachment to square them up and they fit fine.

The fit isn't fantastic, but seeing various blogs that have said they spent a lot of time fettling only to arrive at something that wasn't much better than what they started with, I decided to keep fettling to a minimum - this is a track car, after all. In particular, the gap between the side panels and rear tub is large and uneven - I am not sure what can be done about it - I already have a small crack on the driver's side.

On the advice of others, I fitted the aluminum bracket that supports the rear tub under the car first - that made fitting everything else a lot more straightforward. I did measure and mark the centre of the rear tub so that it was easily aligned with the centre of the chassis.

It still took the best part of the afternoon and early evening to do - the wheels came off more than once to do the bolts that attach the wings to the sides. And the right side will have to come off again when I take the body panel off to cut the hole for the exhaust, after marking it up in place.

This is what it looks like at the moment:

6 hours later . . . a car


It's a shame this side has to come off again so I can cut a hole for the exhaust

The bonnet and boot lid were both damaged in transit and will be replaced - I have used the damaged panels in the time being to test the fit.

Decided to put off drilling or cutting any holes today - best to do when I am not tired!

Thursday, June 25, 2015

Back from Vegas - Bulkhead in

After a busy work week and a couple of days in Vegas for the finals of American Ninja Warrior (I was scoping it out for my planned attempt to qualify next year),
Ninja!
I decided to fit the shiny new replacement bulkhead, so it was time for my trusty drill, clecos and air riveter for one last round of drilling and riveting. I used the damaged bulkhead as a pattern to drill the holes (after ensuring the holes were in the same place as the replacement bulkhead).

Using my trusty bow technique for the bulkhead, it slipped in easily with no scratching at all, and more importantly no creasing to the bulkhead:

Final panel fitted
 So, all is ready for the body to go on.


Vegas really is a strange place. Where else can you see the Statue of Liberty and the Eiffel Tower?

The Statue of Liberty at dawn
The first round of the finals of ANW takes all night, so we walked back to the hotel as the sun was coming up, and I got a picture of the New York (?) skyline (in Nevada?).

New York, New York (?)


As we got to the hotel around 5:30, we saw the same people paying poker we had seen when we went  out around 1:00 - I wonder if they knew it was morning and time to go to work. At least the bar was still open.

Do NOT valet park your canoe at this hotel

We decided to drive straight back and stopped off at the Hoover Dam on the way - A great engineering achievement, but the water level was very low.

Who stole the water?


Monday, June 22, 2015

Seats in . . .

And out, and in, and out and in (you get the picture).

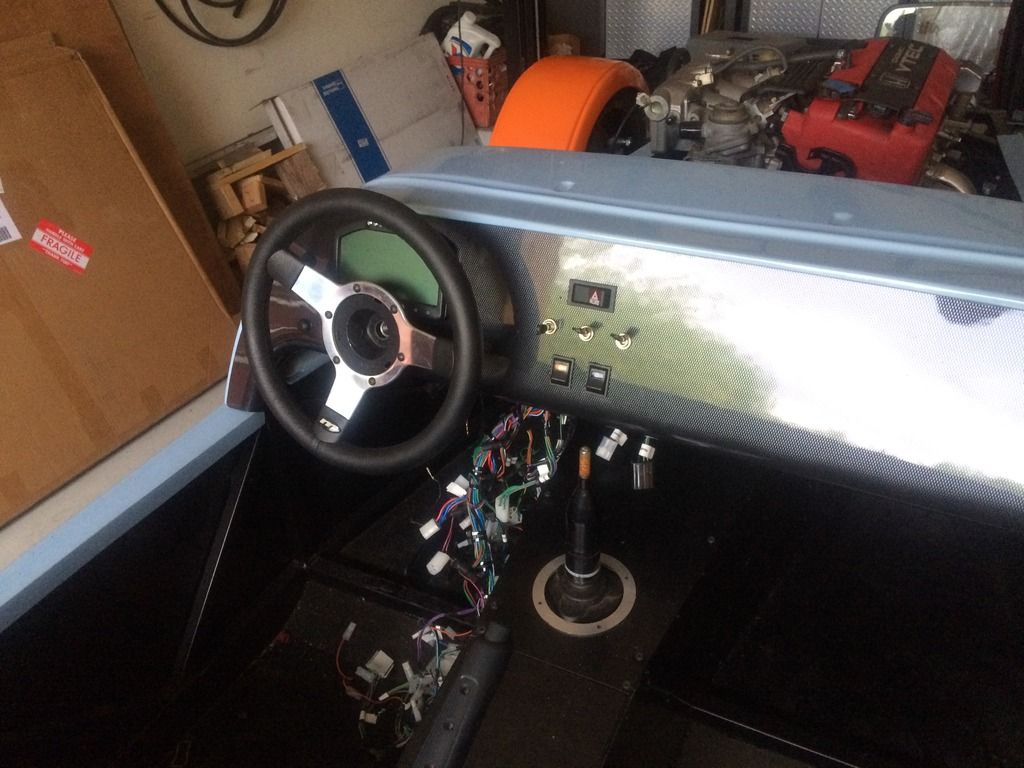
I am mounting the seats on runners so I can accommodate different-sized drivers at the track (i.e. Max and Alex are way taller than me). Mounted the frames on the runners and the runners to the car only to find that there wasn't room to then attach the seat - the seat has to go on to the frame first. Then I found that for the driver's seat the seat bolts foul on the side of the chassis (the left hand side is slightly narrower than the right hand side, as the car was initially designed to be a RHD car, giving slightly more room to the driver than the passenger) so out it came - I tried moving the runners over, but then the seat fouled on the other side - eventually I decided to elongate the holes in the floor (and cut down the seat mounting bolts) to give maximum clearance and now the seat goes forwards as much as I need it). However, I still think the steering wheel is too far away though - will fix that when I add the quick-release boss - by adding a sleeve and an additional piece of rod for the column.

With all the in-and-out of the seats, I finally decided to weld the mounting bolts to the runners - makes it much easier to drop the seats in than trying to locate the bolts on top and the nuts below (it also means it will be easy to remove the passenger seat at the track to save weight, and to avoid taking on unwanted passengers). That means the seats had to come out again. Of course, I didn't have all the nuts and bolts, so there was a trip to the hardware store in there also - couldn't be bothered to wait for another delivery from Westfield.

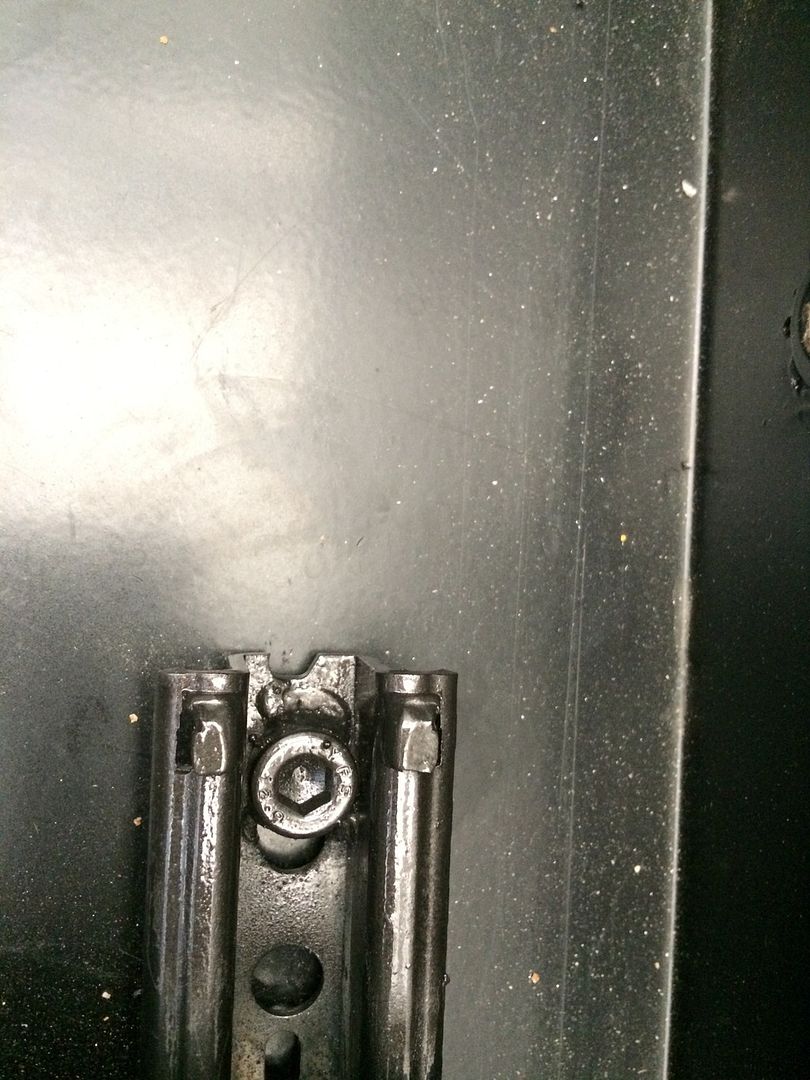
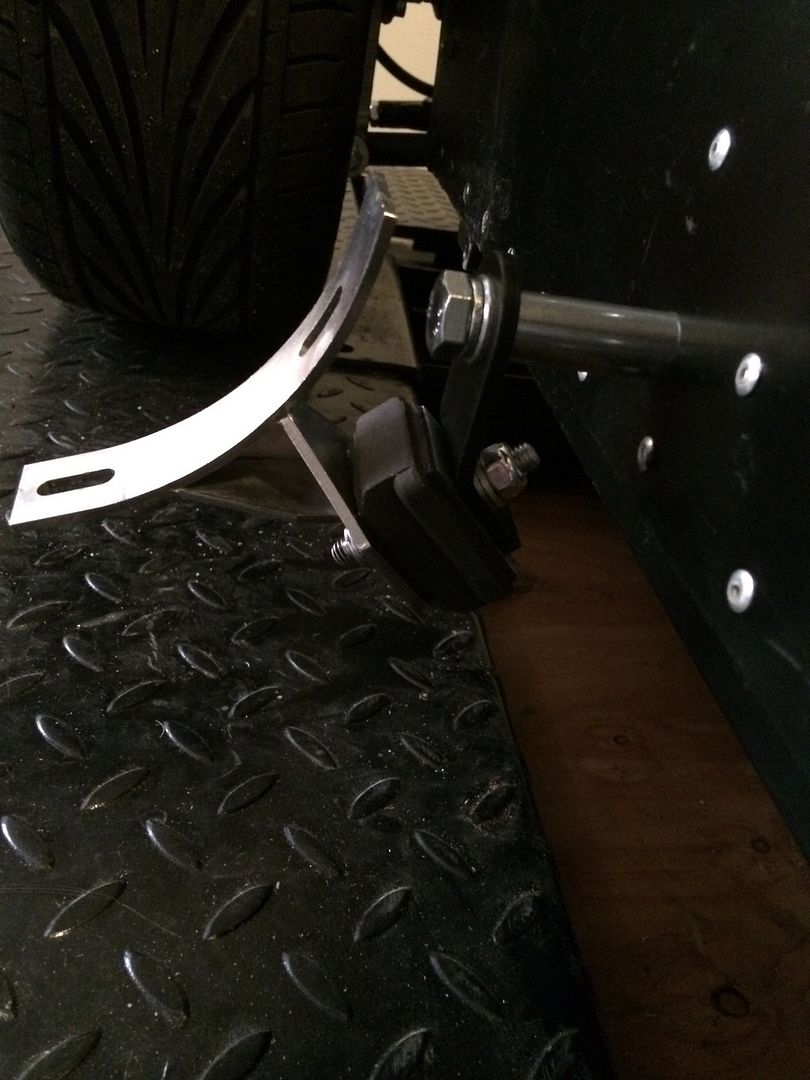
a quick spot welt to each mounting bolt -
just an excuse to play with the welder!

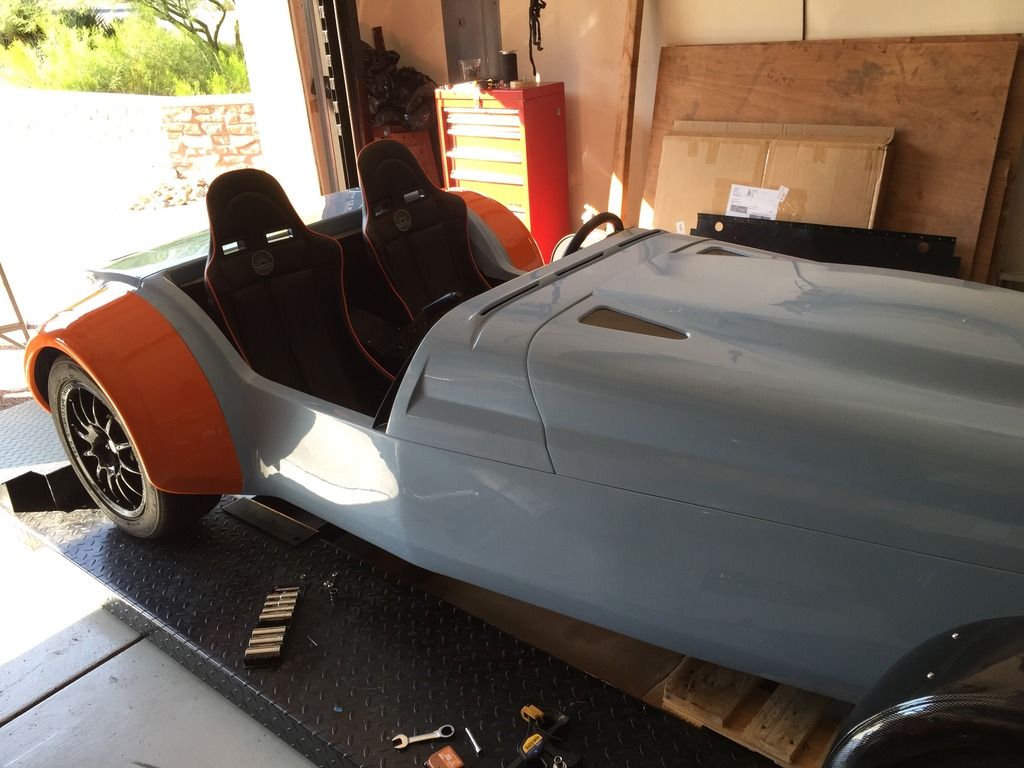
So, the seats are in!

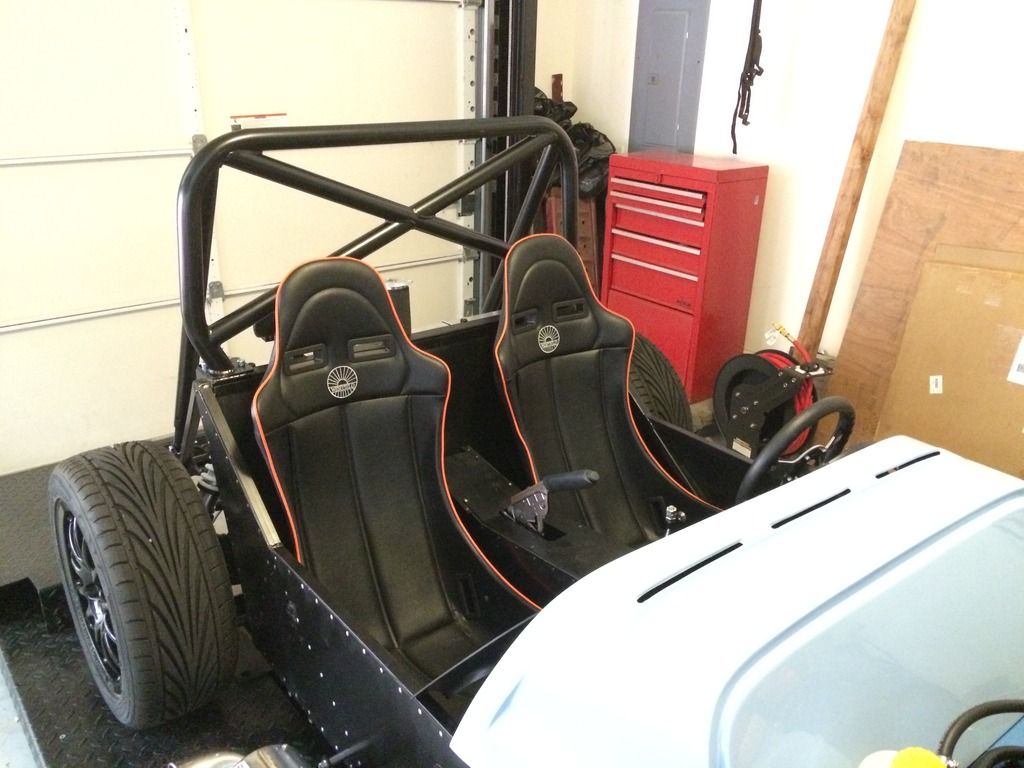
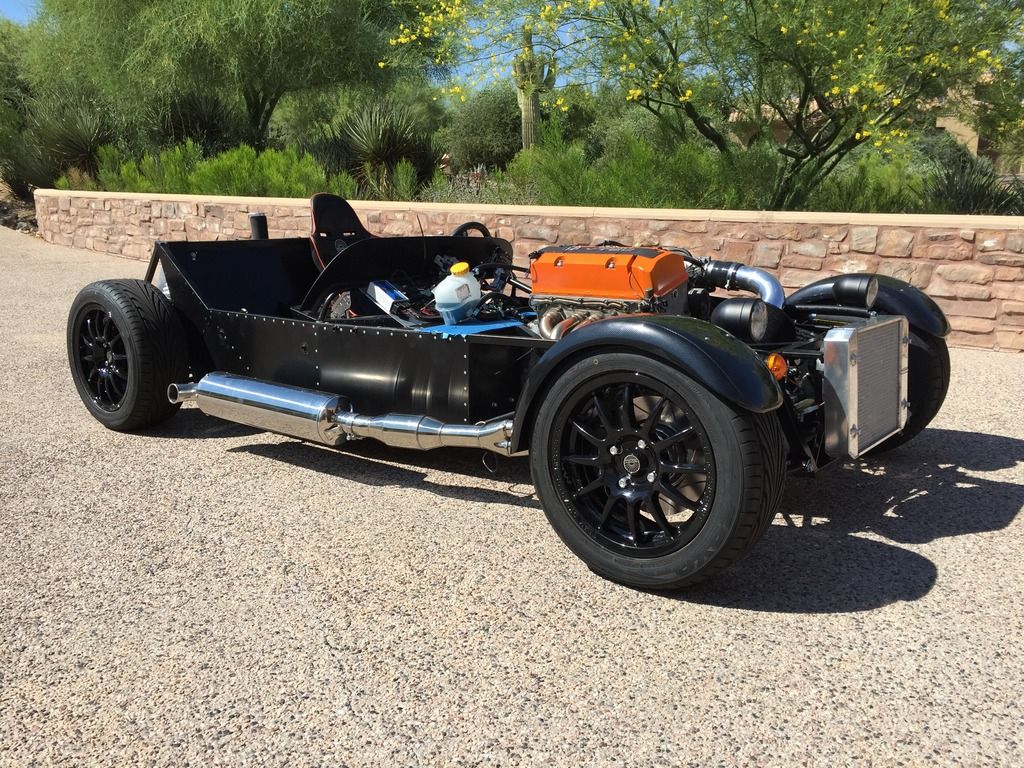
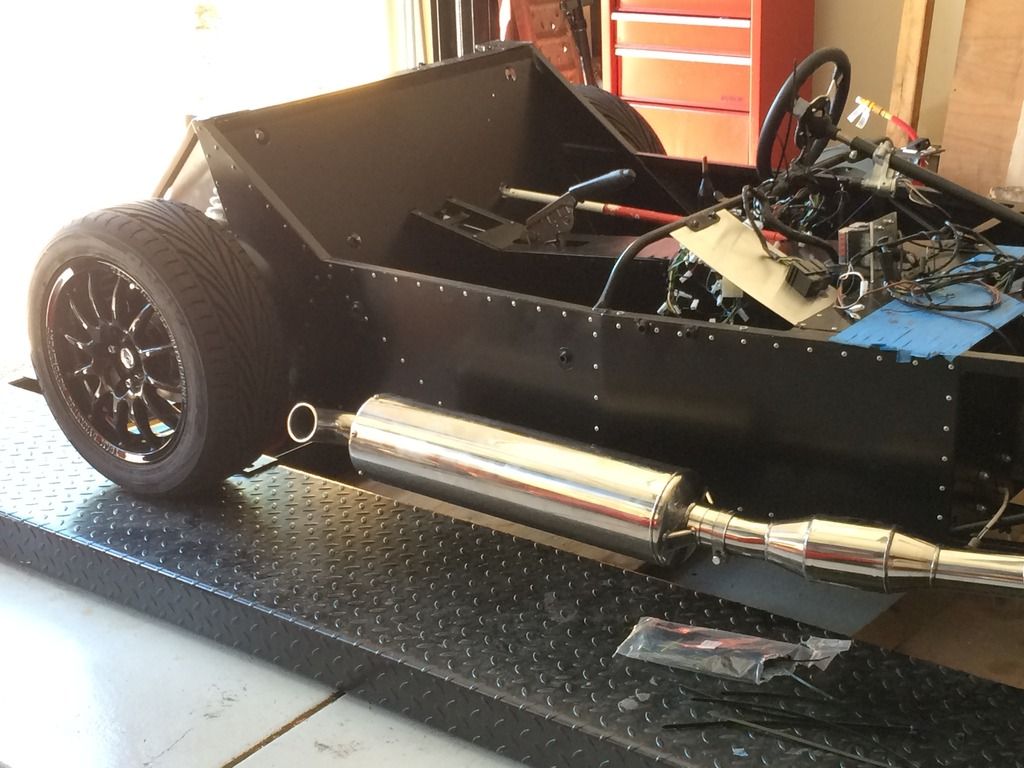
Seats in and half cage test fitted


Half cage on to test fit - the bolts that attach the lower stays aren't long enough, so will need those from the factory before I can install it - those I will wait for!

The DHL delivery man just came with a nice fresh bulkhead to replace the dented one, so the seats will have to come out again (easy now I have welded the mounting bolts) and I can finally get around to putting the body on. As this is the biggest and probably most difficult part of the build, I am really looking forward to it. Can't you tell?

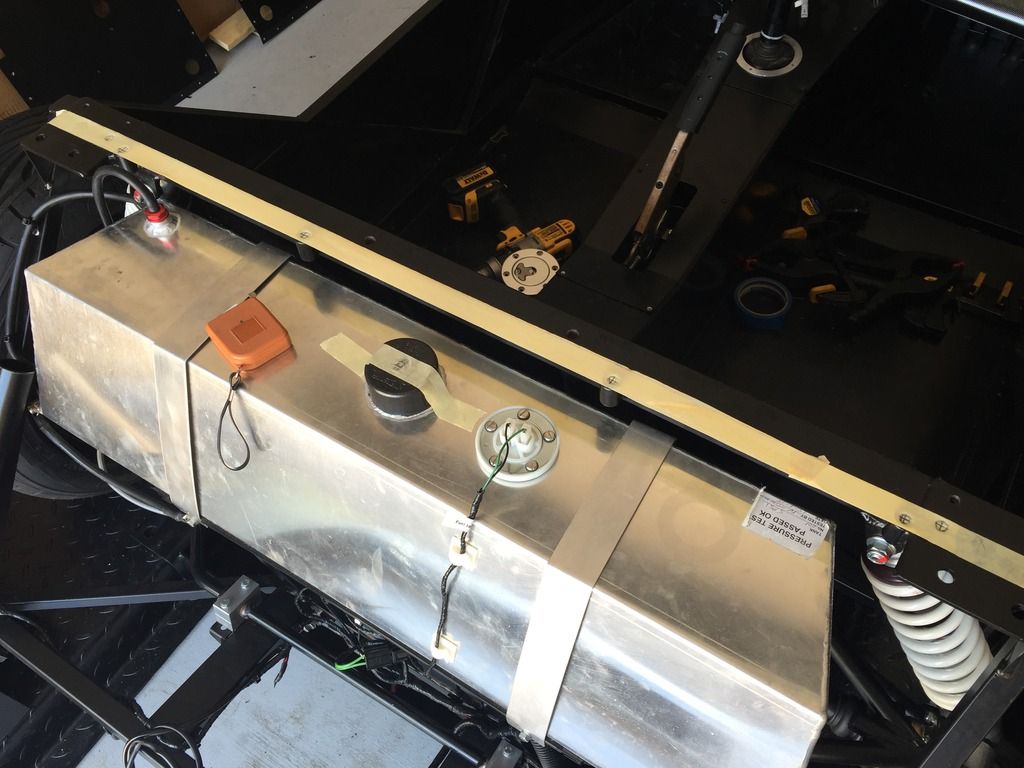
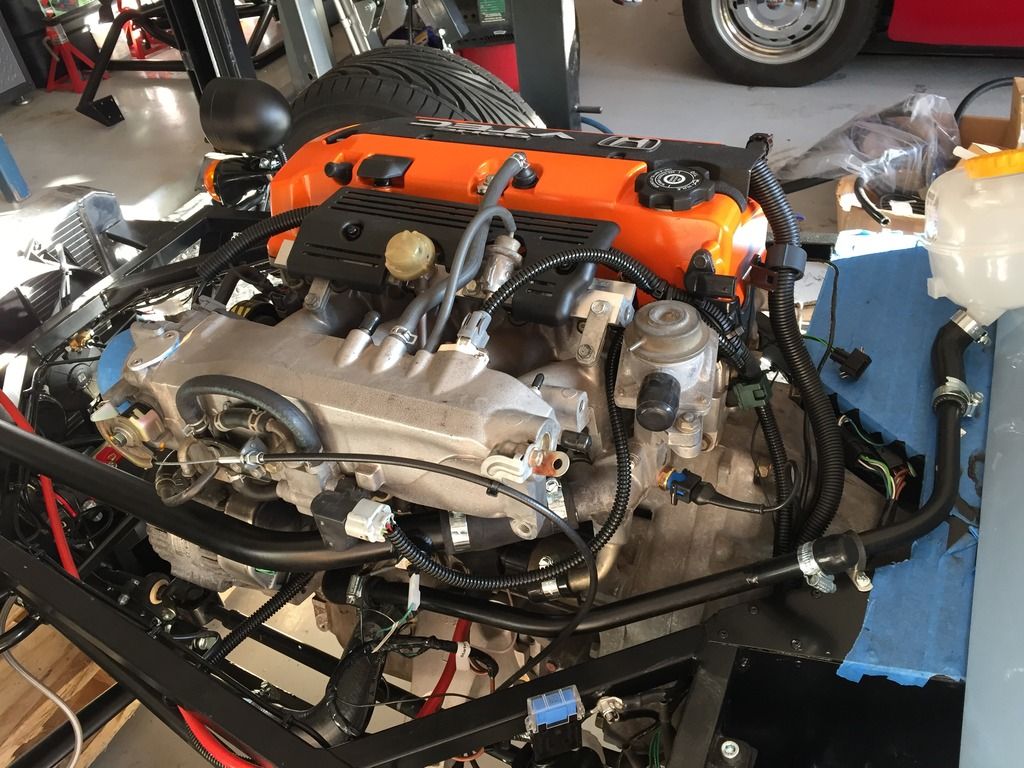
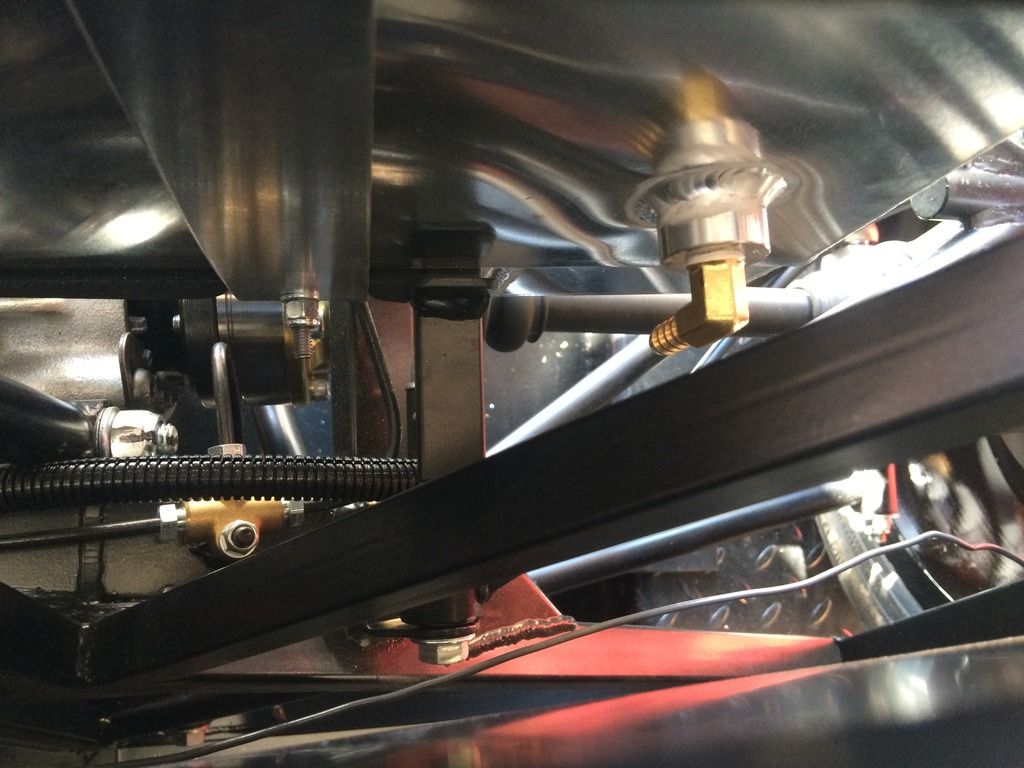
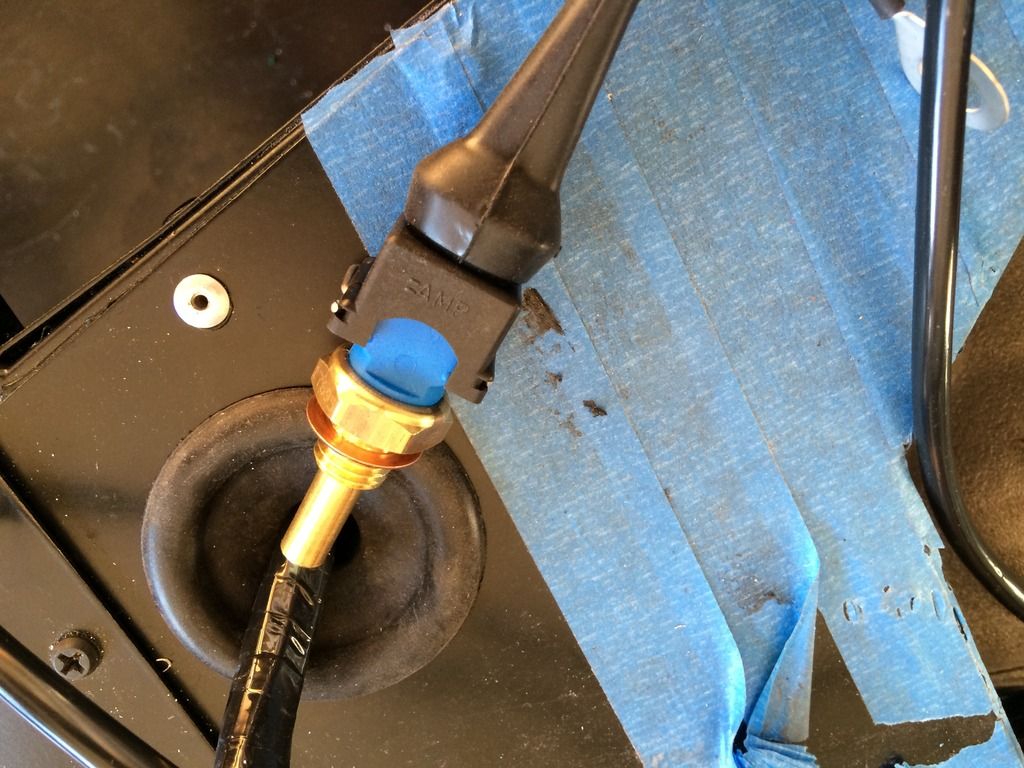
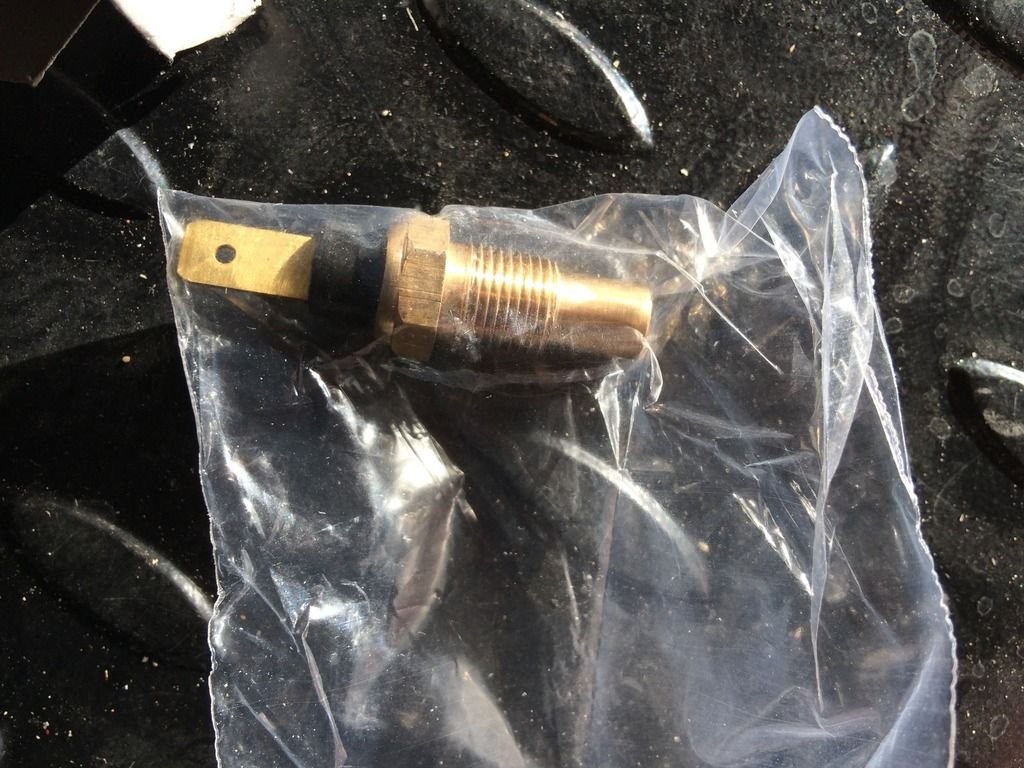
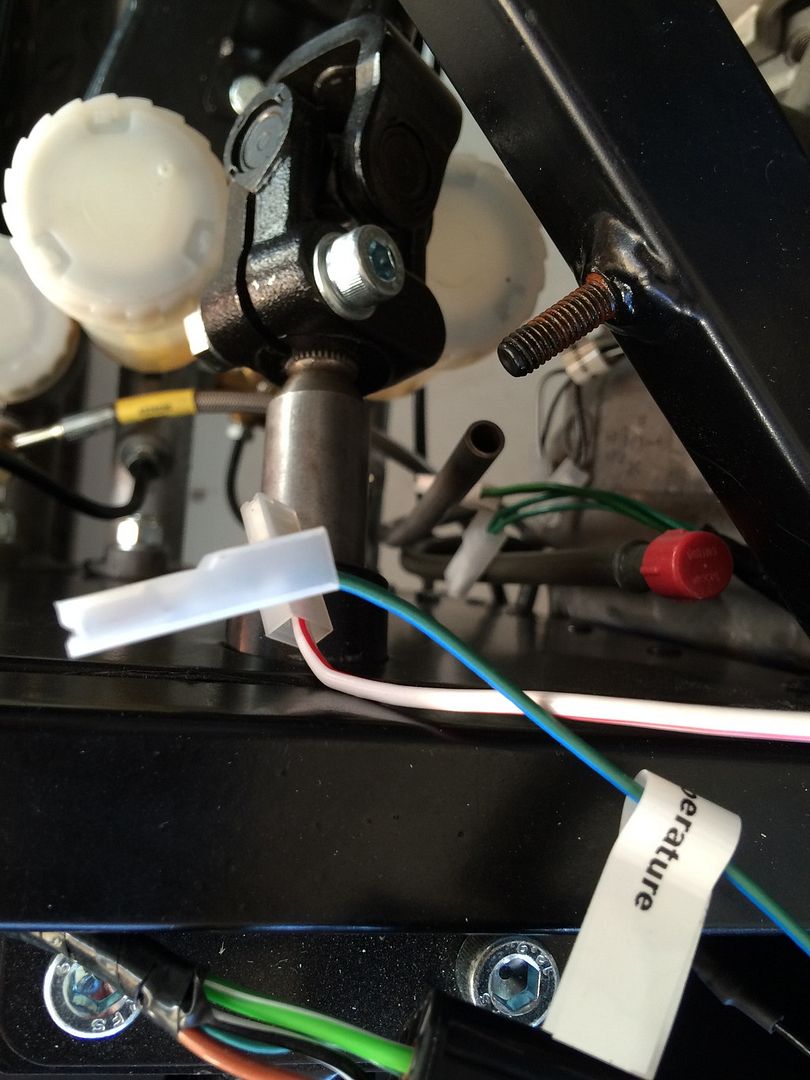
I was also able to load the configuration file for the digital dash and am getting readings, but I am not sure I believe the oil pressure - it is showing 0.5 (bar?) on idle and 2.5 at 3,000 rpm. Compression on all cylinders is good, so would not expect low oil pressure. The readings should be somewhere around 2.5 bar at idle and a lot more than that at higher revs, I believe, so that is a question for Westfield - is the equation in the configuration file wrong, is the sender working properly or do I have an engine problem? I am fairly sure about it not being the third option based on the aforementioned compression test and the fact that there is no blue smoke on fire-up.

Thought I would also check at what indicated temperature the fan came on, so I let it idle to warm up - by the time the temperature was reading 100C, the fan still hadn't cut in so I shut it down and checked the connections - I could hear the relay switching on and off, but no fan - turned out the fuse was a dud, so replaced it and the fan came on at and indicated 80C and off at 76C, This is low - the fan should come on somewhere around 96C, so is it the calibration of the dash, the sender unit for the temperature or the sensor for the fan. Another question for Westfield. The dash also says I have 18 fuels. I wonder if that is 18% - that may make sense as I only put a couple of gallons in the tank.

I want to convert everything to American readings (F and psi), which is easy to do with a laptop plugged into the dash, but first I want to be sure everything is reading as it should. I also have to configure the speedo settings for the specific wheels/tyres, which is relatively straightforward, but I need direction on how to wire in the speed sensor, which isn't part of the wiring harness. Another question for Westfield.

Also got a confirmation today from Tom and Manik that they are sending me a set of competition tyres as originally ordered, and it seems they don't want the others back - will be useful for setting up the car on the road, as I don't think the competition tyres are actually street legal.

Finally, had a visit from Son of Sid on Saturday morning - a small snake that got into the courtyard. It seemed harmless enough so I left it well alone after spending 20 minutes or so playing hide and seek behind the hose reel (the snake was hiding behind the reel, not me). The on Sunday we had another visitor, indoors:

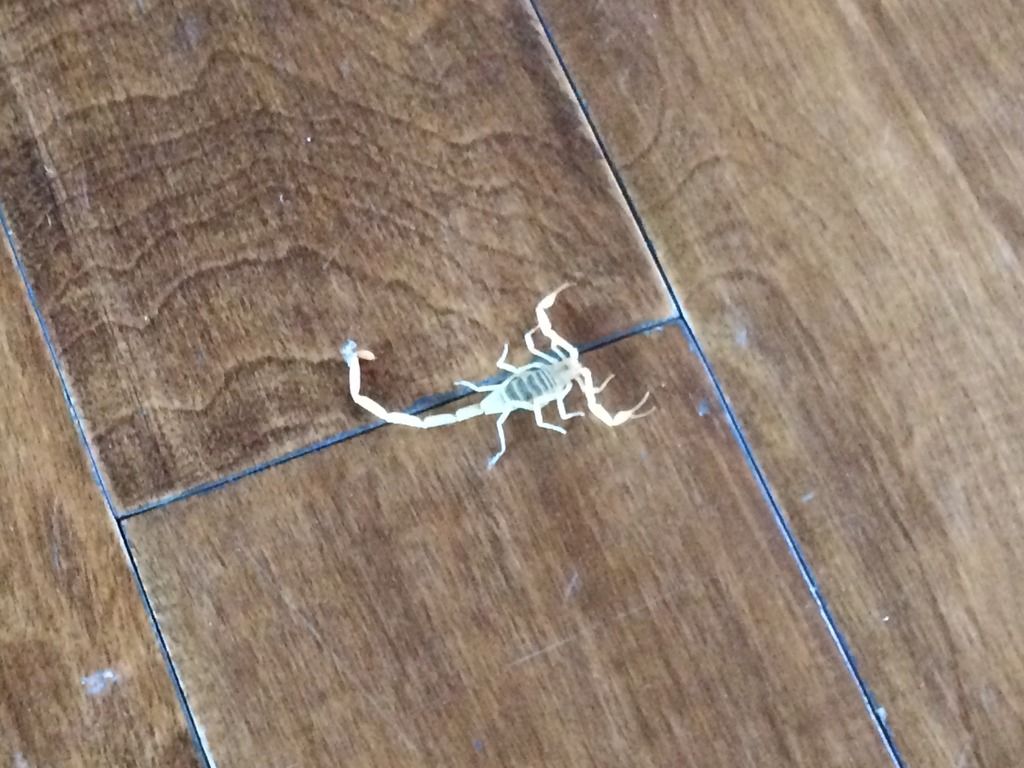
Say goodbye, Mr Scorpion
However, unlike snakes, scorpions are not protected in the State of Arizona, so this little chap was dispatched to meet his maker with a swift thwack of my shoe. Just as well, as they pack a nasty sting in that tail.

Friday, June 19, 2015

Time to Tighten Everything Up

Decided today was the day to go through the car from back to front (literally) and torque up all the bolts. I worked methodically from the rear suspension, through the propshaft, gearbox mounts, engine mounts and front suspension, torquing and marking everything (the marks serve two purposes - to make sure that you don't forget anything and as a witness mark so you can see if any of the bolts are coming undone). So now you know why there are little paint marks on bolts on new cars.

I also fitted the speedo sensor, which I had not installed when I was building the front suspension. However, what they had provided was for a RHD car. I need to fit mine on the other side.

RHD version of the bracket


So I had to bend the two tabs through 180 degrees. Not sure I am too comfortable with this as I could see cracks in the bends. Will have to ask Westfield for a LHD bracket (the list is getting longer again - see below).
no, I didn't just reverse the picture!

We will see how it is. The last thing I want is the transducer falling into he wheel at speed.

The powder coat came off so I had to strip and repaint it:


I have no clue how to connect it to the Dash. Add that to the list of questions I have collected for Mark Walker at the factory (he has been out on his hols).

Thanks to one of the other builders, Ian, I now know that I need to load a configuration file into the dash for it to make sense of the signals coming in - fortunately Julie had an old laptop sitting in her office that I thought I could plug into the dash, but, it doesn't have a serial pot, so it is on to Amazon to find a USB to RS232 adapter so I can download the configuration file, once I get it from Westfield (add to the list). I probably should have read the manual first, as I installed the wrong software, so I had to uninstall and reinstall it, so that took a while. It is pretty neat - you can configure the dash how you want it, so no doubt I will have fun with that (things like shift lights, gear indicator rev counter etc.) There are a bunch of custom screens accessible from four buttons on the dash - there is a data logger option also, which will do lap and segment times, which will be really useful at the track.

As everything was tightened up, I thought I might as well see if it could move under its own power. All in the name of seeing if the clutch is bled properly:

Pretty cool, if I say so myself
It actually looks pretty good like that. The seat isn't fixed in (a job for tomorrow - I am a little reluctant to drill the holes in the shell needed to mount the seat to the frame. I also don't have all the fittings - I appear only to have enough for one seat, so that is another item for Westfield).


Ok, maybe I went  little further than just pulling out of the garage. I did go for a little spin around the neighborhood while nobody was watching (as it was 112 degrees, there was no chance of meeting anybody!) You can hear the gearbox hoop bottom out at the top of the driveway (it is quite a steep transition to the road).


What with a brand new clutch and the car weighing next to nothing, it is a little difficult to be smooth (especially as the seat wasn't fixed and I was holding onto the dash with one hand), but it seems everything works - no trail of essential liquids left behind like when I had the maiden run in the Healey!

Thursday, June 18, 2015

Work keeps getting in the way

So I haven't been able to do anything until today.

So I went to the Honda dealer first thing to pick up two jugs of the good stuff:

Honda reckons this is the only stuff you should put into one of their engines . . .So who am I to argue?


Cost $50, but I figured it is best to put the real stuff in. It took the best part of two jugs, so I am guessing around 7 liters.

Poured a couple of gallons of gas in the tank, and


Fired up at the first attempt and ticked over fine. The coolant burped nicely too! Glad to see the horn works. None of the readings on the Dash 2 work, apart from the rev counter (no oil pressure, temperature or petrol). It does sound a little docile for a racecar.

As you can see, I celebrated to nobody in particular!

After running the engine for a while to check on any leaks (there were a couple of coolant leak, which were easily sorted, I stared at the dash for a long time, hoping that would make it work. It didn't, so instead, I decided to fit the carbon-effect cycle wings. A fiddly hub, and it involves drilling the stays, which are above the tyres . . . nearly pooped myself when I went through with the drill a little too quickly and thought I hit the tyre! Fortunately no damage done. I put a block underneath after that!

The look good - I have a set of orange cycle wings also, that I will fix with blind fasteners, but these will do for the meantime. I also placed the (broken) bonnet on for effect:

Really looks like a car now


Sunday, June 14, 2015

It's Inhumane in That Garage . . .

Well into the 100s today.

Did all the little tidying up jobs today to get it ready to fire up - all I need to do is to make the connections in the dash and turn the key (supposedly).

Finally got around to crimping up the connectors Westfield sent me for the handbrake - seems to do the job quite nicely:

What Westfield supplied and the crimping tool I found at Amazon 

The final result with the heat shrink on connects quite securely onto the pins in the switch.

Finished terminals


Also wanted to connect the inertia switch (switches off the fuel pump should you end upside down in a cactus), but quickly realized that the plug does not fit the switch and there is nothing in the kit that will - question for Westfield in the morning.

I guess I will just have to be careful not to drive upside down for the time being.


Added the ring terminals for the fuel pump and did all the plumbing for the fuel system. Will have to redo, should I ever get my swirl pot (will need to add the low pressure fuel pump, the pot and reroute the flexible fuel lines). Also fitted the vent for the fuel tank and filled the diff with oil, along with tidying up of various wires at the back.

Decided to clear some space on my shelves and fit the cycle wing brackets, only to find that they need some sort of spacers on the top mounts:


Space needs filling with some spacers


Instead of the usual approach and just complaining to Westfield, I rummaged around in the ever-dwindling supply of small plastic bags with parts in (it gets easier the fewer there are).


I found these sitting in a bag with some bullet connectors and they seem to do the job - there are four, and that is the number needed, and they seem to be the right length, so on they go. They are chamfered and the chamfer fits the hole on the back of the brakes where the brackets screw on. Basically, I can't think where else they may go:


In fact, they fit perfectly, so they must be the right items:


Now it's really starting to get there - even put the air intake on and did a trial fit of the cycle wings:

Perfect color match to the valve cover
 Or I could go with he carbon fibre look:

There really isn't much else, other than the body, to do. I suppose I could have a go at fitting the seats in the meantime. Will bond the big head bolts to the cycle wings during the week (so I can get an invisible attachment of the cycle wings, instead of having bolts show through) - will need to replace the M6 nylock nuts I stole to fit the rear light assemblies though . . .

Saturday, June 13, 2015

Not so Fast . . .

Well it was too good to be true. After fitting M5 rivserts to the battery box and then riveting it to the chassis (contrary to the manual, I had to put it in with the tall side facing the driver, as it wouldn't fit in the other way around), the battery was too close to (actually touching) the steering rack. Not good.

Damnation, the battery doesn't quite fit


After a little swearing and pondering, I decided to cut a notch in the box to go over the chassis rail, which would allow me to move the box back slightly. Here we see it drying in a friendly Ocotillo cactus:

Finally found a use for the Ocotillo in front of the house


It worked, perfectly - just enough clearance to get the retaining strap in.

Problem solved! Will turn the battery around later - see below

After all that, I hope the battery works!


Now, do I hook everything up and switch it on to see if my fancy digital dash thingy is working?


Well that was an exhausting day. It is getting a little warmer here and it was well over 100 degrees in the garage. After sorting out the battery I did a bunch of cleaning up of the wiring for the engine, fitted the temperature and oil pressure senders and plumbed in the cooling system.  I did have a few pieces left over!

I think I did it right, but I do have an awful lot of  bits left over!

In particular, I was not entirely sure what the bent aluminium pipe was for and I couldn't see the point of using the short one. Was able to reuse one of the Honda pipes (they were all new). The one hooking up the line to the expansion tank was at just the right angle, so I just shortened it and put the pipe in there. I don't seem to have any tubing to connect the radiator breather to the expansion tank - not entirely sure what to do. Will need to see pictures of other cars I think, before deciding - the old build manual I have for another car says to blank them off.


Some general plumbing


Lower radiator pipe is squeezed against the chassis
Can't say I am too happy about the lower radiator hose - it gets crimped slightly against the chassis rail, but it shouldn't impede flow too much. will have to see if I can find a hose with a small "s" bend in it


Beginning to look ready to go
Still, everything seems quite neat and tidy around the engine now (still some more to do on the starter solenoid wires - I can't for the life of me figure why one of the brown wires is longer than the other two, if they all go to the same terminal. I still need to adjust the venting and remove the feed to the fuel pressure regulator.


I will need a longer +ve wire for the FIA master switch (allows you to cut all power quickly in the event of an accident - essentially a big red switch that should say "Don't Panic" in big red letters under it), which I want to put in the dash on the passenger side. For the time being, I will just put the wire I have in temporarily. When I do put in the switch, I will turn the battery around, so the positive terminal is on the passenger side, and at the back, which will be a neater fit.


Still a bunch of small jobs to do: Inertia switch (I wonder if i will keep it, what with this being a track car and I do like riding the curbs - fortunately the harness comes with a bypass already installed), fuel pump wiring, connecting the fuel lines (temporarily, while I await the swirl pot), terminals for the handbrake switch (they finally sent some), and then making more sense of the under-dash wiring. So much of it is not being used, I am wondering what to do with it all. If I was really adventurous I would cut a lot of it out, but what if I want it later???

I need to buy some coolant - the Honda manual of course says you have to get genuine Honda stuff or you will destroy the engine. Twaddle, I say.  I think the Hondas use blue coolant - quite what the different colors mean I don't know, but I should try to get something similar to what the Honda engine would normally use.

Friday, June 12, 2015

I Forgot. Today was Golf Day

So not much work on the car.

I am pleased with my battery find, though. It's almost as if it was made for the battery box:


Thursday, June 11, 2015

High Beams!

Spent some time wiring up the headlights and front indicators today - Jon H dropped off the indicator pods I had ordered from PlaySkool along with some bighead bolts for the cycle wings (thanks Jon) - I didn't want to fit the indicators on the nose, so under the headlights they went - I ordered the 4" headlights and the indicators are nearly as big as they are!

You can tell which is the indicator because it is orange and it flashes.
That really is a tiny headlight

The wires are as follows:

Black - earth from H4 bulb
White - low beam from H4 bulb
Yellow - High beam from H4 bulb
Yellow - side light
Cream (actually it looks white) - earth from side lamp.

Quite why it needs to have two yellows and two whites is beyond me,  but the sidelight yellow and white (cream) wires were the non-tinned wires (the bottom two in the picture below). It's easy to check which are the sidelights by using a 9v battery.

Black, yellow, white, yellow, white.
There are other colors, you know.
In the four pin Westfield plug:

Black - earth
Blue/slate - high beam
Blue/pink - low beam
Red/orange / Red/black - side light

Making up the connectors is easy, as long as you have the correct crimper. Just splice together the black and yellow (sidelight) wires first. Will do the connectors for the rear lights tomorrow.

Have decided to combine everything in the six-pin connectors, rather than having separate connectors for the fog and reversing light. The six-pin plugs on the harness are already wired for the fog and reverse lights (they are just on the opposite side of the car to the two pin connectors) - I think - all I need to do is have the fog lamp on the left instead of on the right where it is at the moment (and which makes more sense for a LHD car) and the six pin plug has the red/blue wire ready for it. Same on the other side for the reversing light - there is a green/brown wire there. Not sure why the harness is made up the way it is with multiple options - perhaps for different types of cars. The approach I am taking just makes more sense to me and reduces the number of connectors.

While the bolt isn't captive on the headlamp unit, there are two ridges which stop the bolt head from turning once it is tightened up, so securing the headlamp and indicator pod is straightforward, once I found some leftover washers in one of the suspension bags! The indicator lamps fit directly into the pods (the holes are pre-drilled perfectly) All that was needed was some M4 bolts and lock nuts.

Spent the afternoon trying to make sense of the wiring loom, which isn't that straightforward on a LHD car, I think I have it sorted though, hopefully some picture of it cleaned up a little tomorrow.

I also received the right-angle inlet for the gas tank from Westfield, so I can finally connect up the fuel lines, or I could, if I had my swirl pot. I will just hook it up without it for the time being.

I've been waiting for this!

Went on the hunt for the banjo fitting for the feed on the fuel rail (thanks scienceofspeed for giving me one they didn't need). Also found the biggest non-spill bike battery I could find, which fits exactly in the housing by a happy coincidence. Pictures of that tomorrow. Hopefully it will have enough oomph to turn the engine over.

Took the TR3A out when I went to get the parts - all in all I was out for three hours in 100 degree heat, and the temperature gauge really only climbed coming up the last hill to the house (it just boiled over a little when I got home, as Triumphs, and other old British cars tend to do when they are hot and bothered). Max and I had retarded the timing on the ignition over the weekend as it was pinking quite badly under load - have been fiddling with it since, gradually advancing the timing, and I think I hit the sweetspot - only the slightest pinking under load when the engine was really hot. It will need to be adjusted again after the summer when the weather cools down to get better performance. I on the other hand did not fare as well - Note to self, do not take a convertible out in the middle of the day in the Arizona sun. I was exhausted when I got back, and probably very smelly. My left are is now the same color as the car!

Wednesday, June 10, 2015

No News

It's tough working when Mr. Westfield is sitting in the garage, calling my name. So no progress since the weekend. Fellow Westfield enthusiast, Jon, did stop by from England with a special delivery of my indicator housings and some bighead bolts, which means I can fit the front lights and cycle farings.

I did have some back and forth with Westfield to confirm which wires are which on the headlamp pods and harness fittings. We also discussed the various temperature sensors, so now I know what goes where, i just have to fit them at the weekend.

Also had a lot of back and forth on the exhaust mount. Westfield say it should look like this:


Which just looks silly for a side mount exhaust, if you ask me (which nobody did). I have elongated the holes in the bracket as much as I dare, and the exhaust is pointing just slightly upwards (perhaps I need to dare a little more). It rarely rains here, so I doubt a slightly upturned tip will be much of a problem.

Need to get a battery - will try to do that tomorrow when I go out to ScienceofSpeed, to pick up the fuel inlet fitting that I don't have on the engine.

Still hoping to do a test fire this weekend, if I can get the cooling system plumbed first, that is.


Sunday, June 7, 2015

Plugging in

Decided to take on the task of fitting the engine harness. More or less a matter of matching plugs on the harness with their counterparts on the engine - the lengths of the wires helped to make sure the right coil packs were connected to the right wires.

I did seem to have a few sensors left over though and I seem to have three temperature senders, so I must be doing something wrong - I think I have to replace some of the Honda ones with new ones, and I have a feeling there is one I don't use at all. Another call to Westfield will be needed:

Not sure where this goes, or indeed if it goes anywhere
They gave me this one too
And it looks like this is the wire for it
So in addition to the Honda sender on the back of the engine, I have these two. I have a feeling I take the Honda one out and use the one in the plastic bag as that came with the Dash2 dashboard unit. Then perhaps the first one isn't used at all - I have nowhere to screw it into!

I think I did solve one mystery - I had plugged one plug into the temperature sender on the back of the engine, but I had a sensor left over when I had finished (the air intake temperature sensor). I just checked and the plug fits this one too, so I think that is where that one goes and it is in the bin with the sensor on the back of the engine and one of the two others will replace it.


I have a similar problem with the oil pressure switch - Westfield supplied what I presume is a replacement for the Honda part, but there are two spade connectors on it, and the harness has a single eyelet on the wire - which would fit the Honda it. Add that to the list of questions for Westfield!


I also had to wire up a plug for the alternator as the harness came with two bare wires. The only trouble is the plug was for four wires and the harness only has two. I think I got it right, but I need to check with Westfield:

Finally, time to reveal the new valve cover. The red would clash with the blue and orange finish for the car, so I just had to go with this. I had stripped and painted the spare valve cover a while back, but I wanted to wait until the engine was in before fitting it, just in case it got damaged. We will see how the paint holds up to the underhood temperatures:

Saturday, June 6, 2015

It's Been a While

What with being in Houston and Chicago last week (and recovering from my retirement dinner), I didn't have much time to do anything.

One minimalist dashboard
I did get the carbon effect dash drilled (very flimsy, I think it will need replacing with the real thing) and the dash2 and switches fitted. Of course, it necessitated a trip to the hardware store to get the required bolts.


Seems to be a mismatch of different shapes and sizes - this is something for an upgrade in the future. Note to self, be careful with a Dremel on a plastic dash - one of the holes got too big too quickly. Fortunately not too big and I was able to bond the offending switch in place so it is hardly noticeable.


With son #1 here at the weekend, we did finish bleeding the brakes:

This was after we took the TR3 to cars and coffee - it always seems to generate a lot of interest when I take it there.


There were some interesting cars:


Couldn't resist this one!
When we got back we did a test fit of the exhaust - seems strange to design a bracket where the rubber bushing hangs down, rather than having the weight sitting on it and compressing it.


But with everything tightened up, it seems to be OK (I was worried about the weight of the canister pulling the rubber mount apart). However, the exhaust is pointing up in the air and there is no adjustment left on the bracket - cue a phone call to Westfield in the morning.

It really shouldn't be pointing in that direction - it will fill up with water in the unlikely event of rain.

The car does look really good with it on though - how about we leave the body off and just run it like that - it will be lighter!


Was great to have Max here, even if it was just for a day. We played tennis - I think he found it a little warm,


so he cooled off with a boat ride in the spa:


But he did manage to try a race car on for size:


Thanks for dropping in Max, and thanks for the wine at dinner!